Pink Gingham shift dress

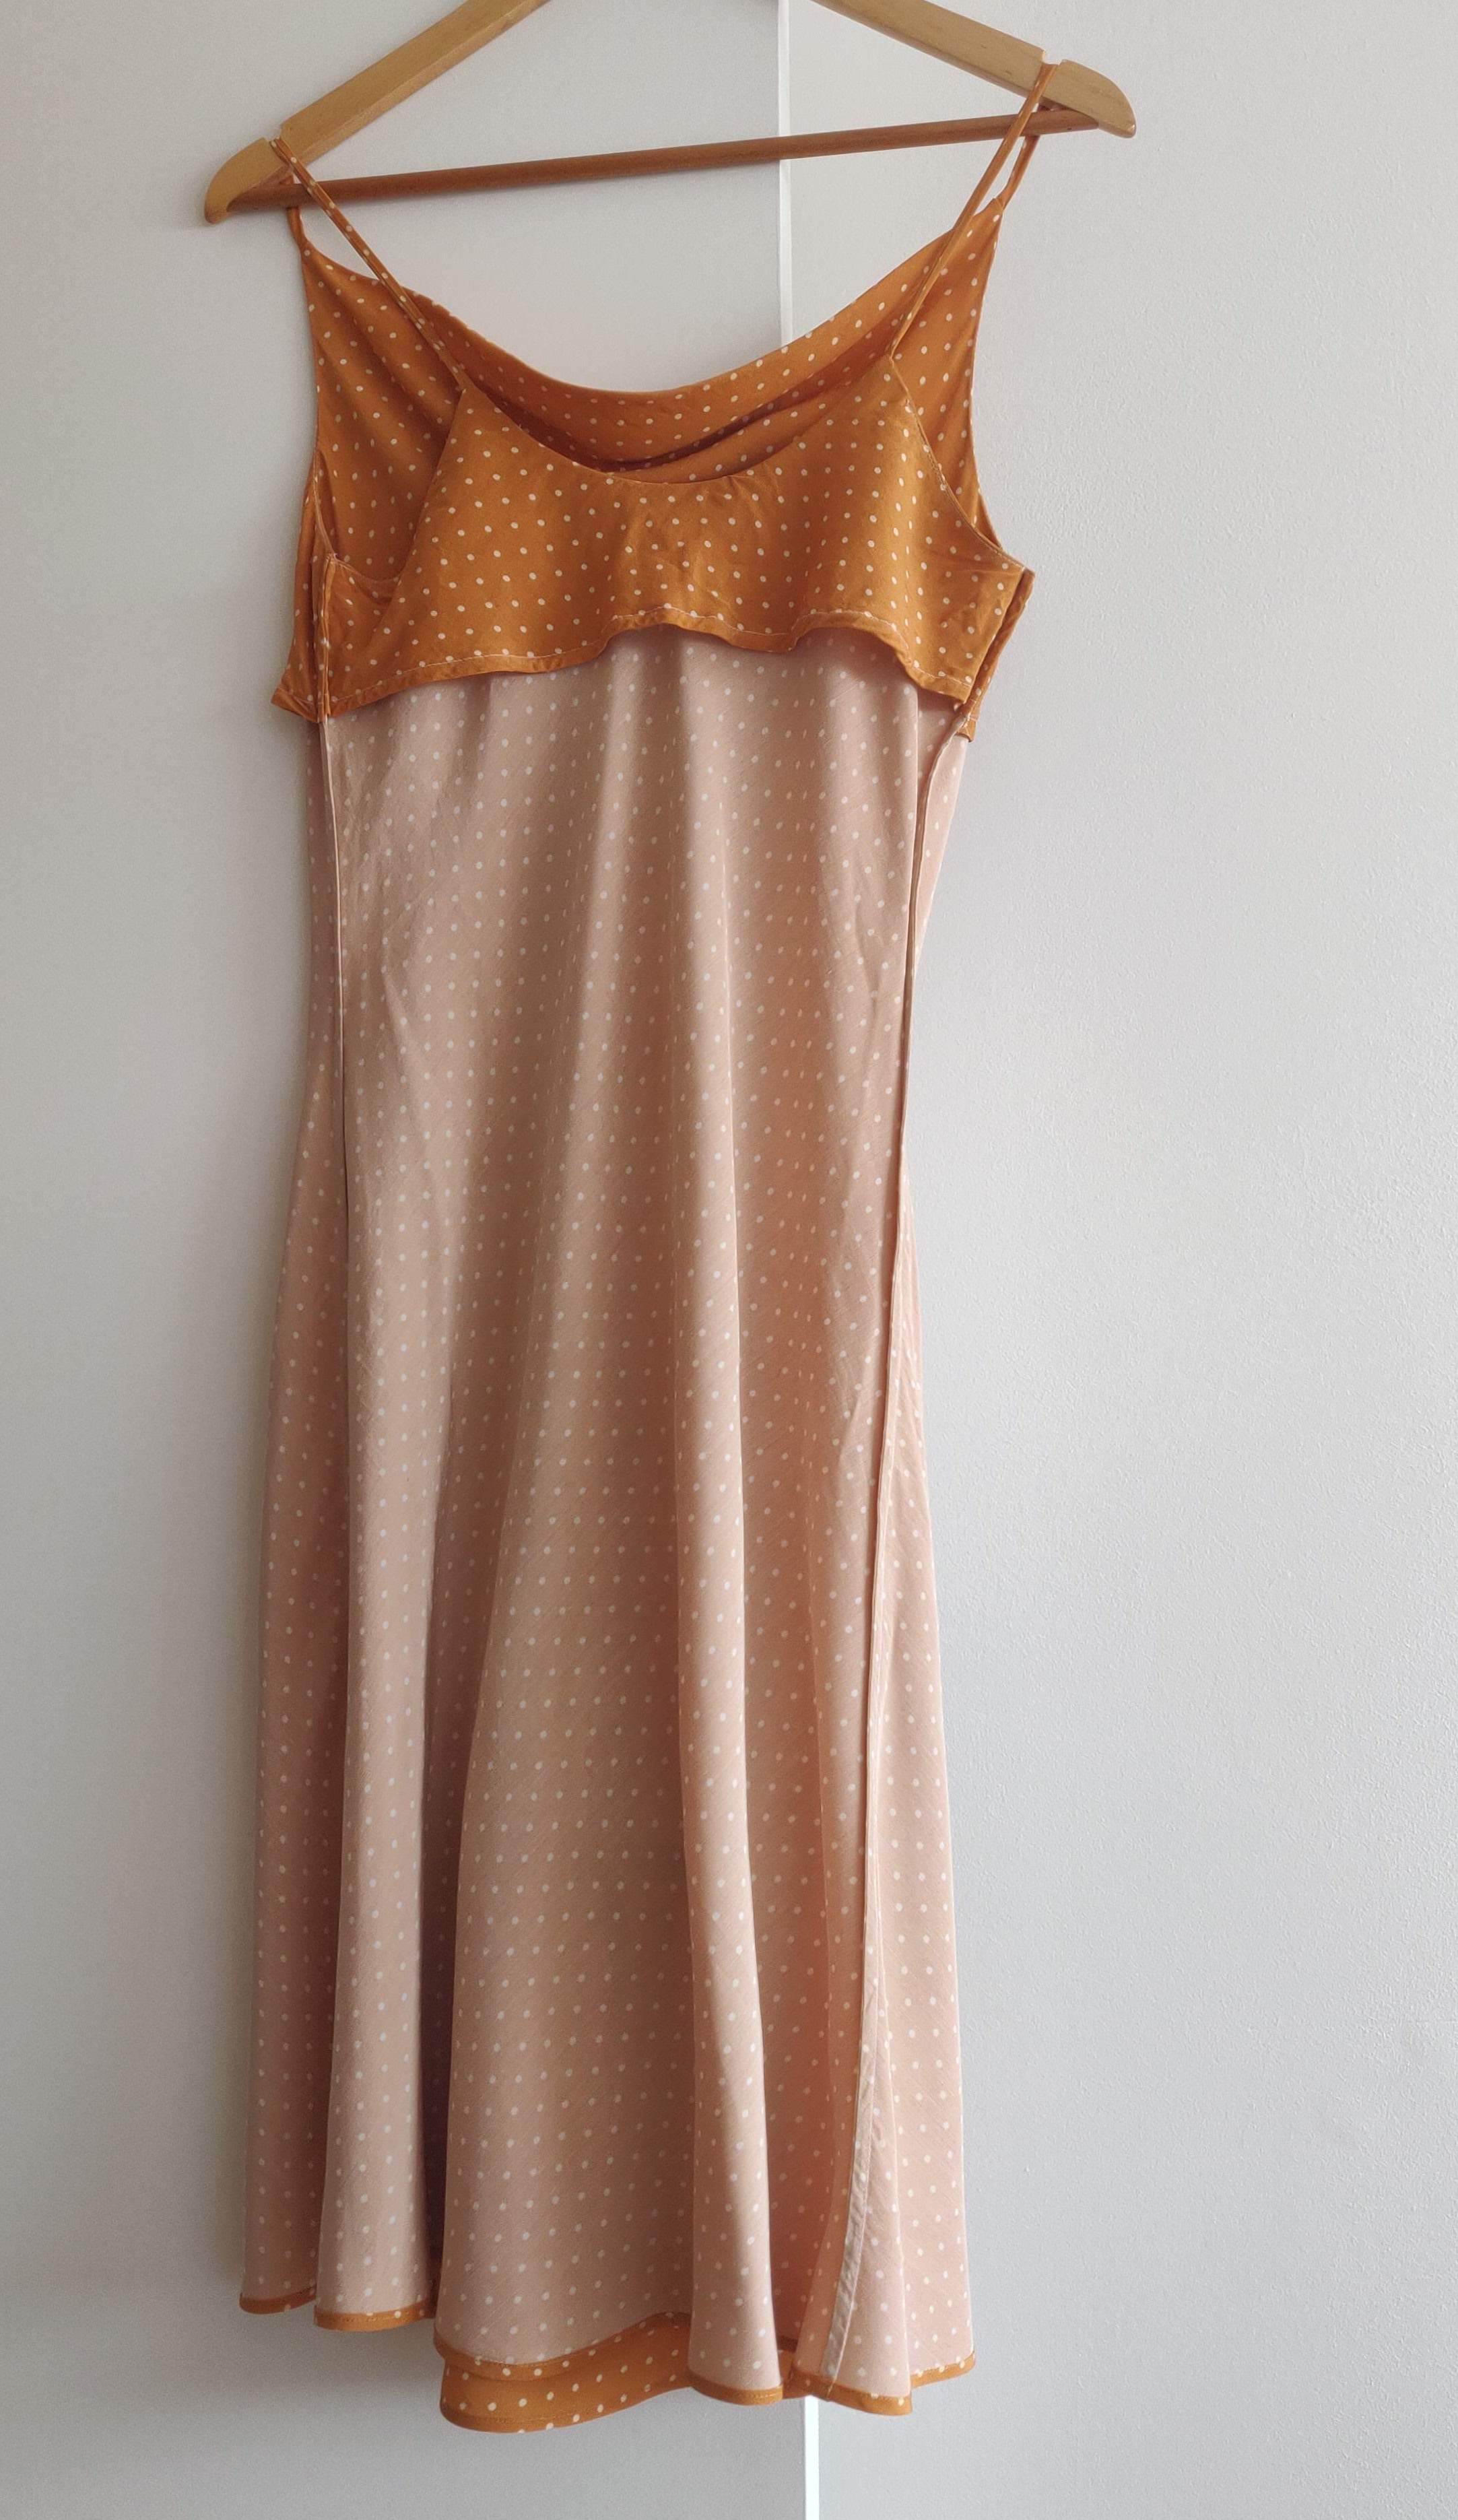
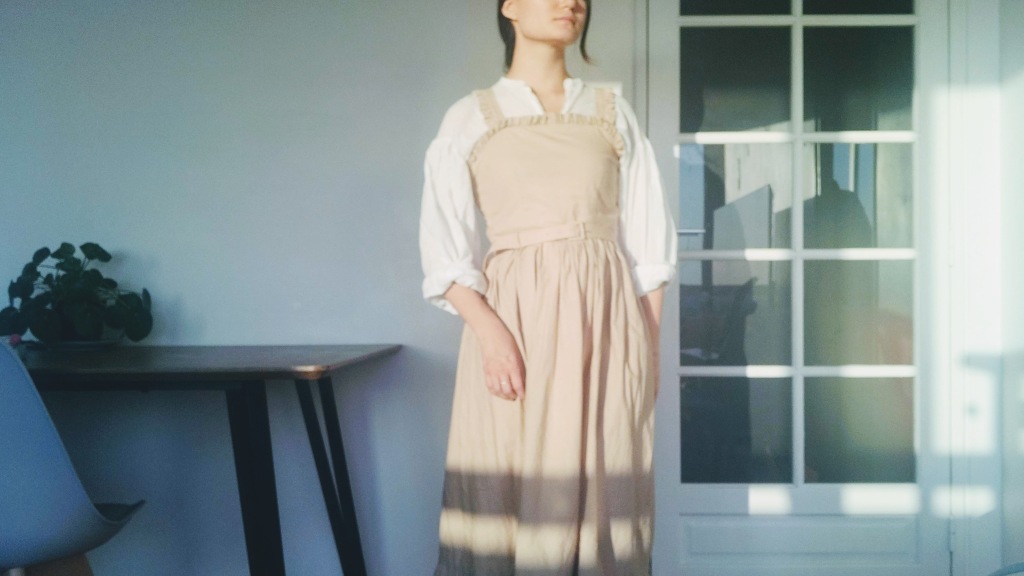
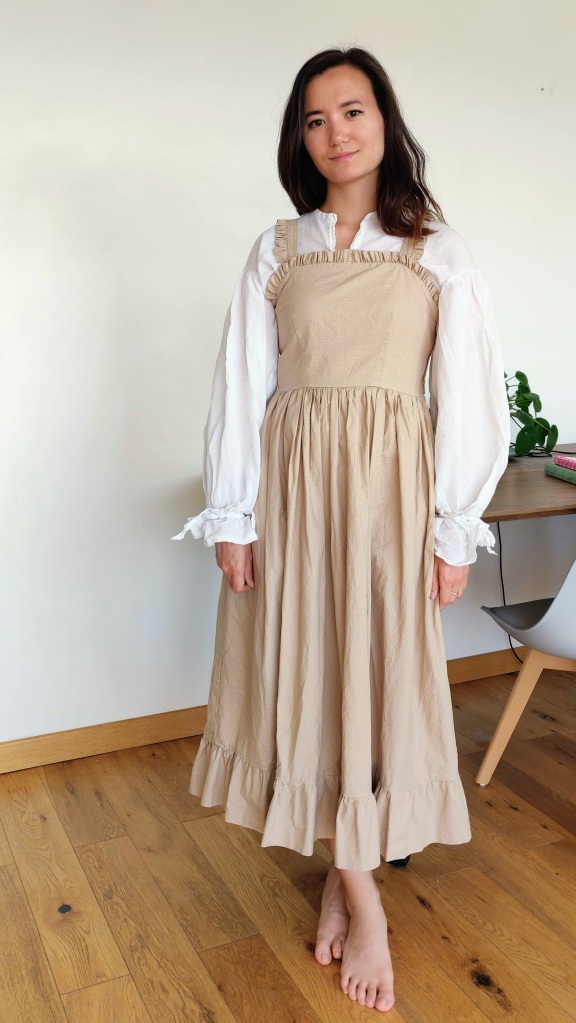
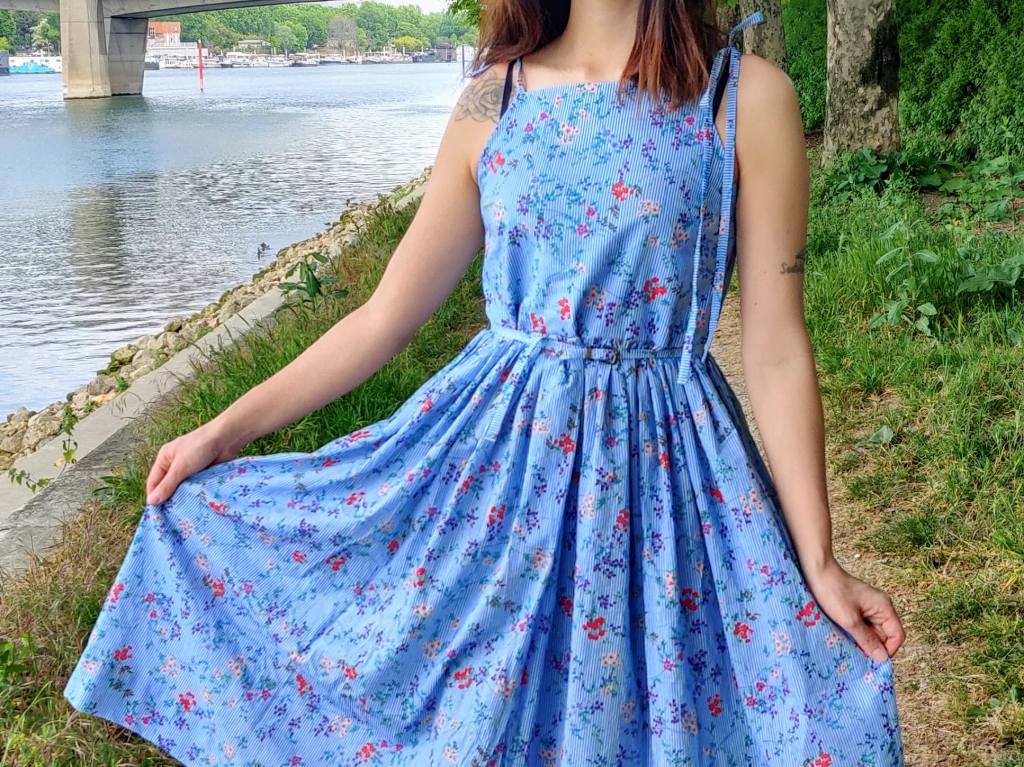
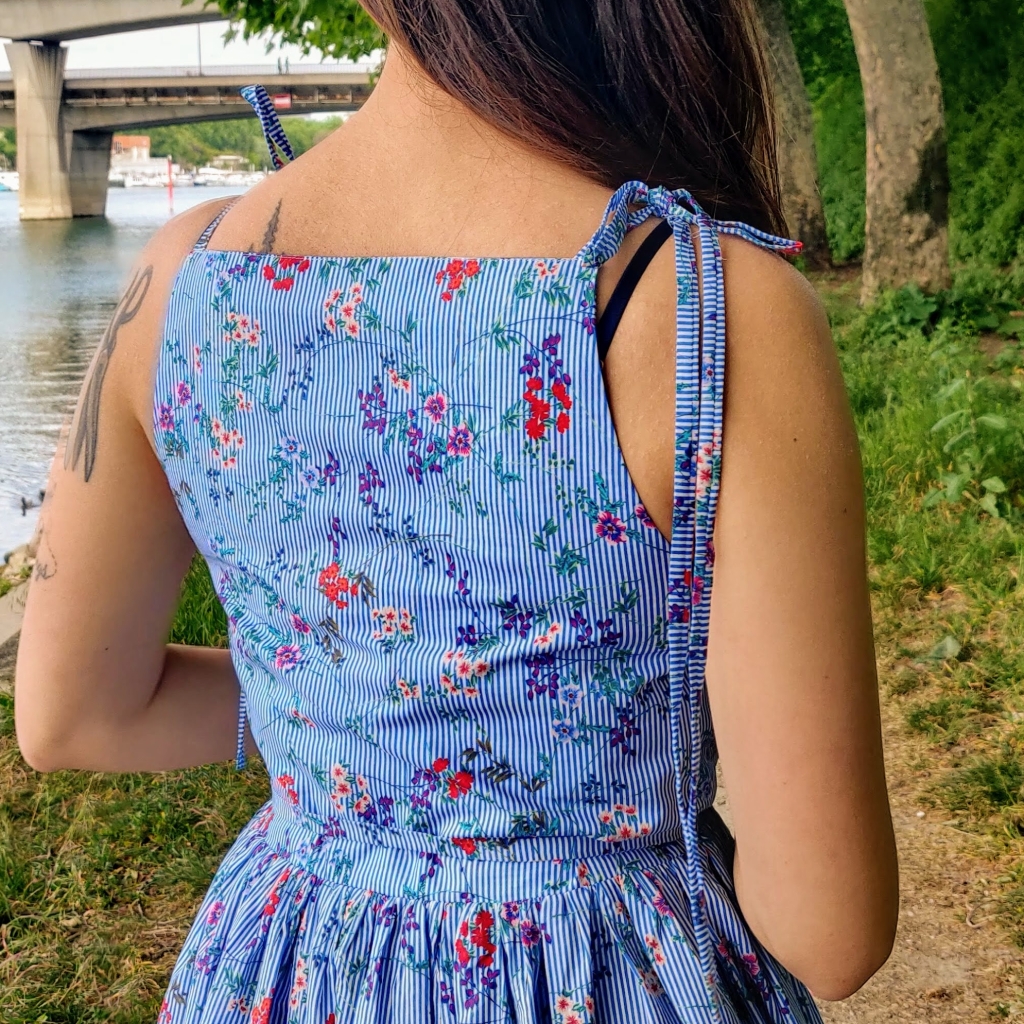
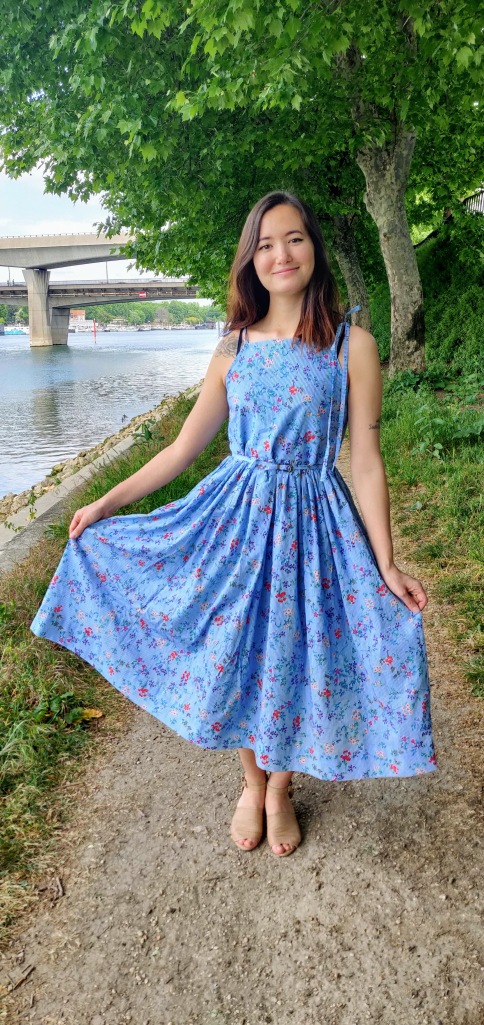
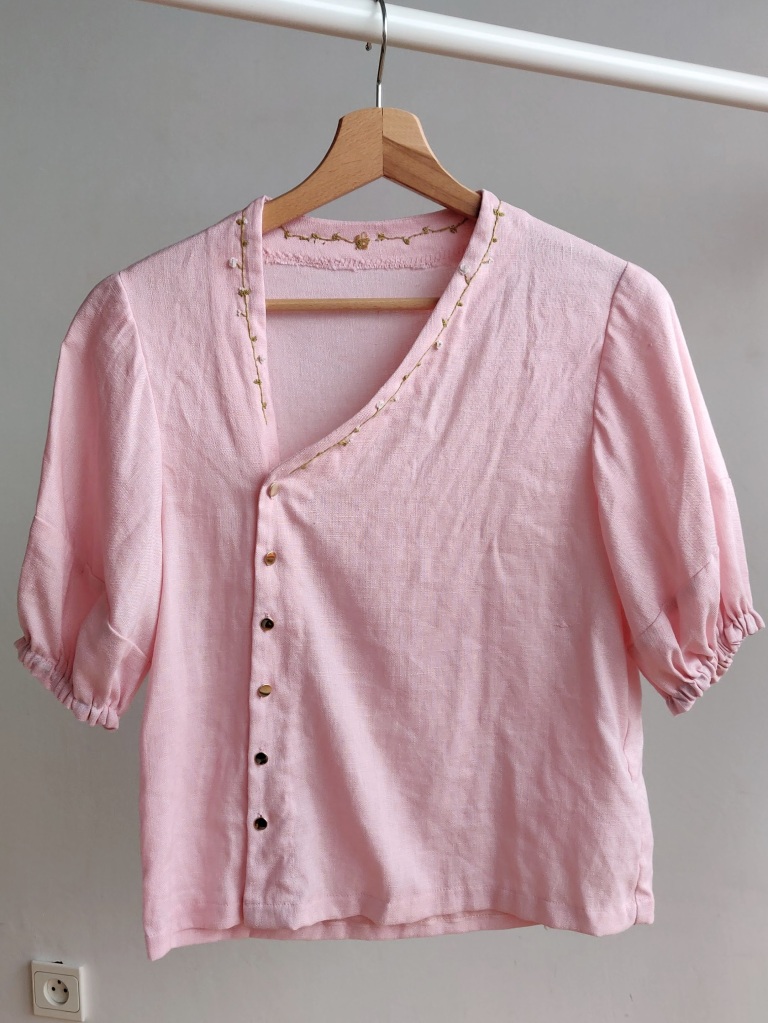
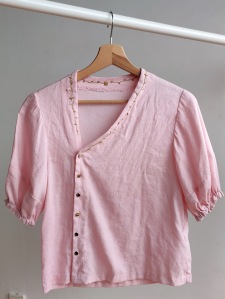
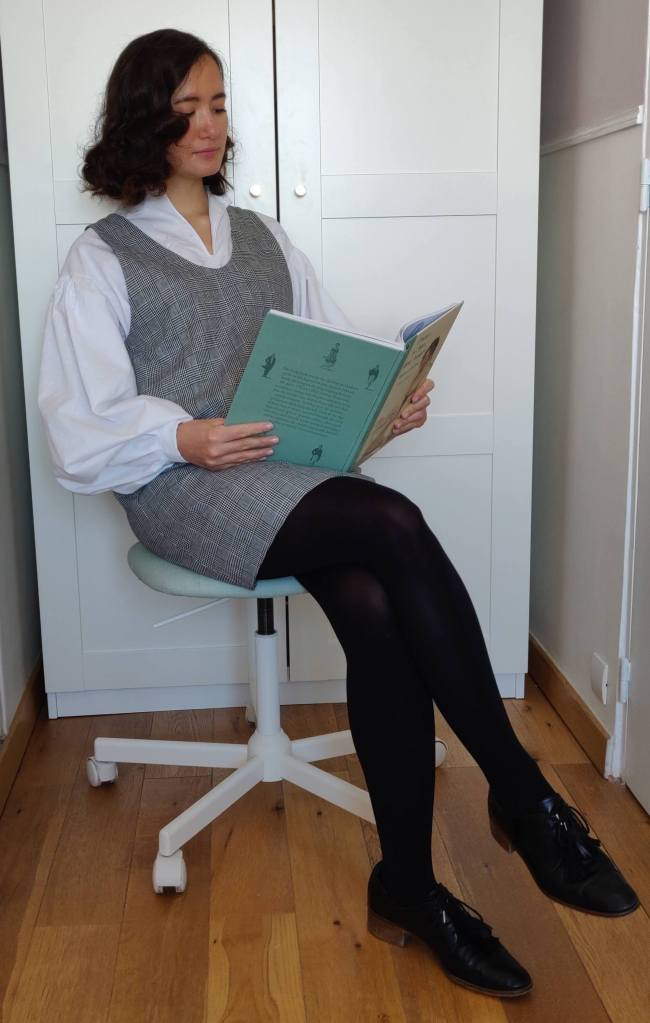
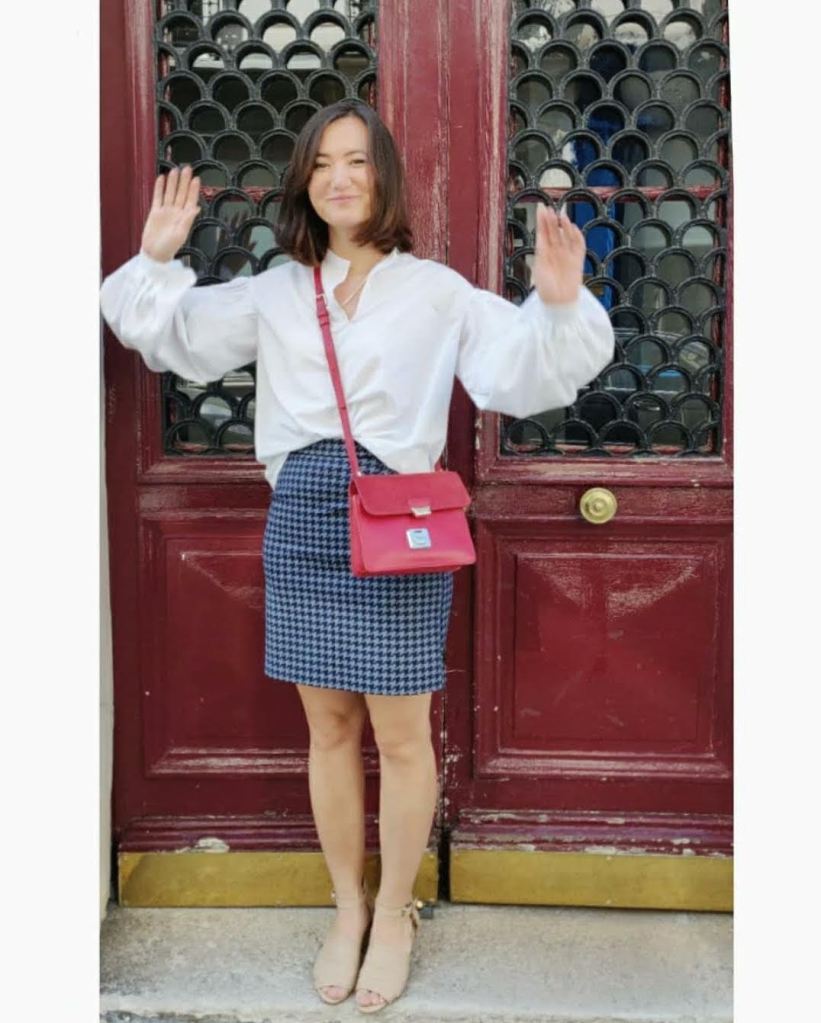
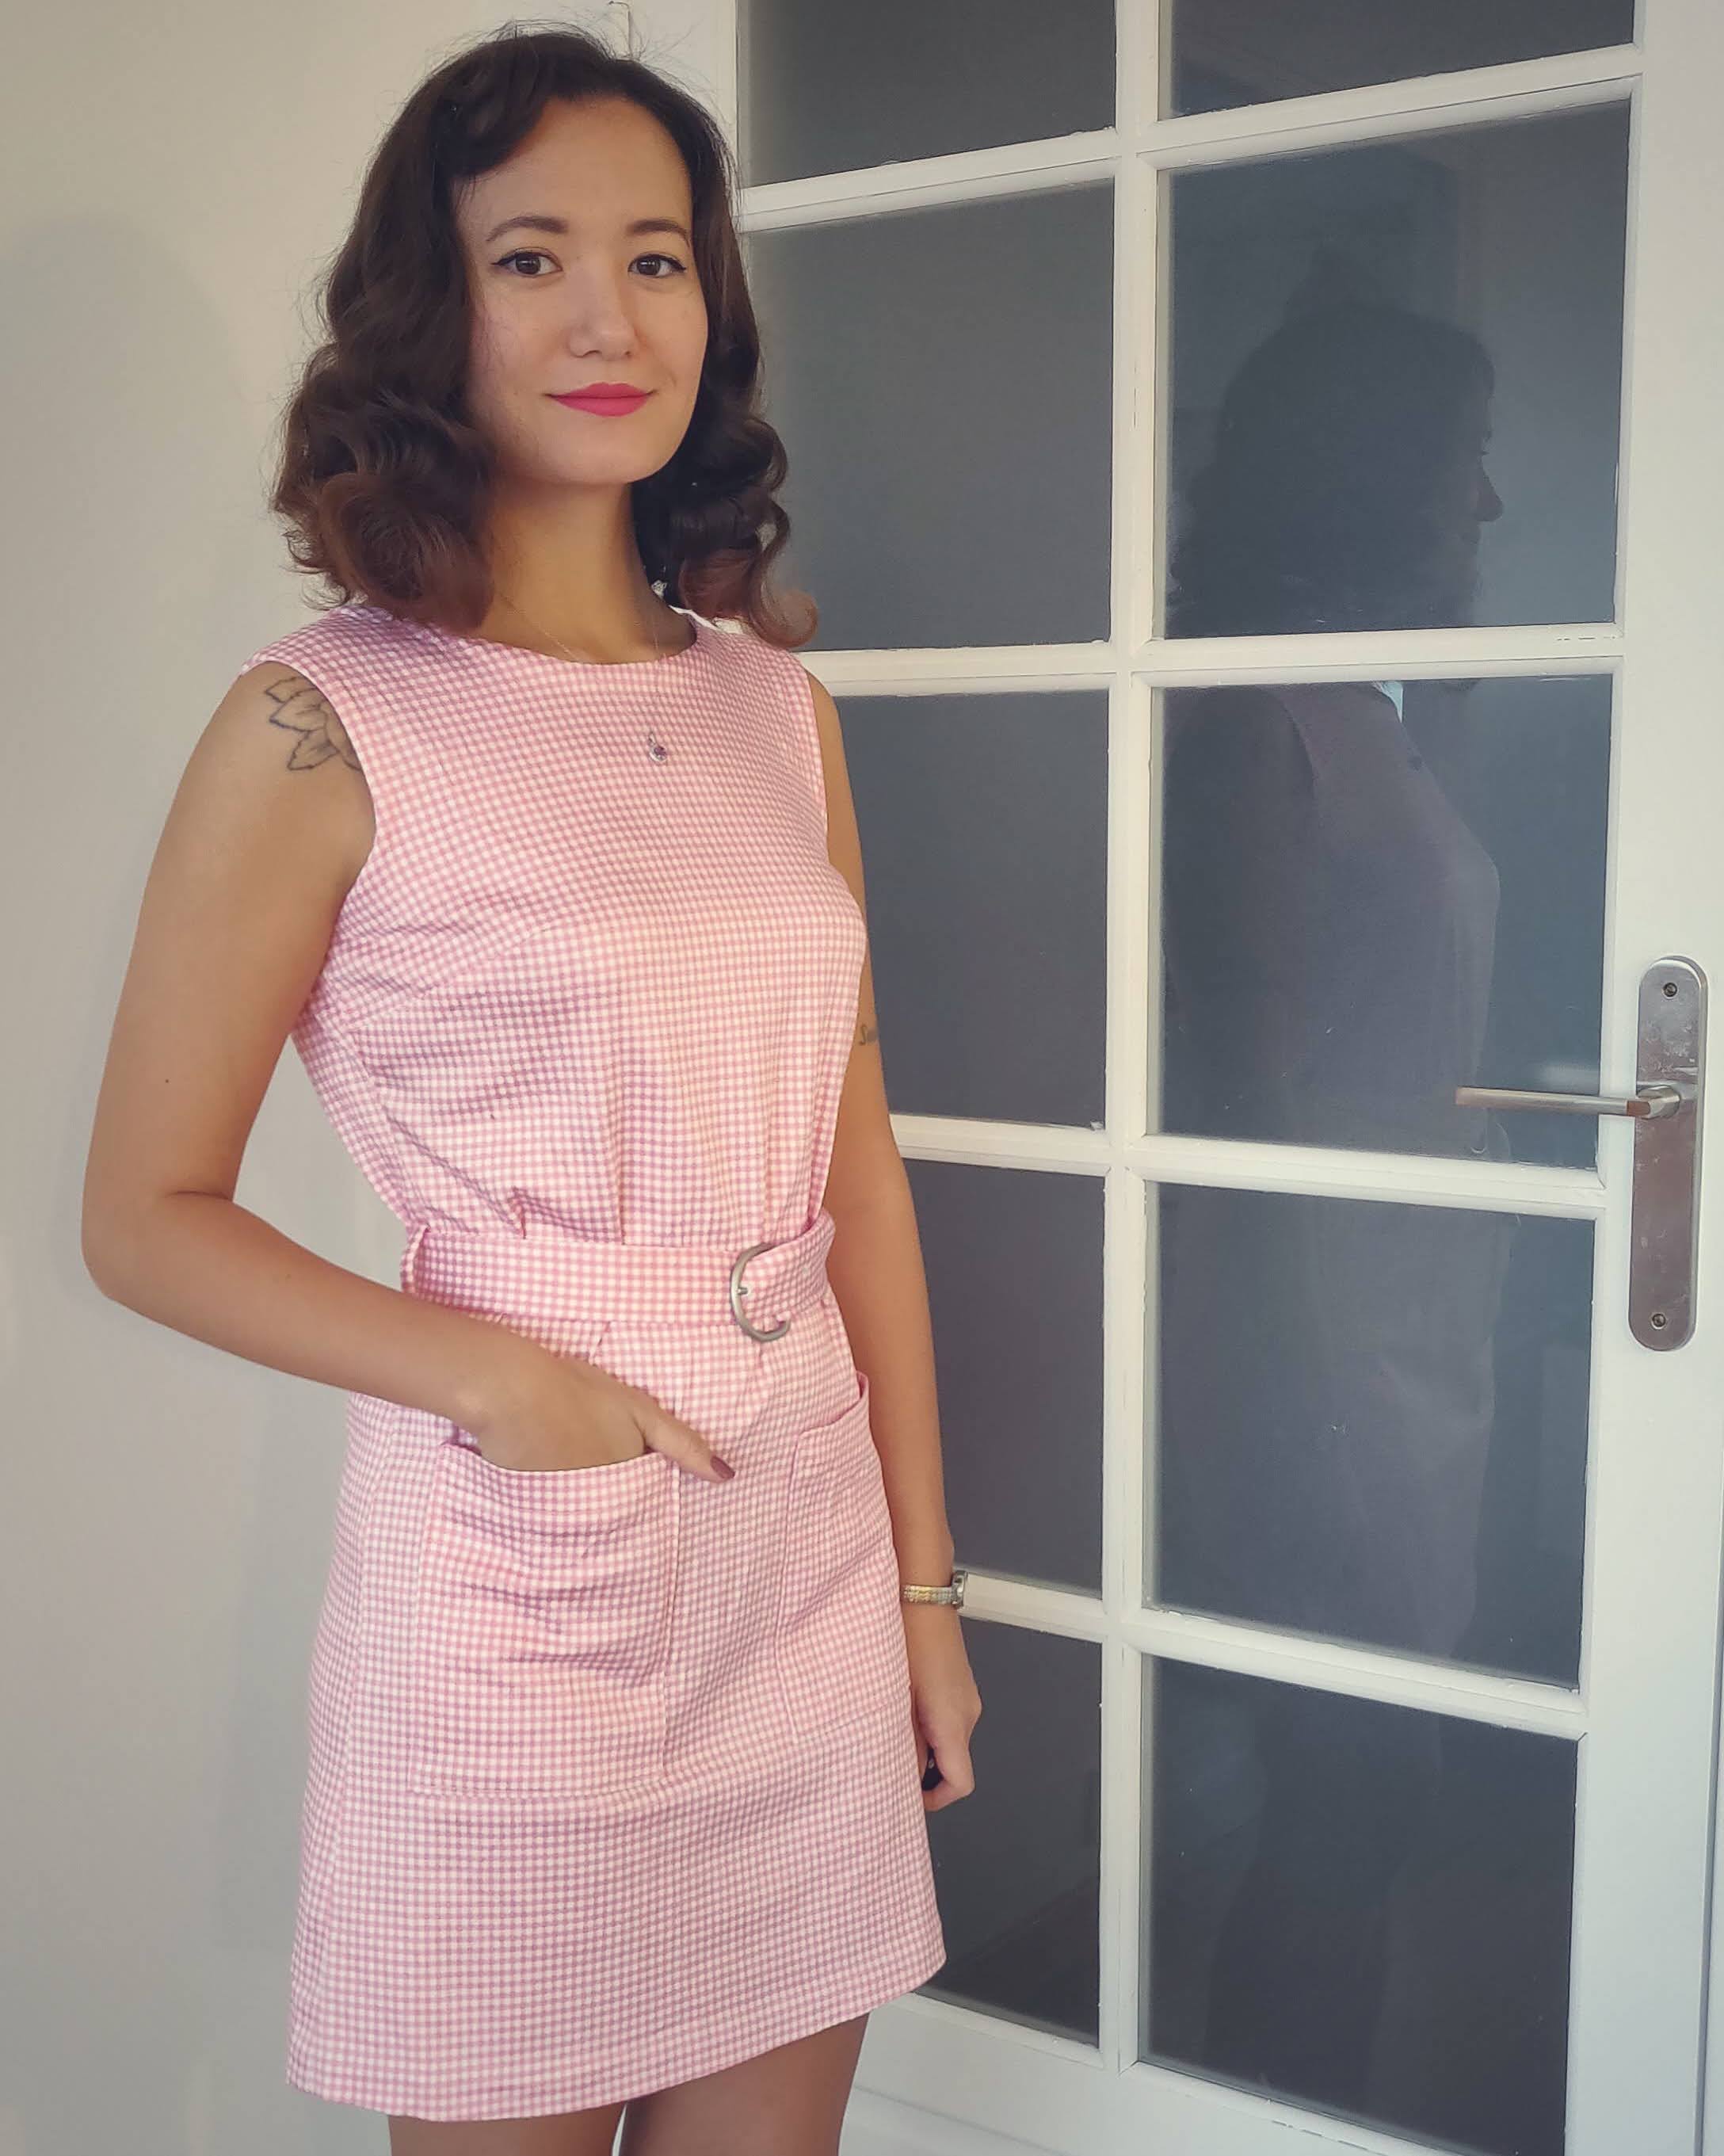
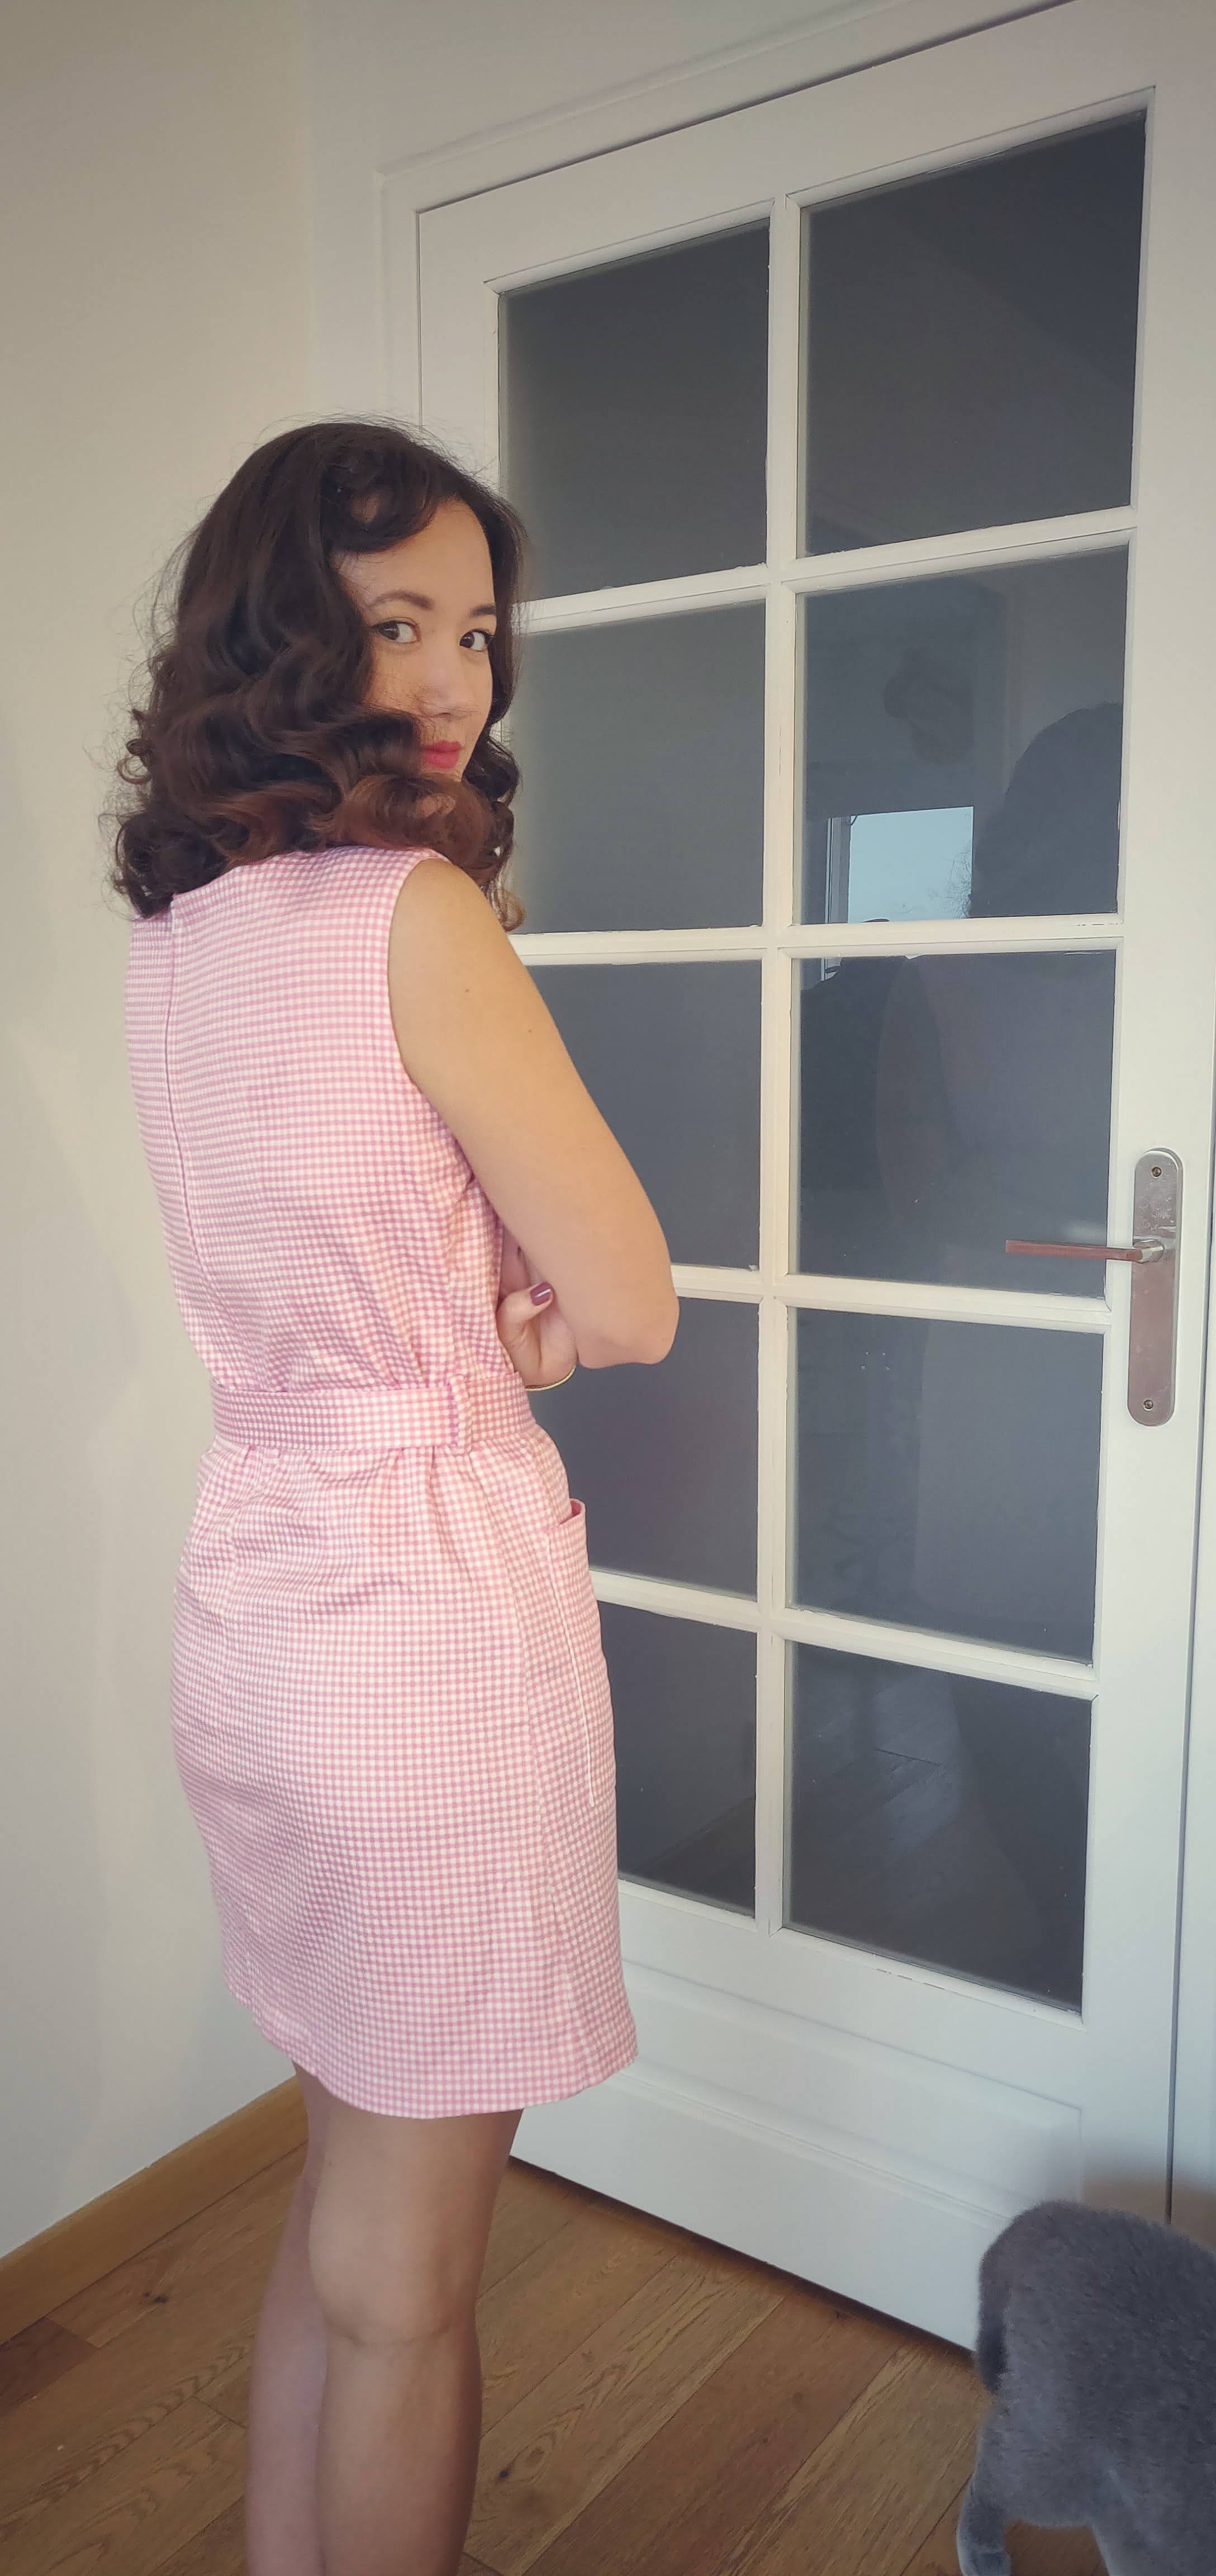
Today I’m bringing you some vintage 60s vibes with this candy colored shift dress!

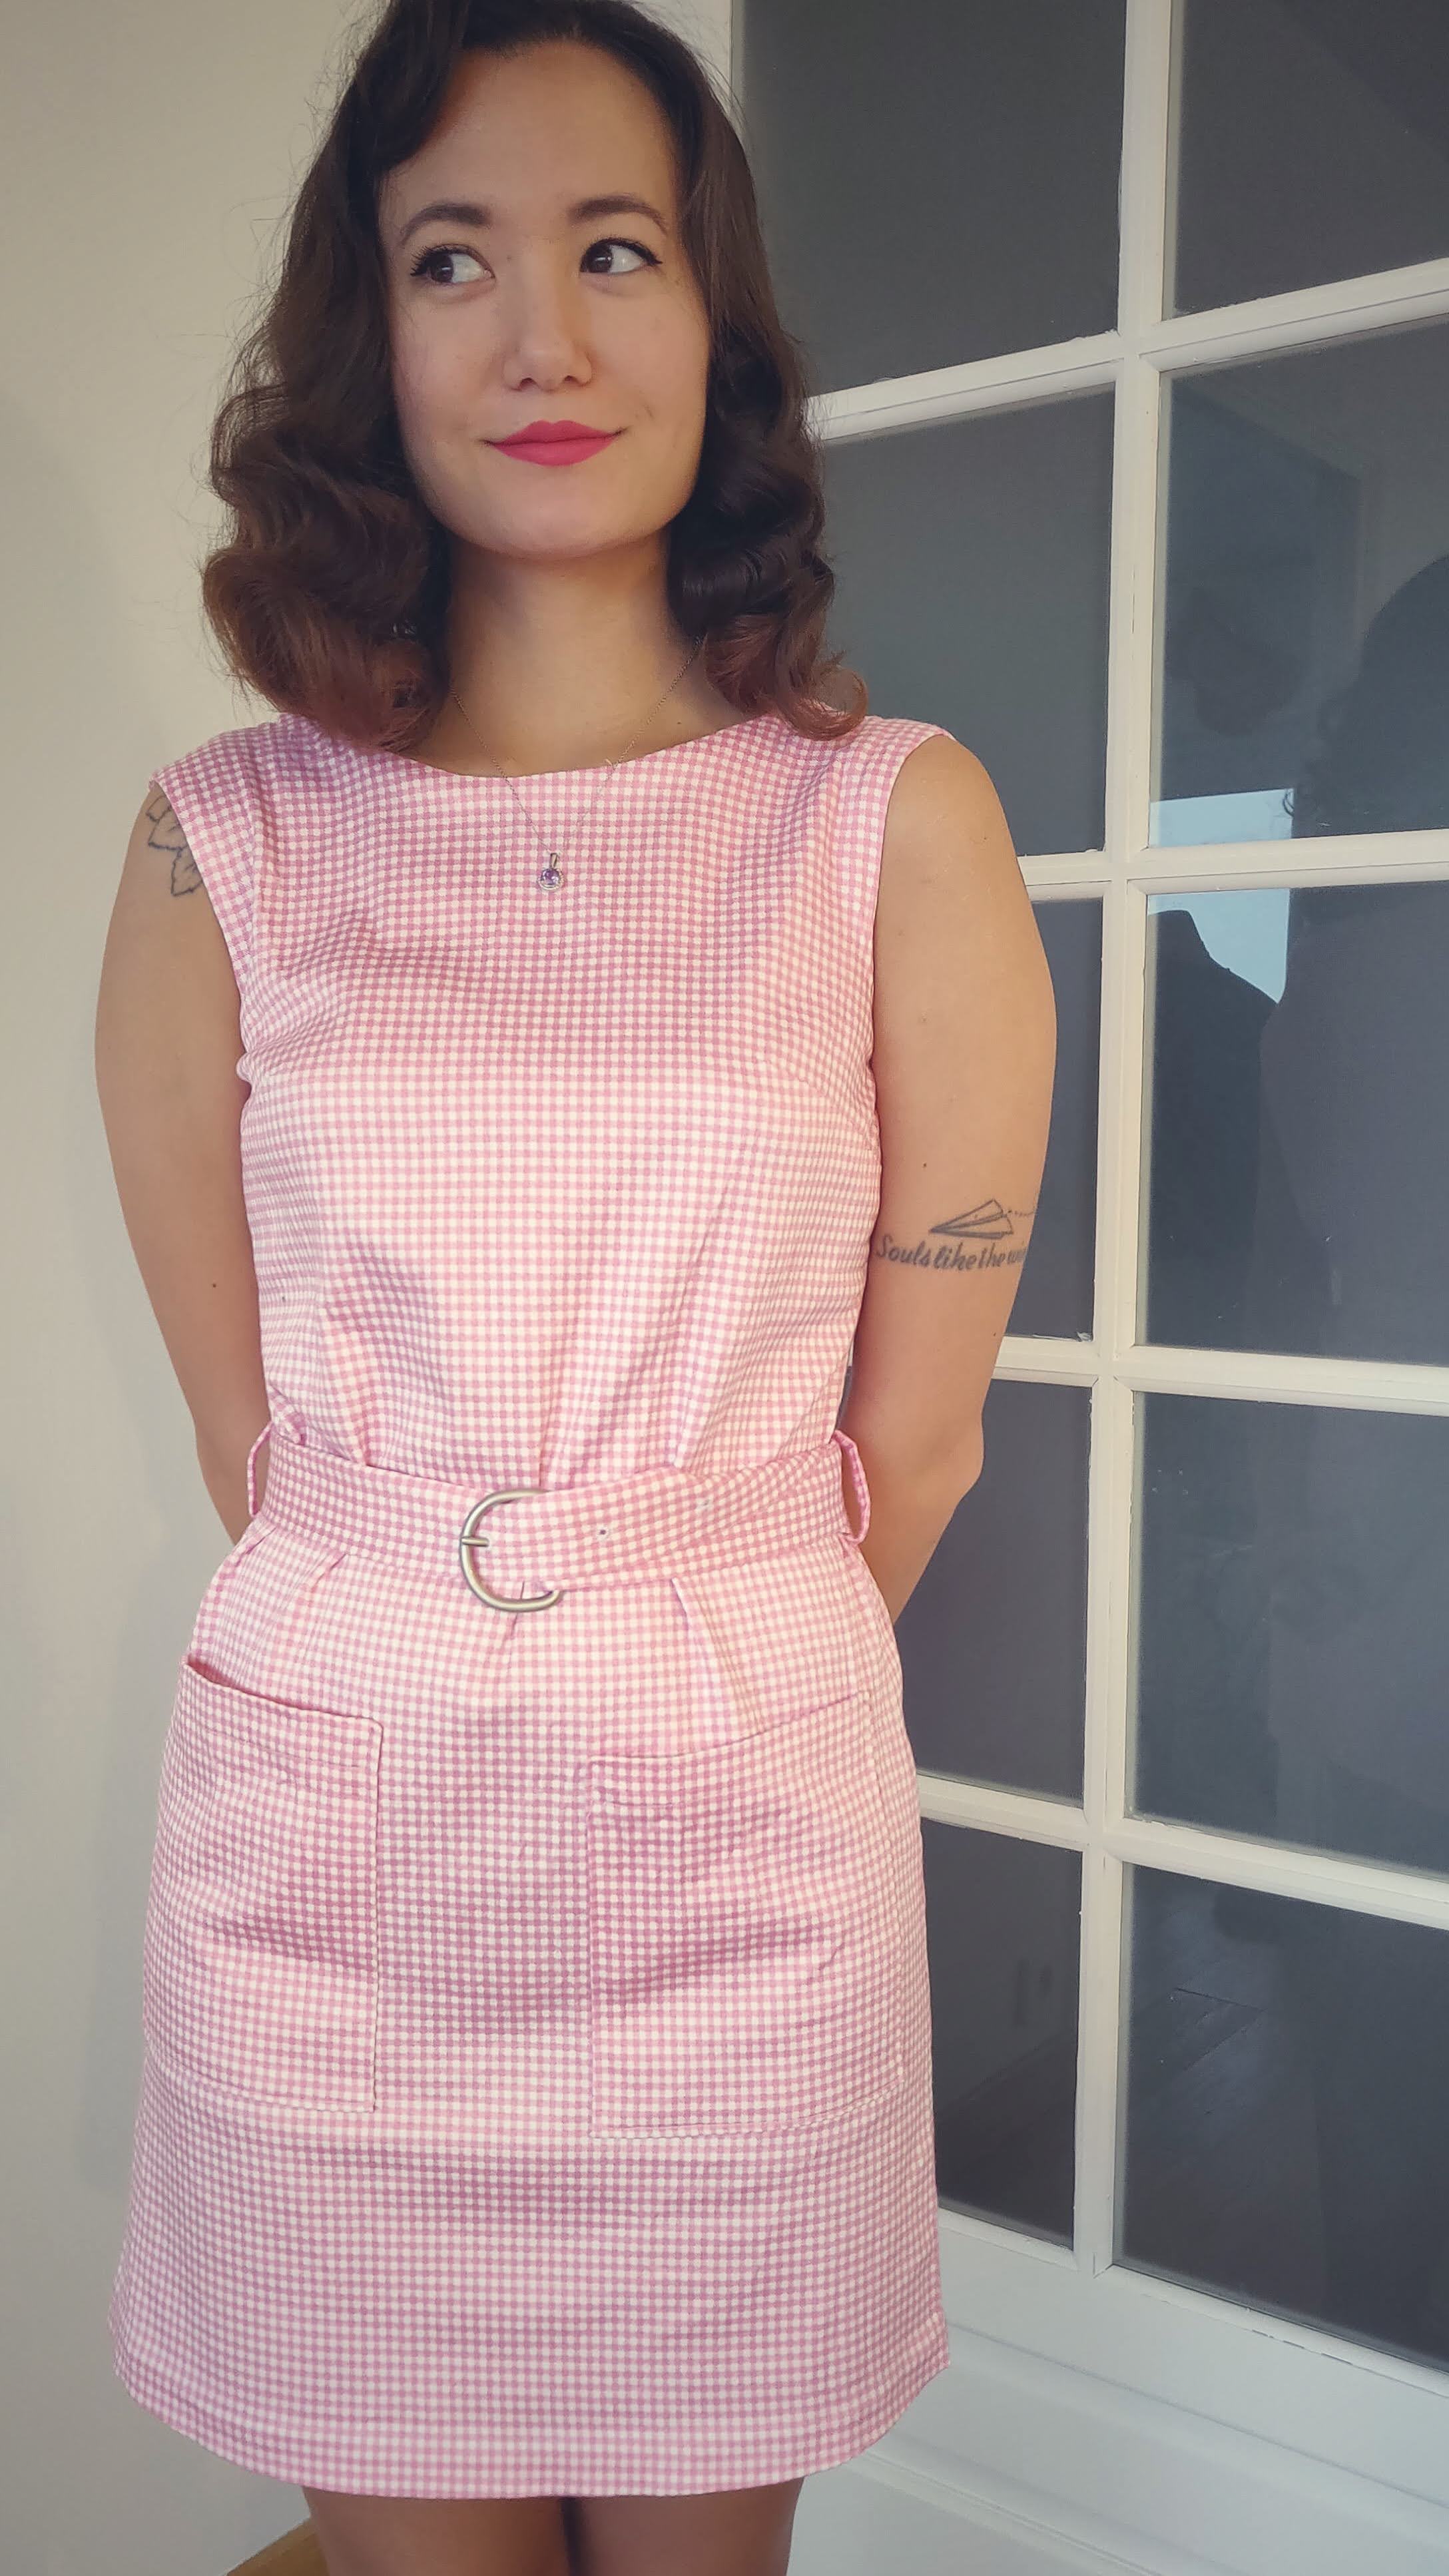
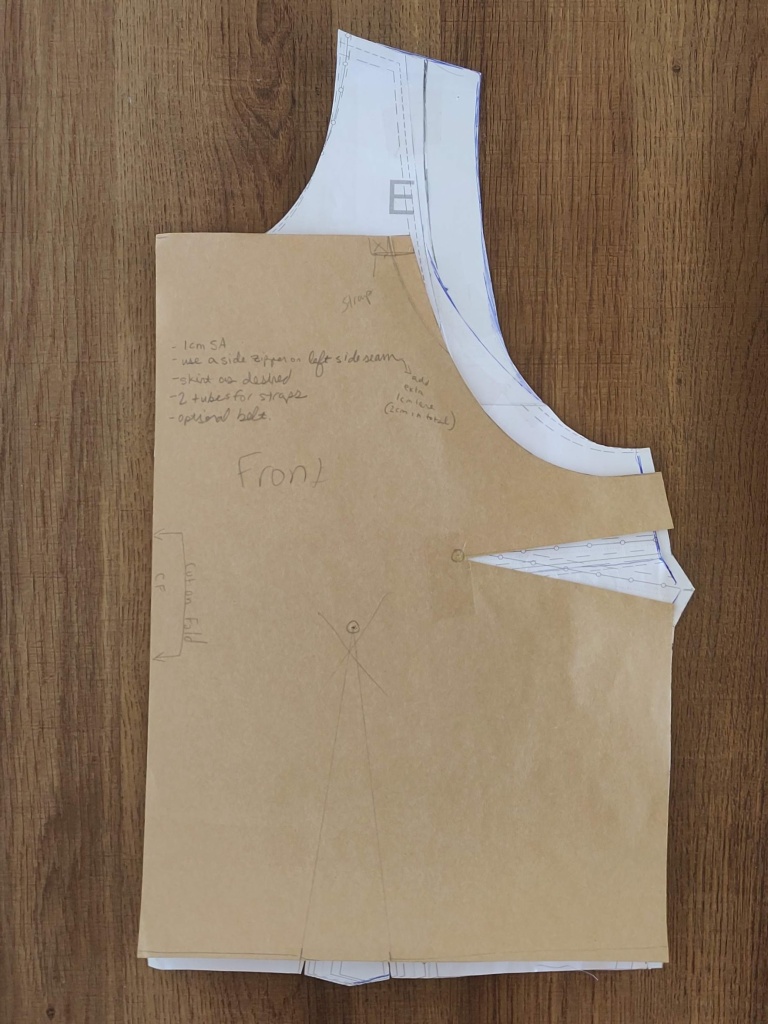
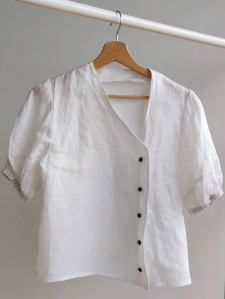
The pattern I used is the Laurel Shift Dress from Colette Patterns. This is one of the first sewing patterns I ever purchased as i’ve always been drawn to this silhouette. However, it’s not a pattern I’ve made that often as I’ve never really taken the time to fit the paper pattern perfectly to my body (Colette/Seamwork patterns are drafted for curvier figures).

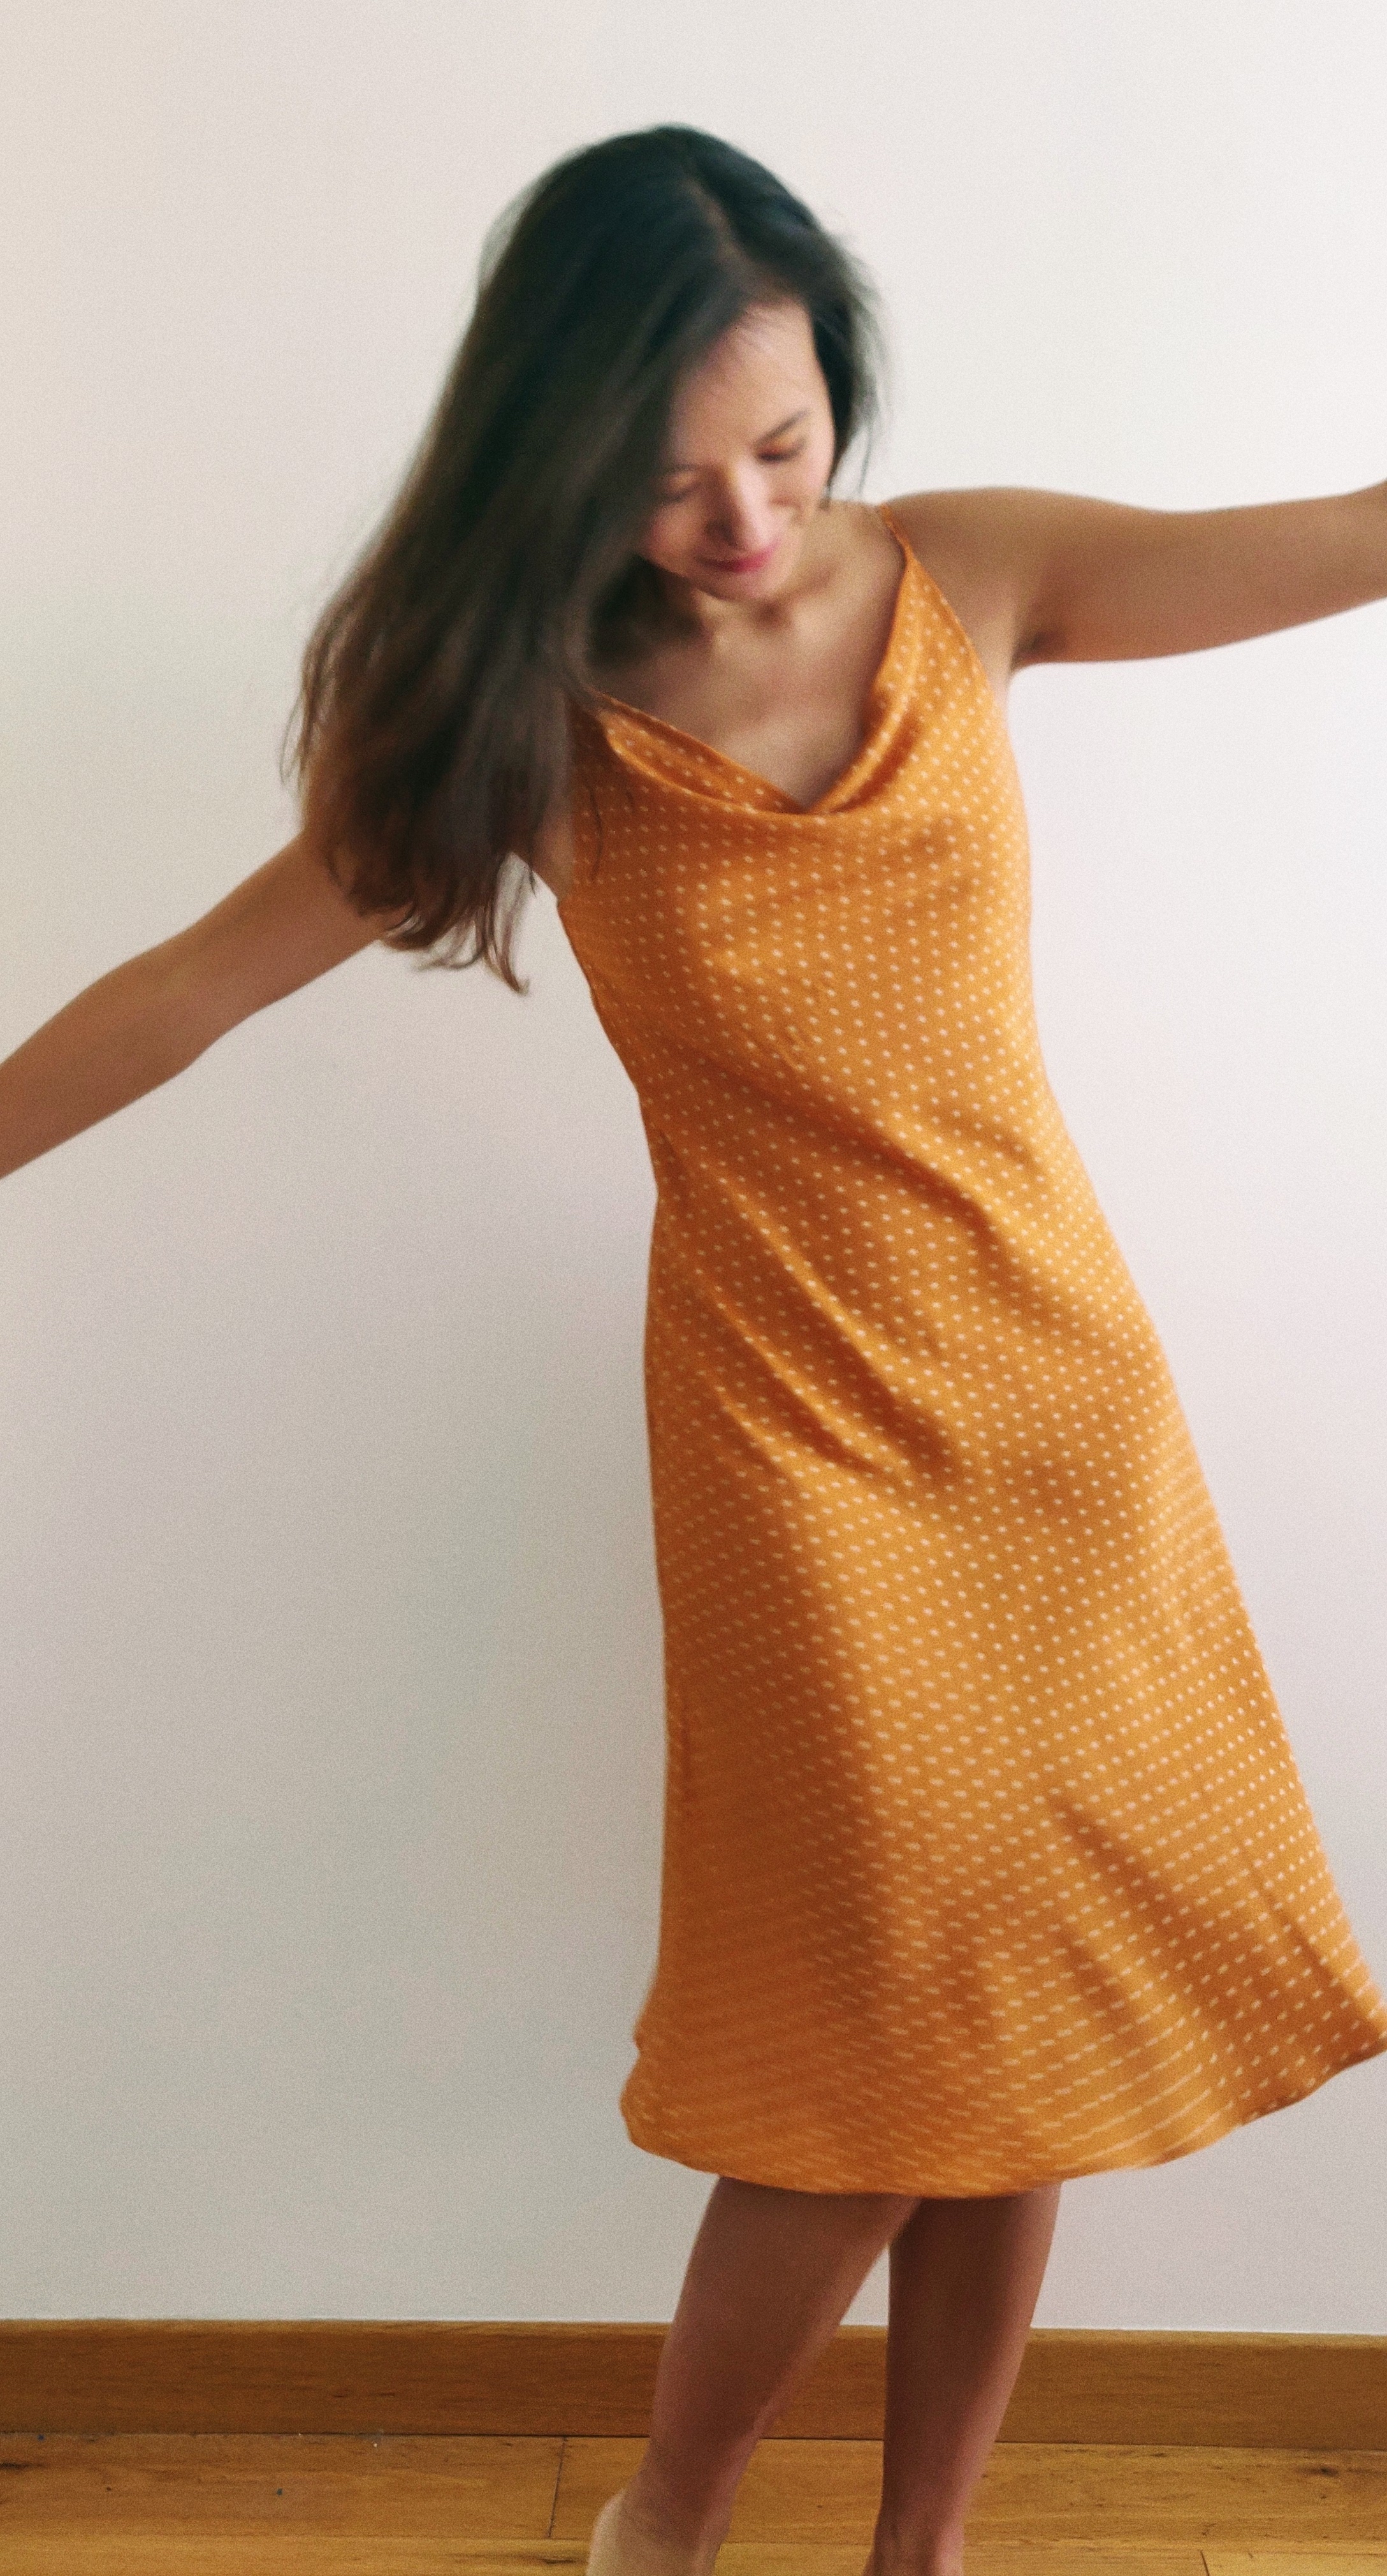
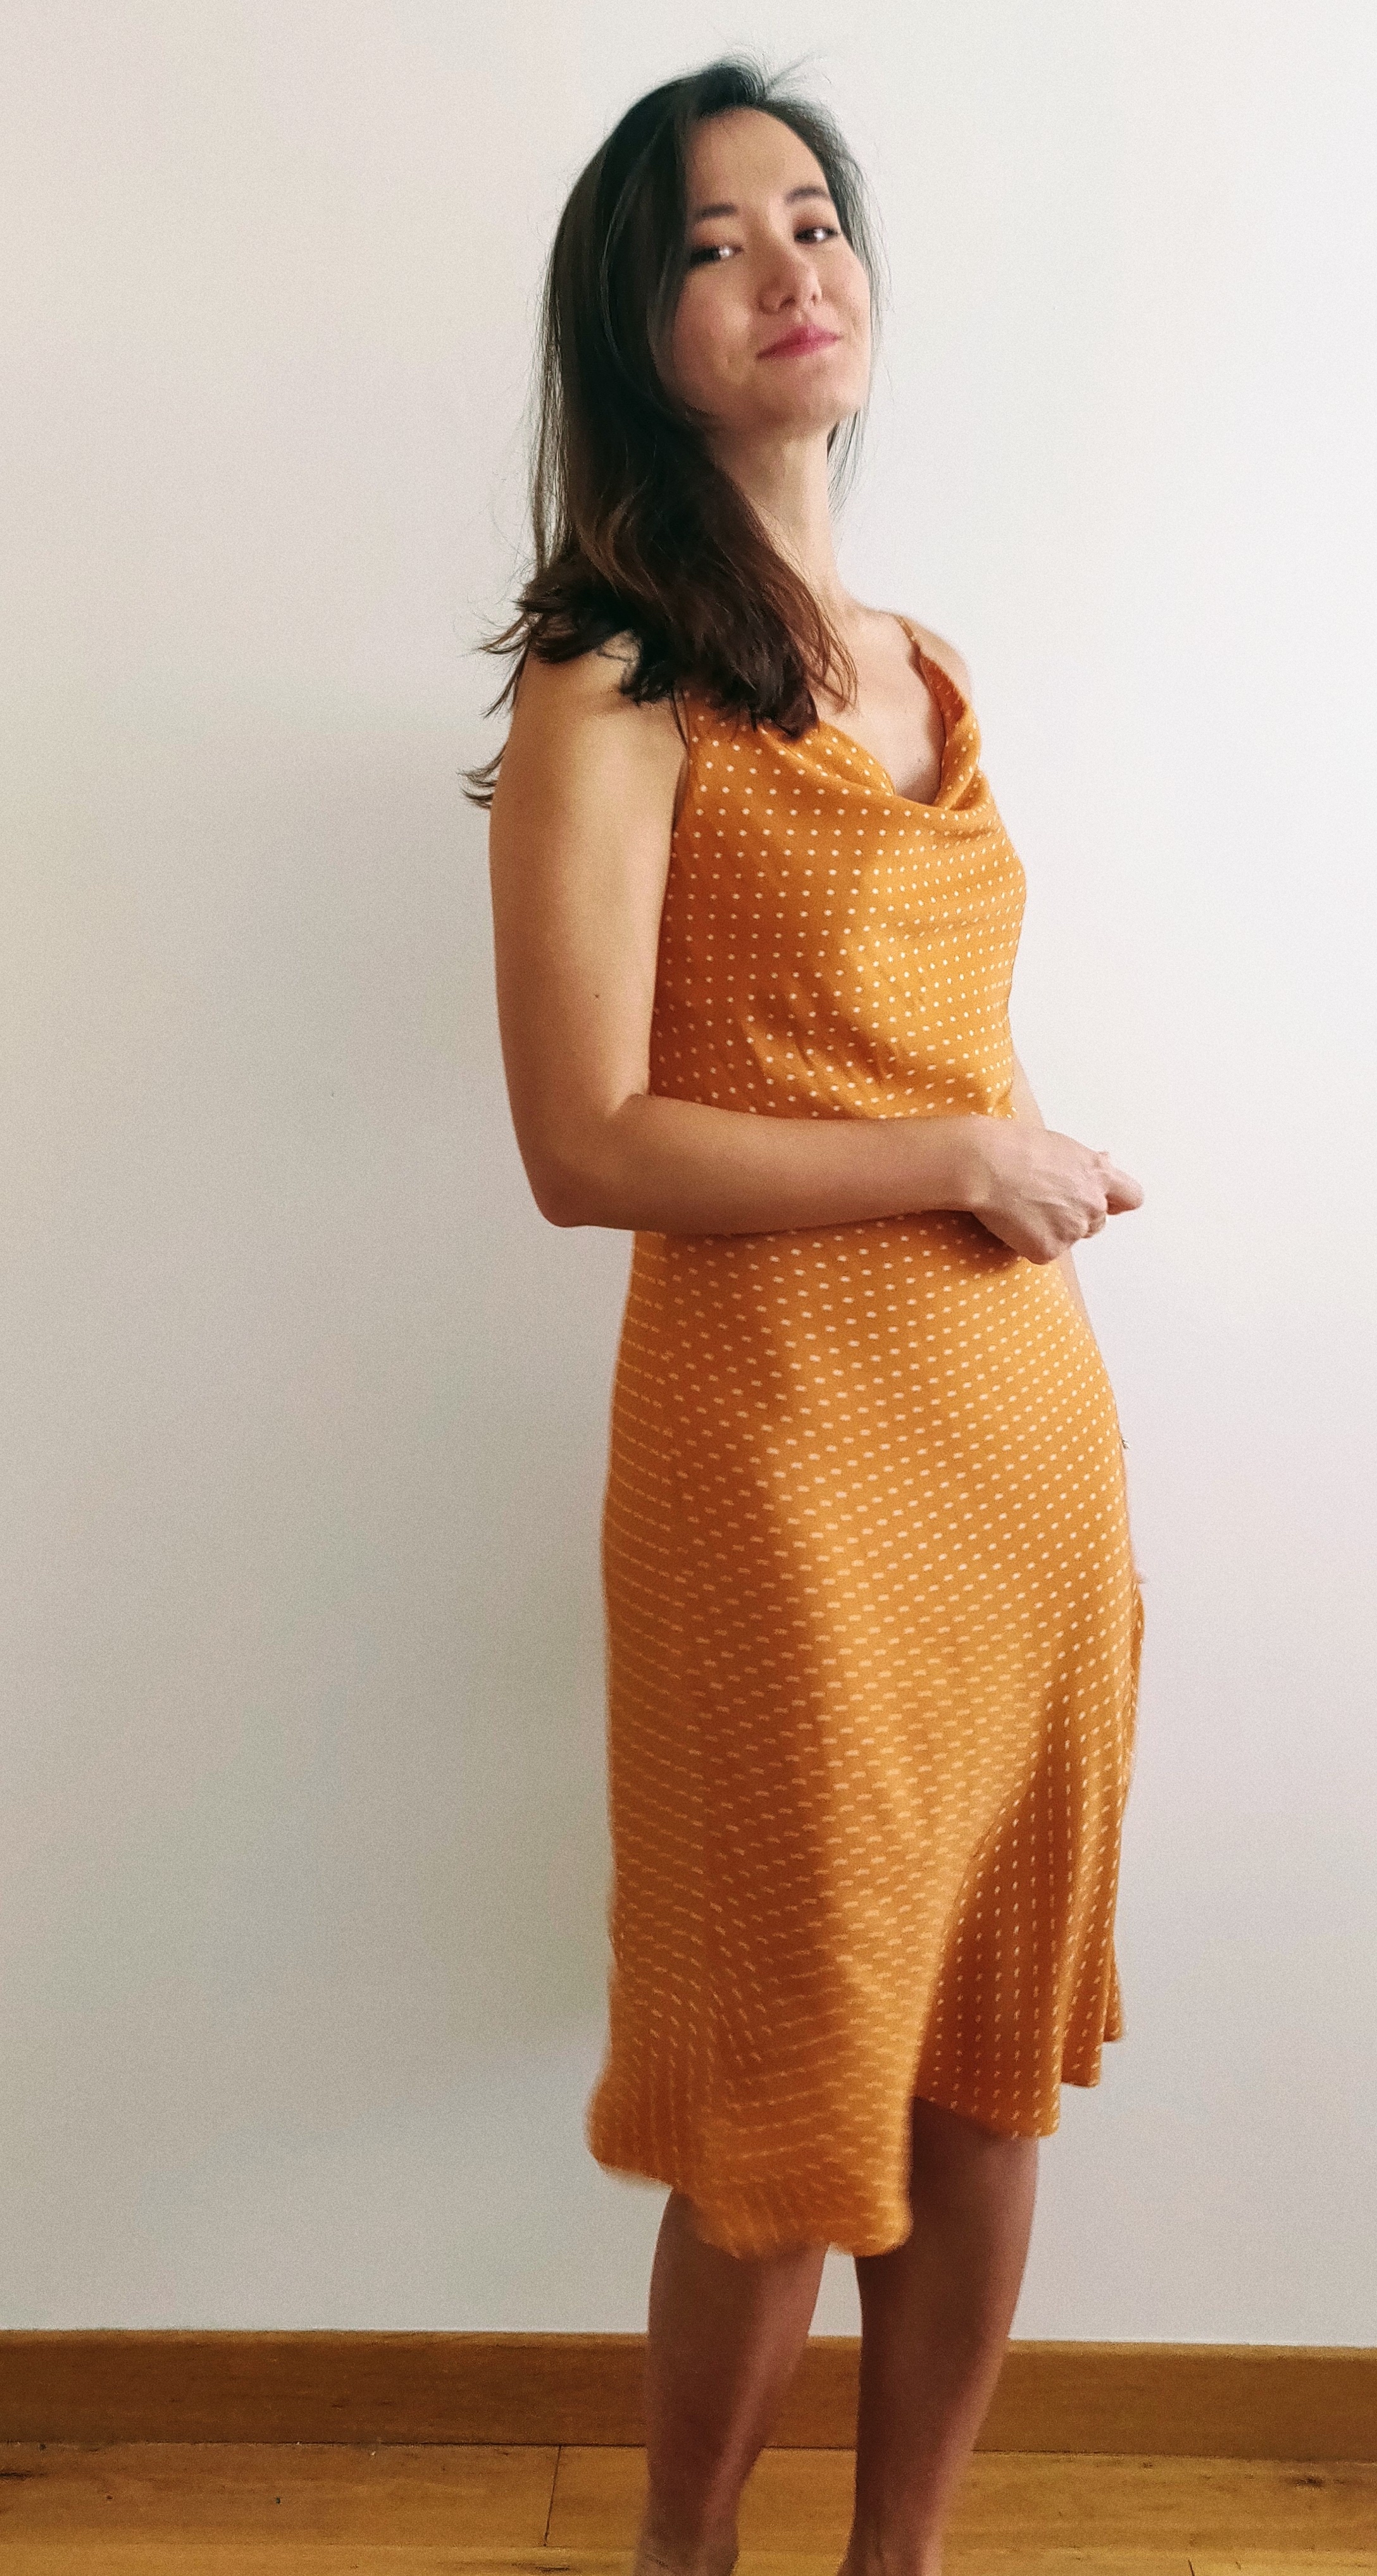
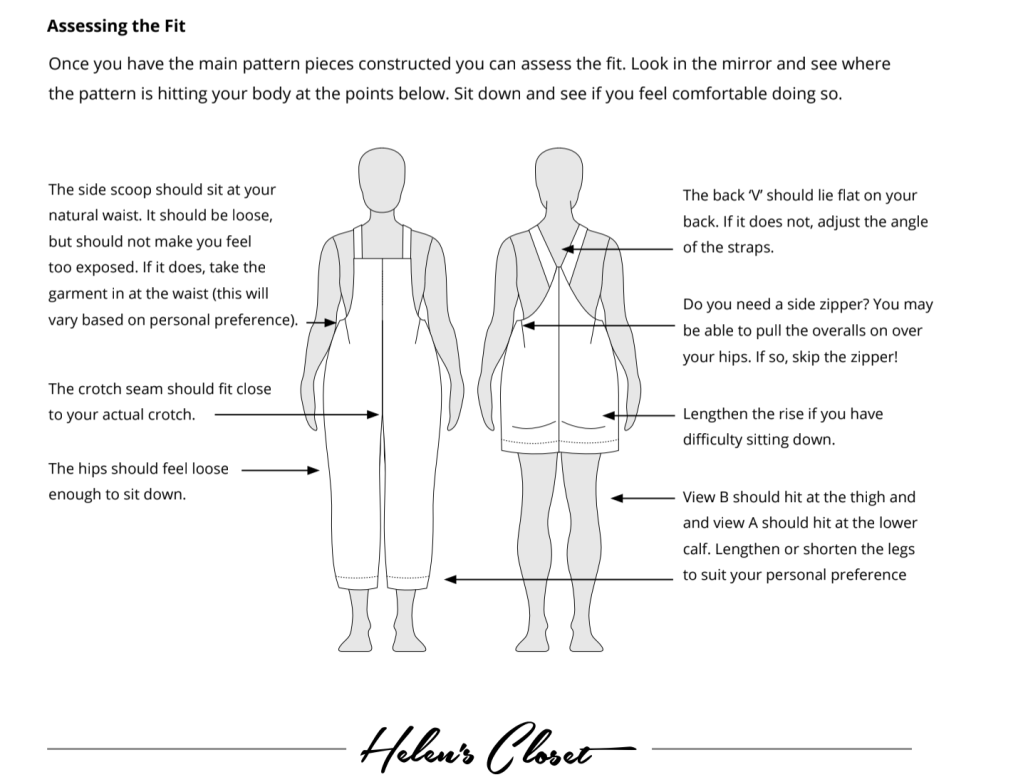
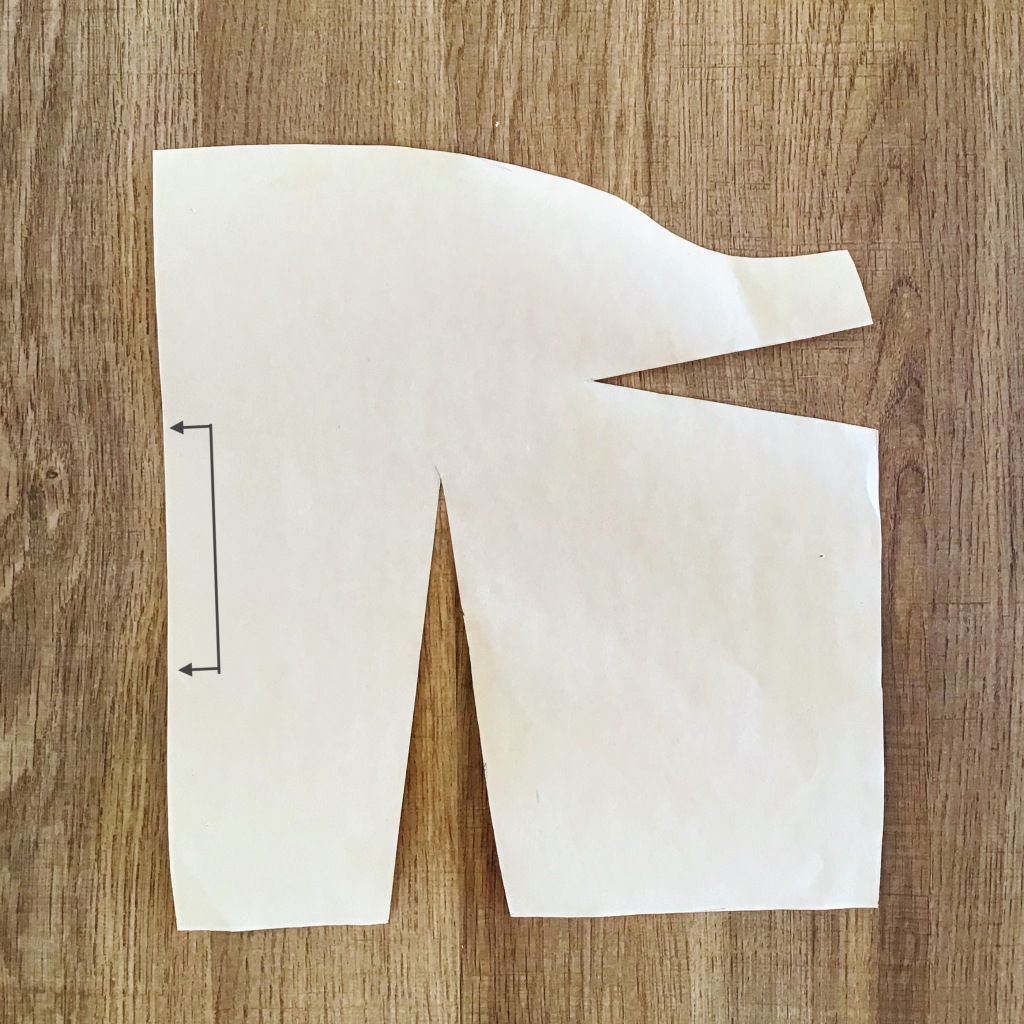
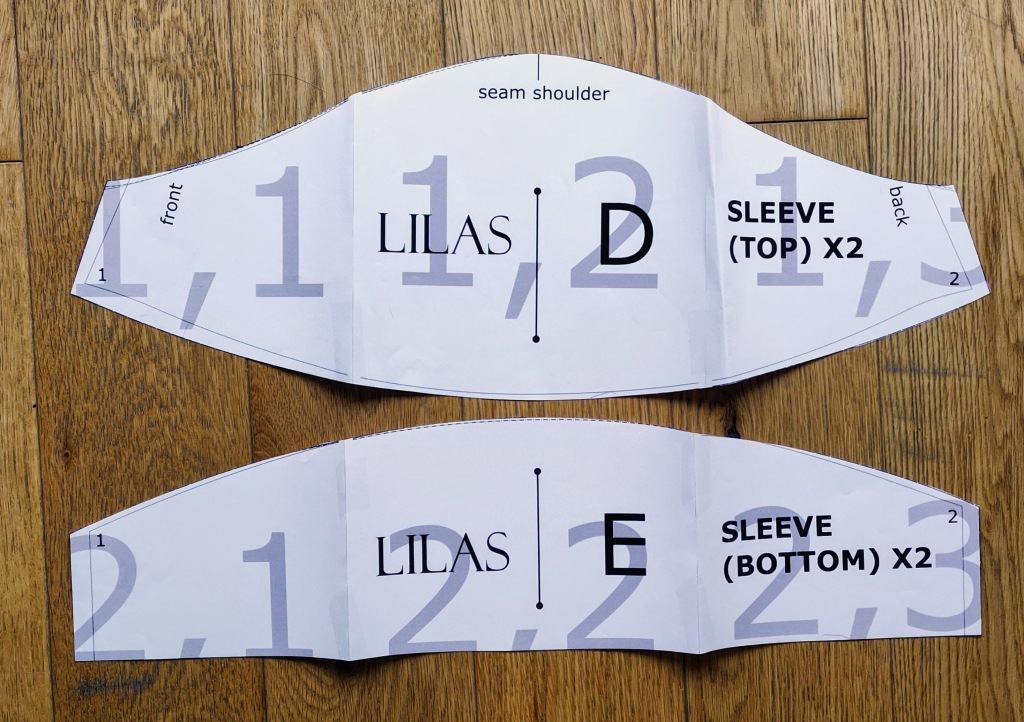
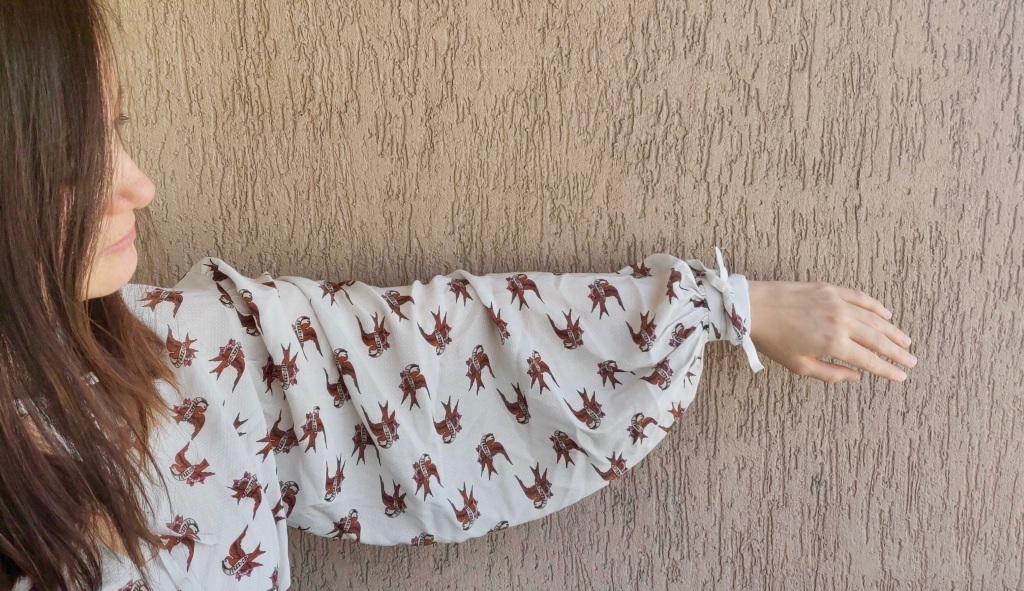
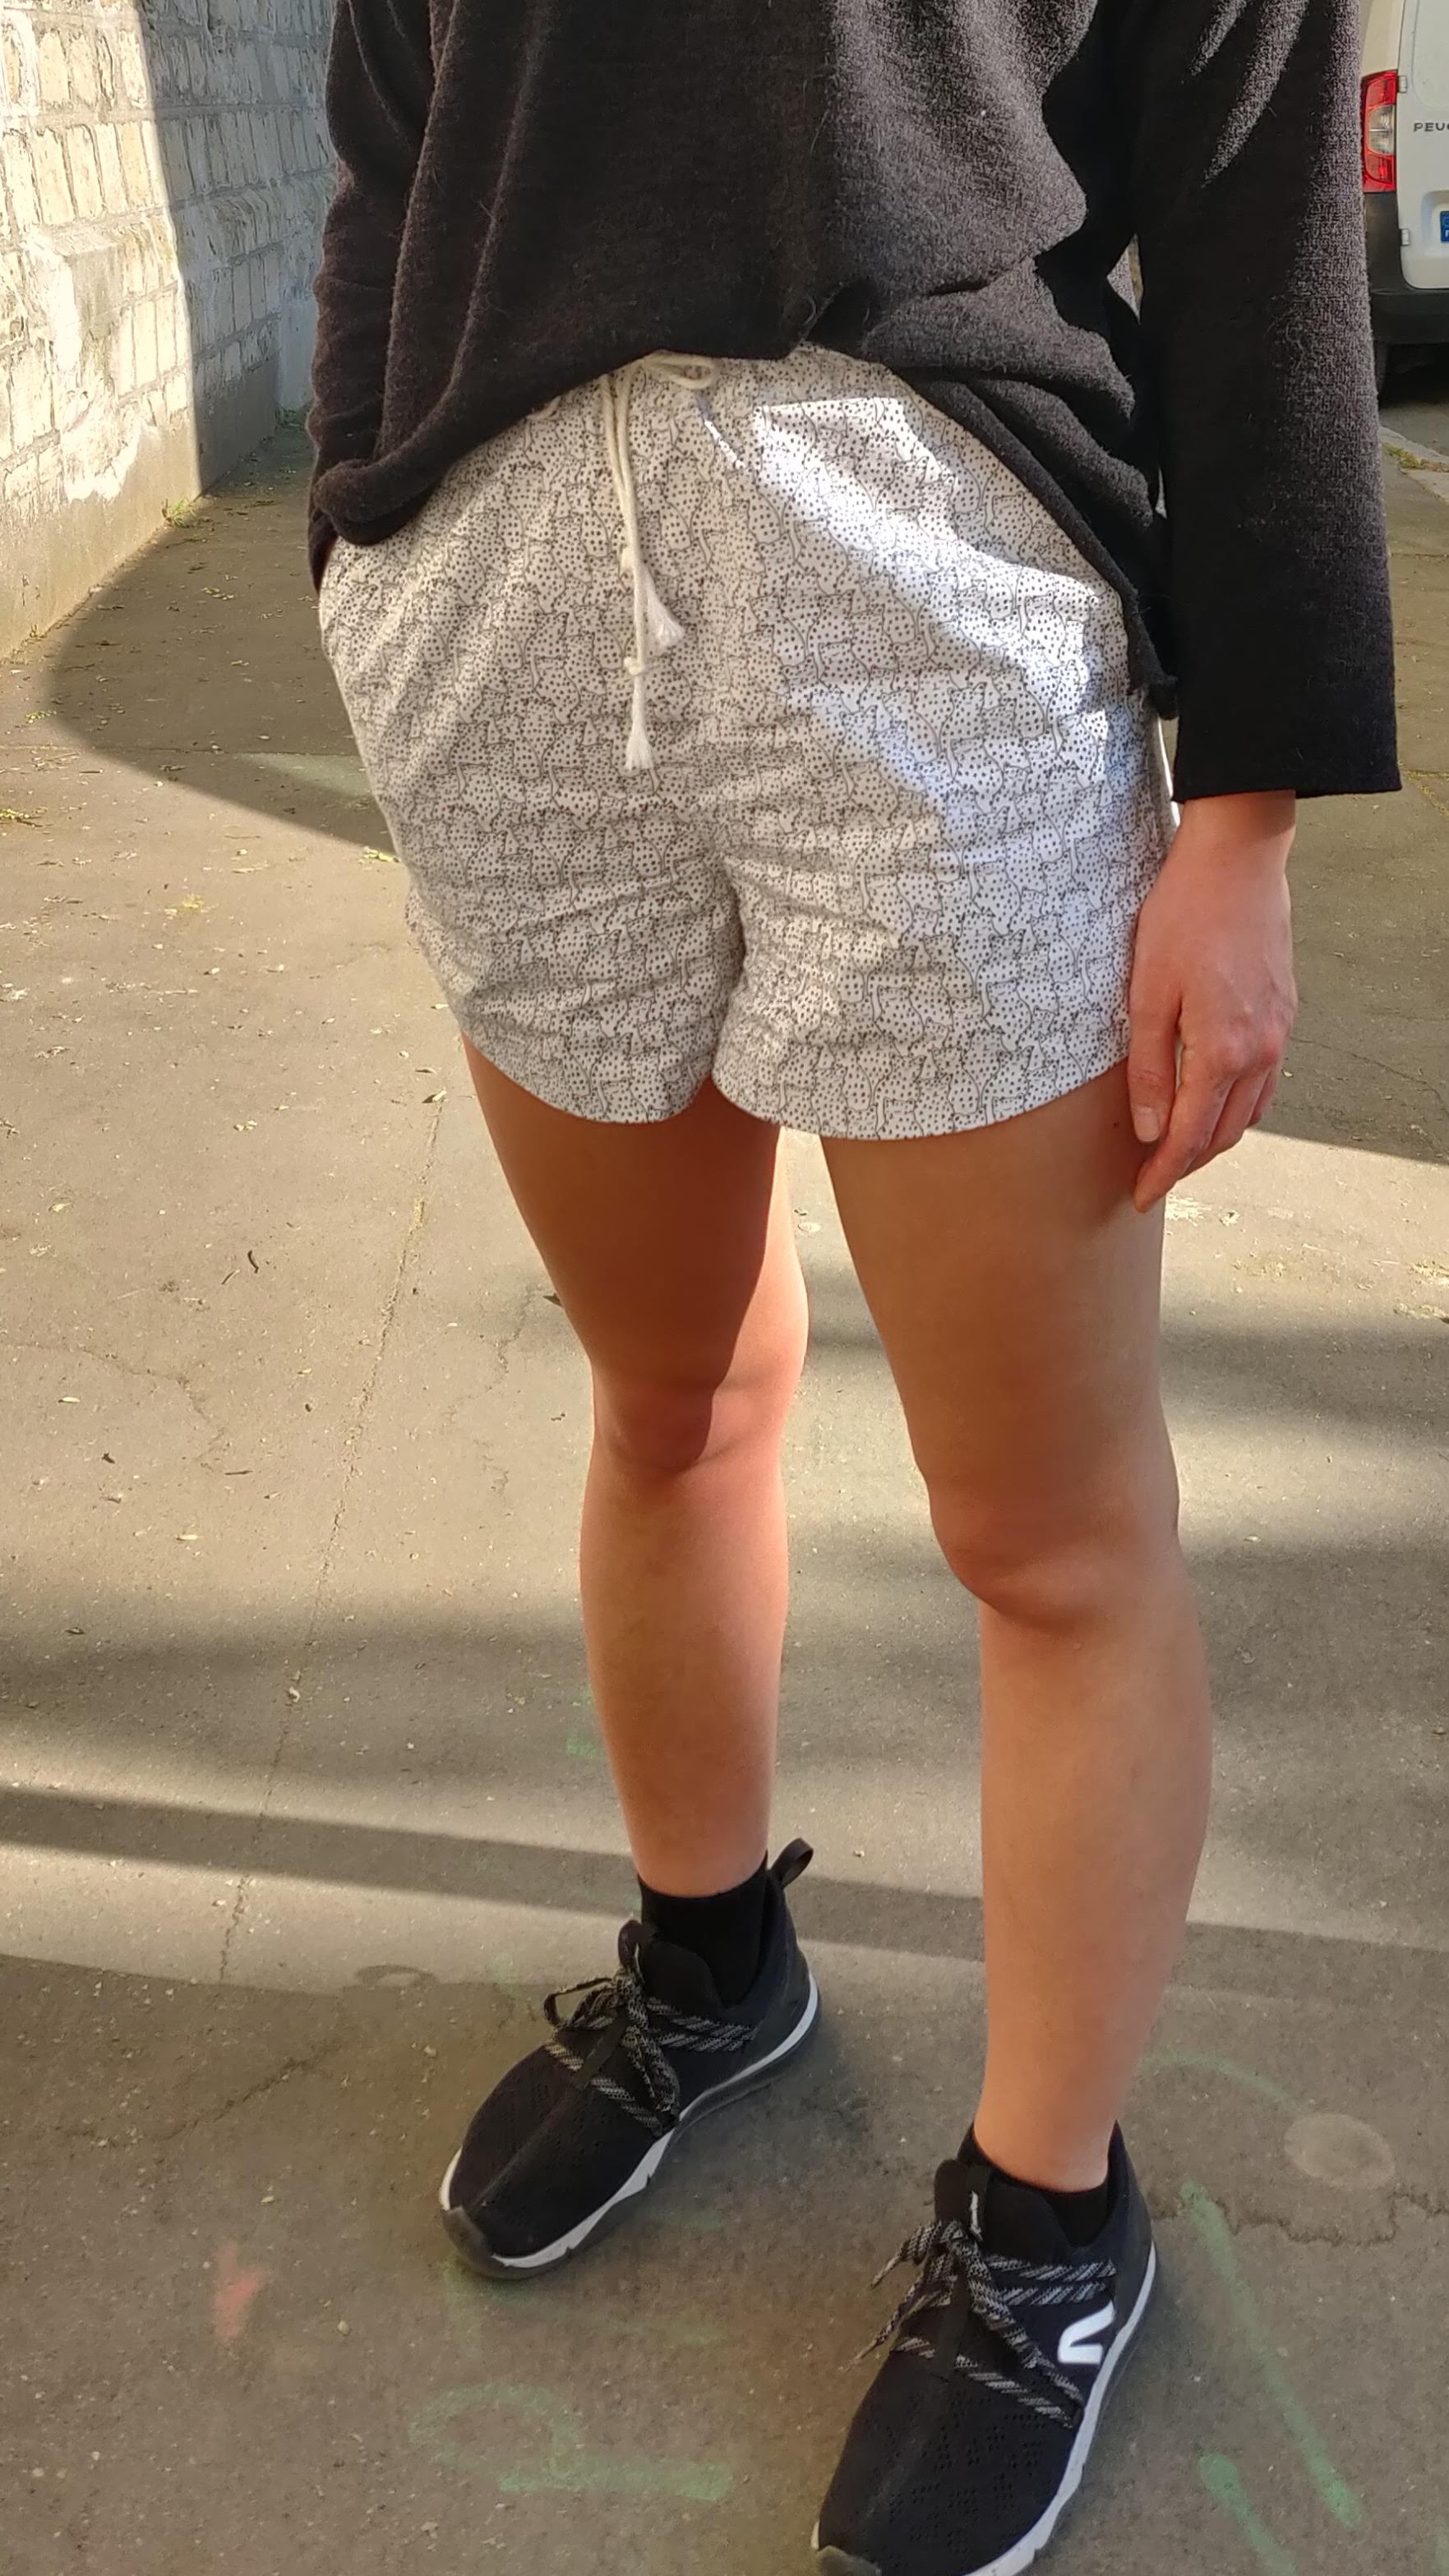
For this version I ended up removing the sleeves as it just felt too overwhelming with this thick, slightly stretchy cotton. To fix the fit around the hips, I drew a straight line from the natural waist down to the hem instead of having it follow my natural curves.

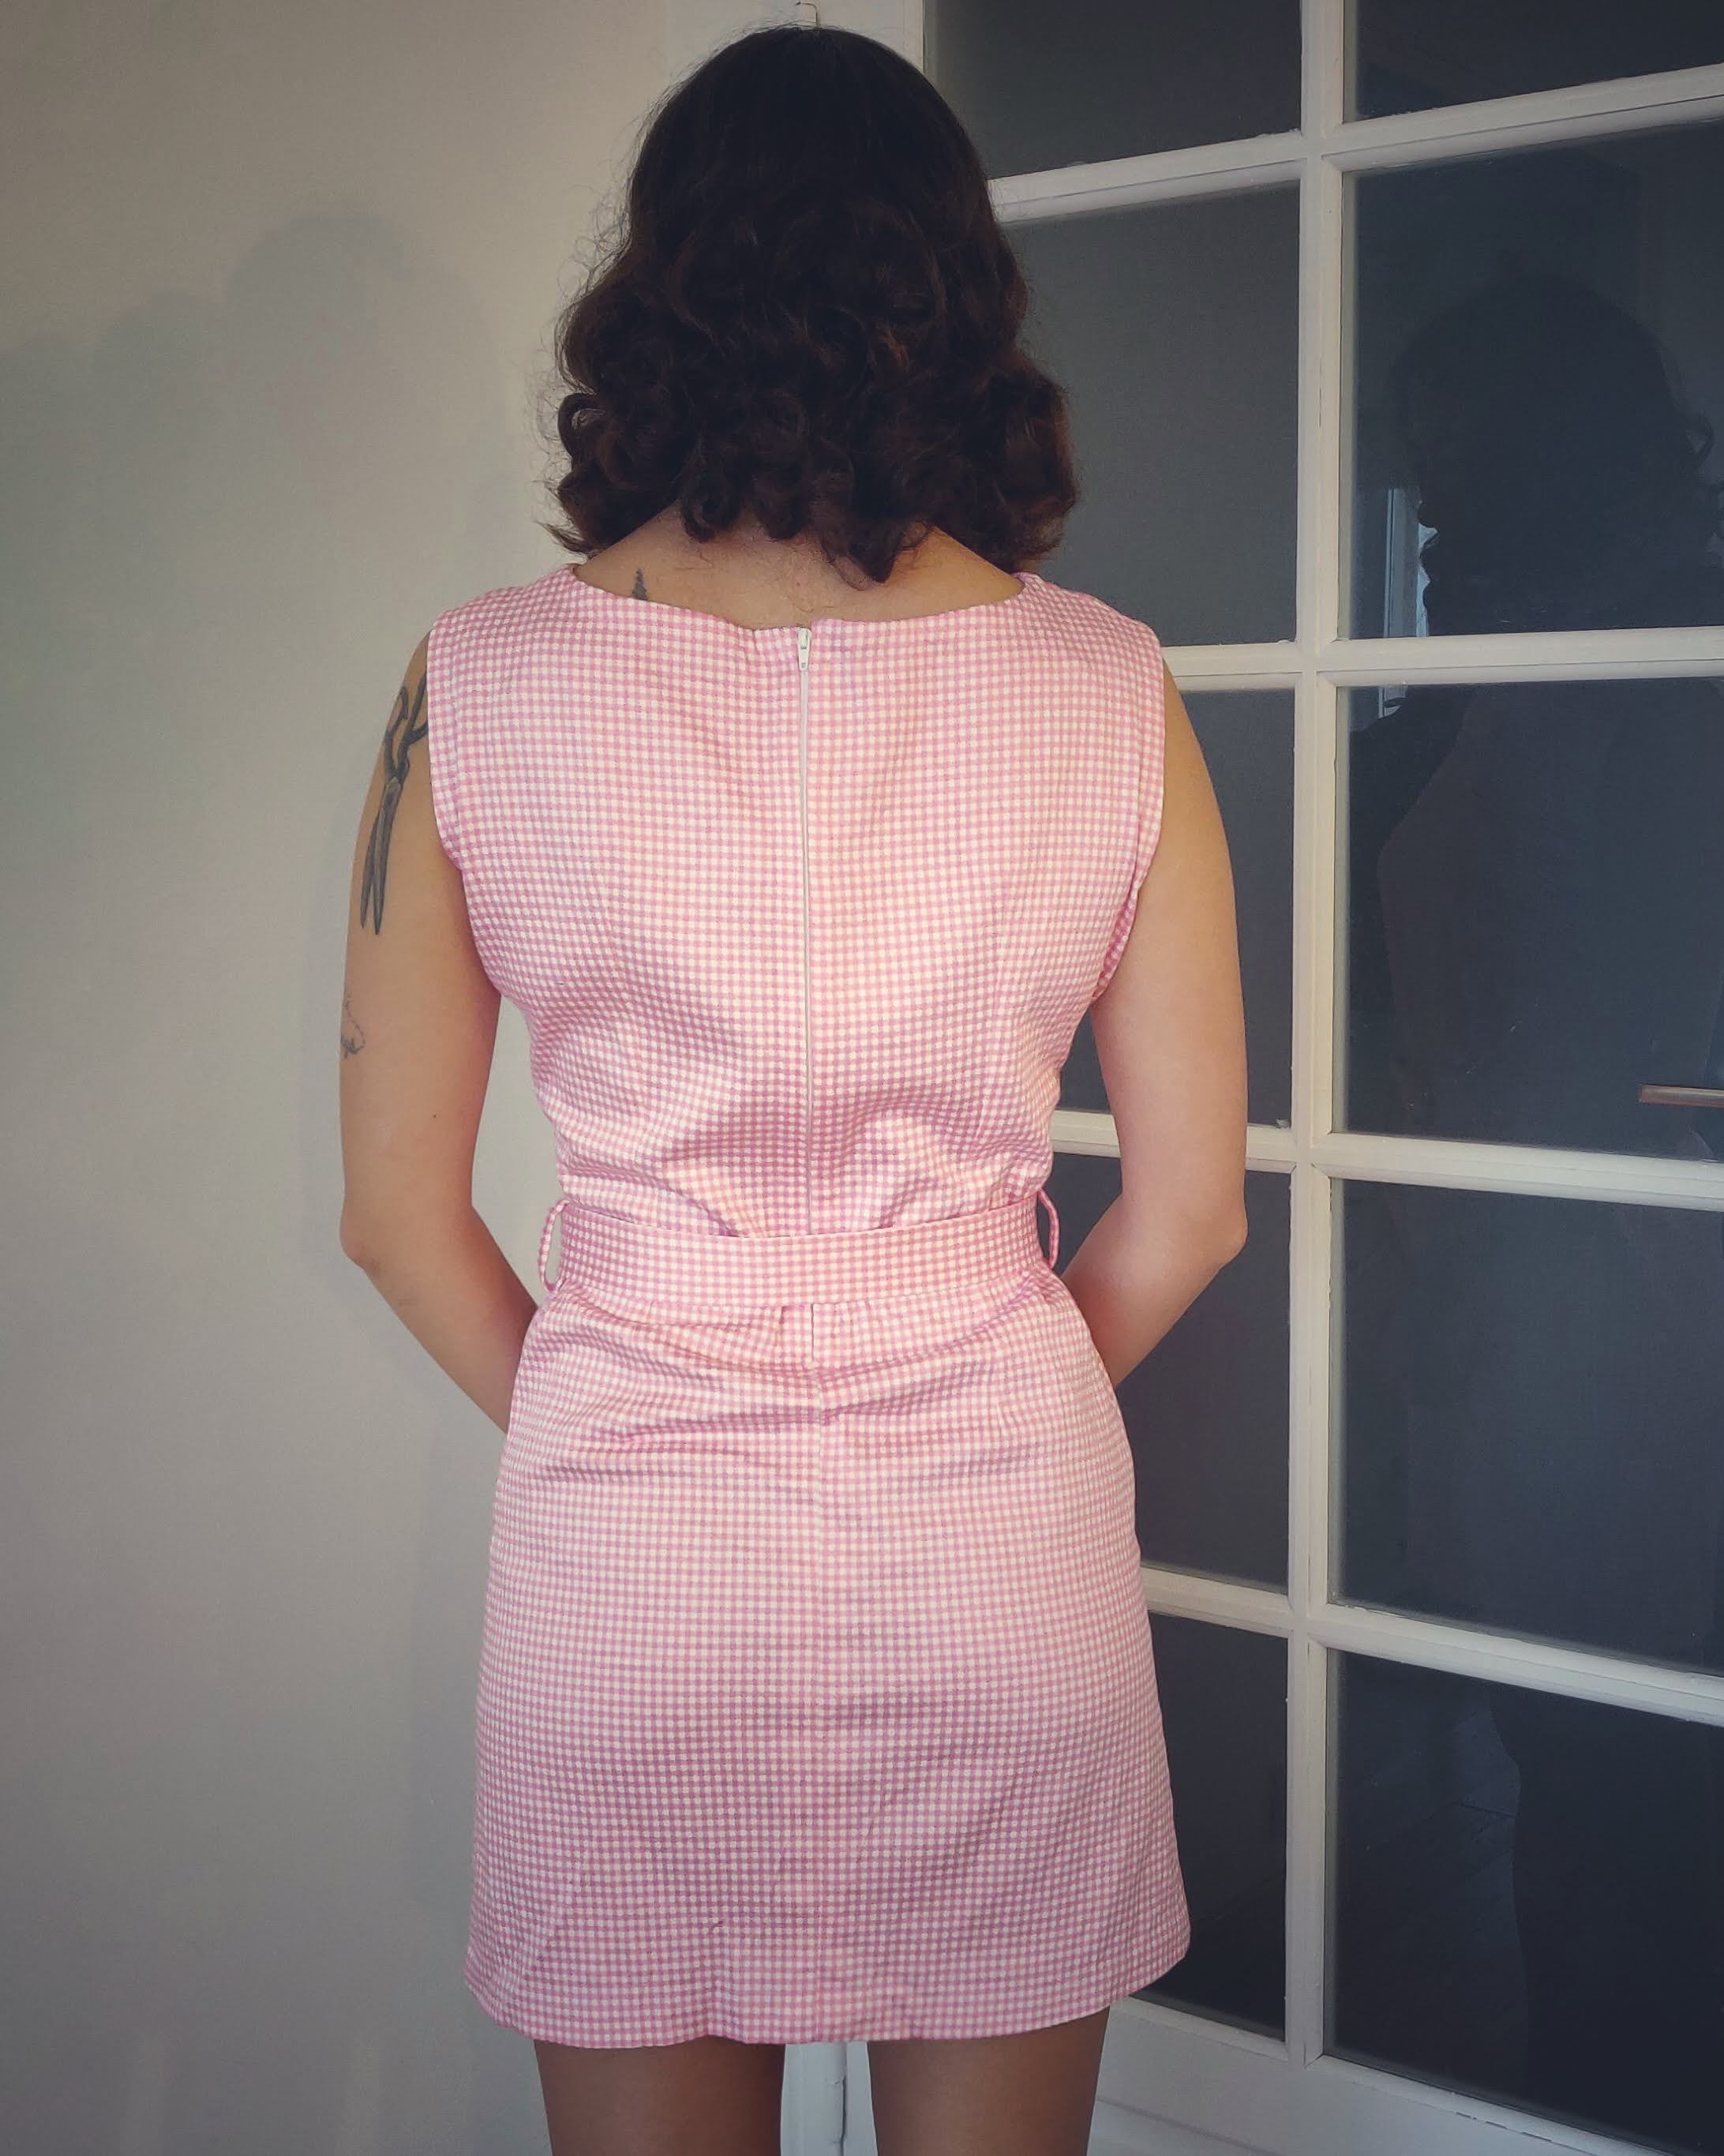
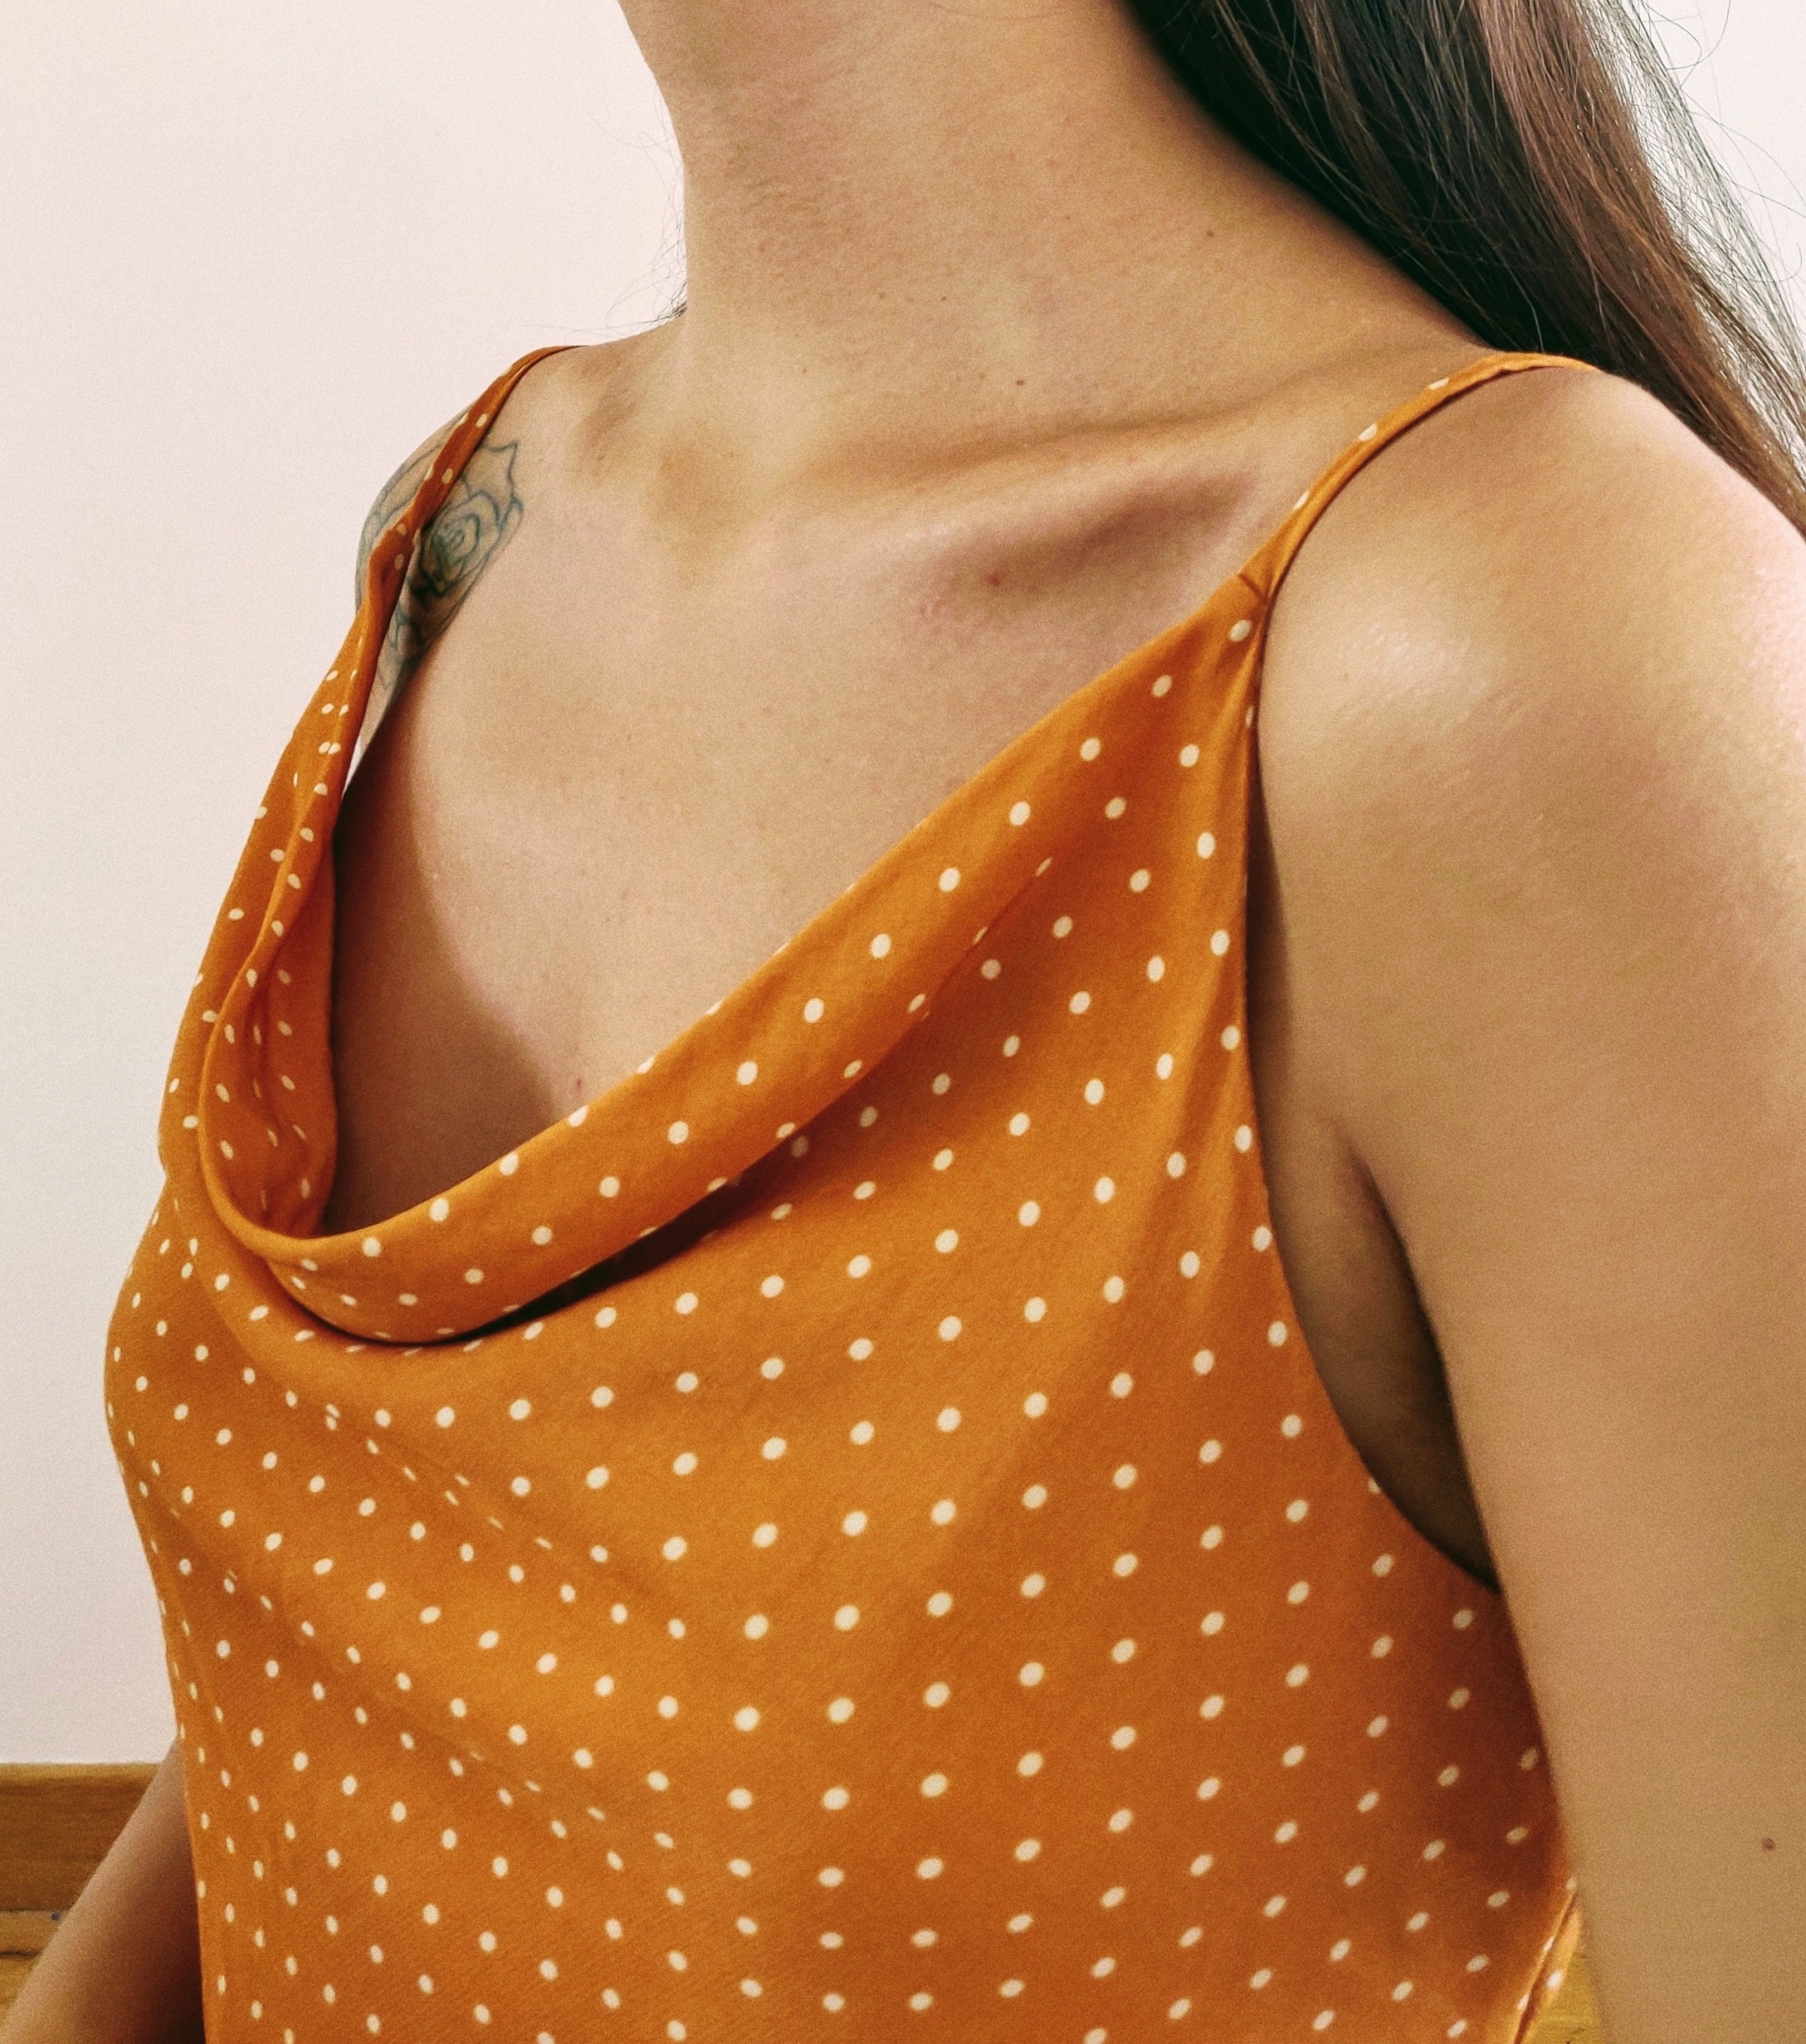
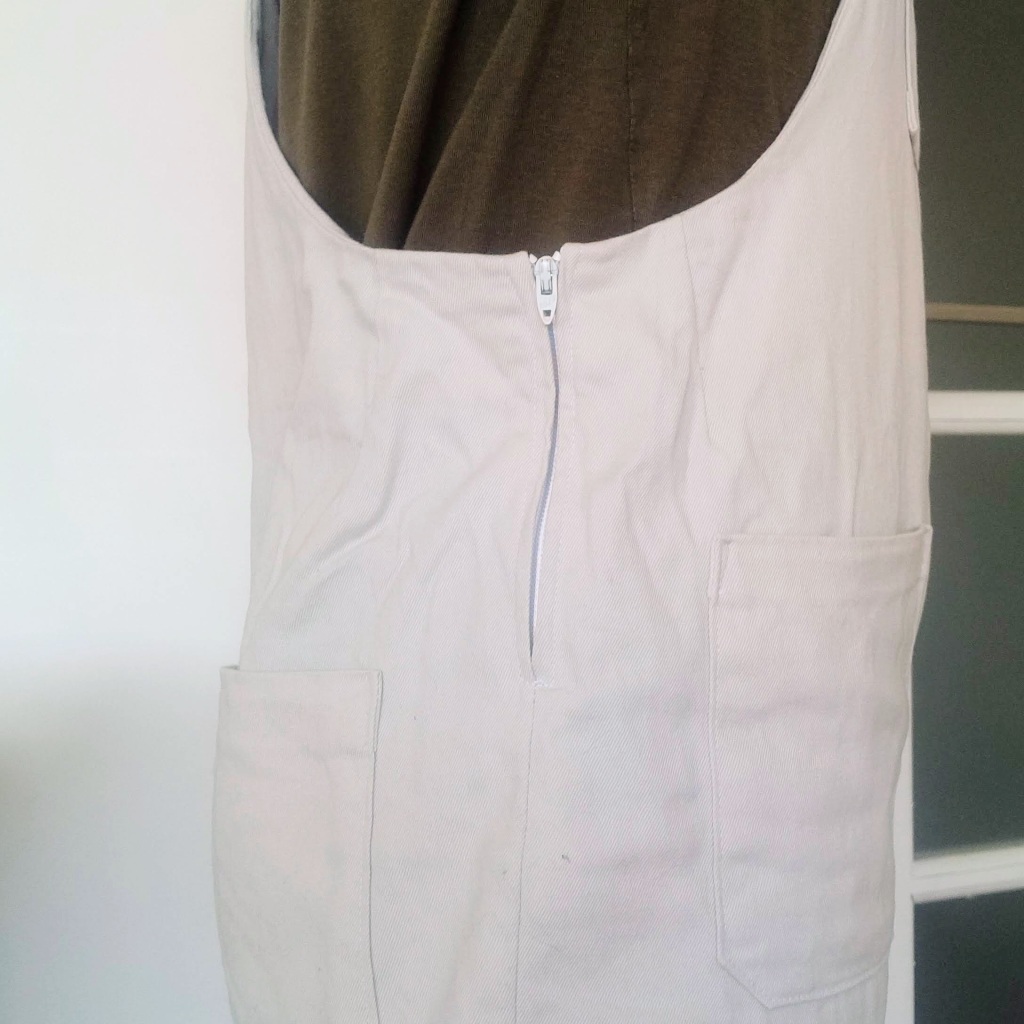
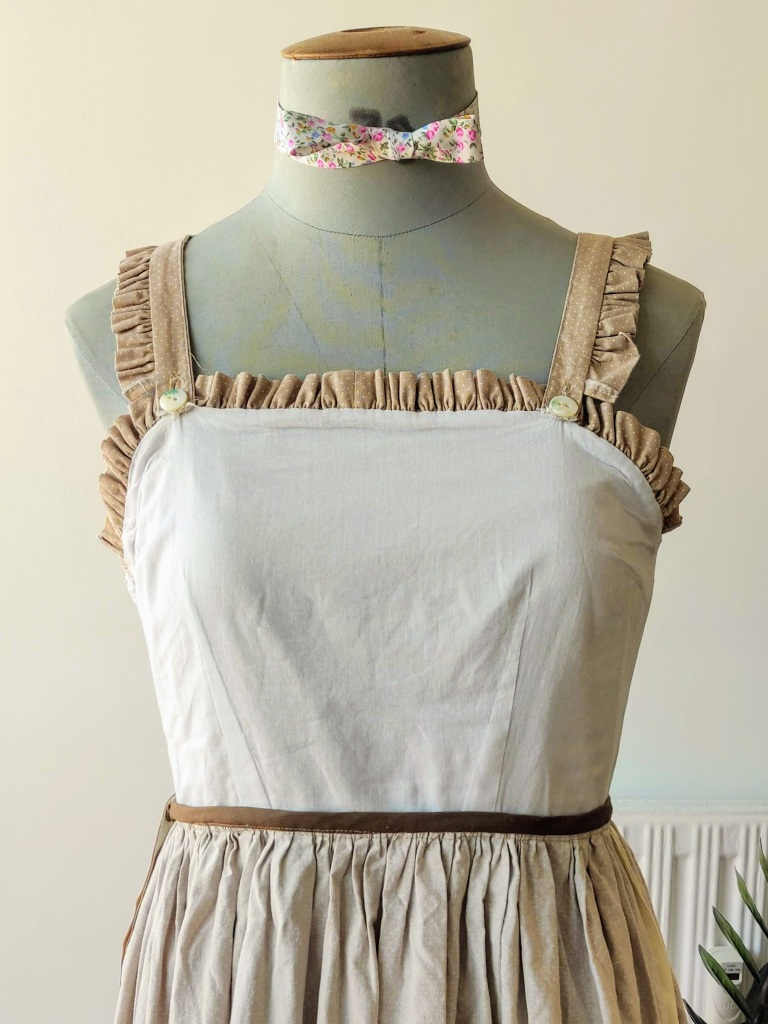
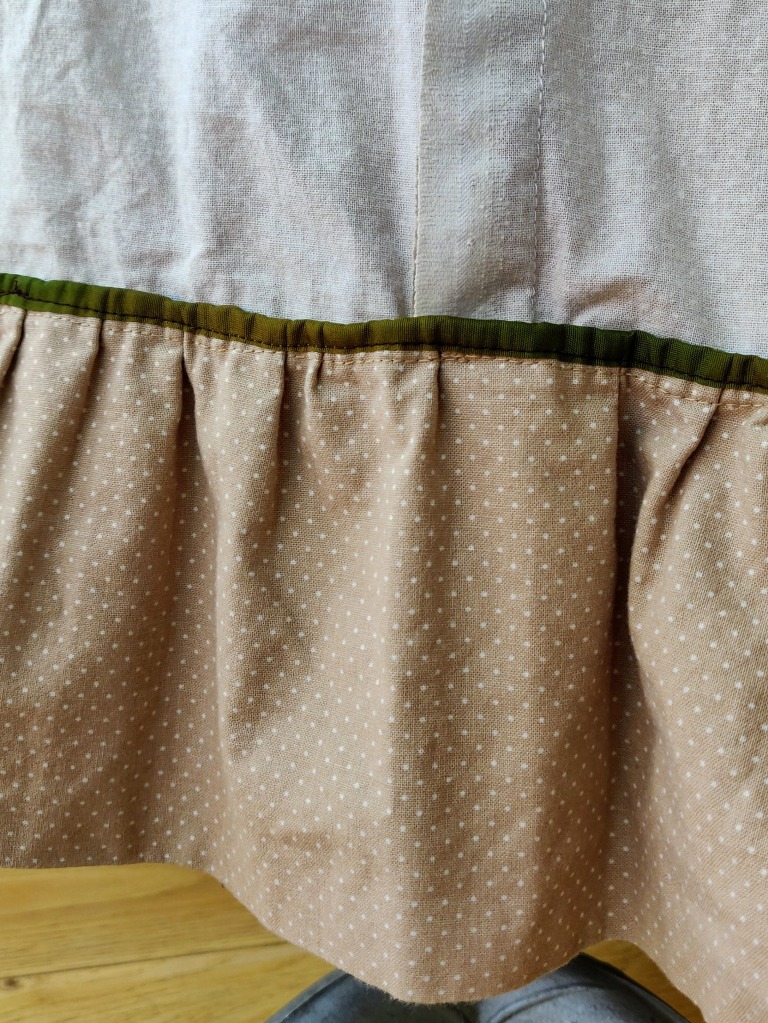
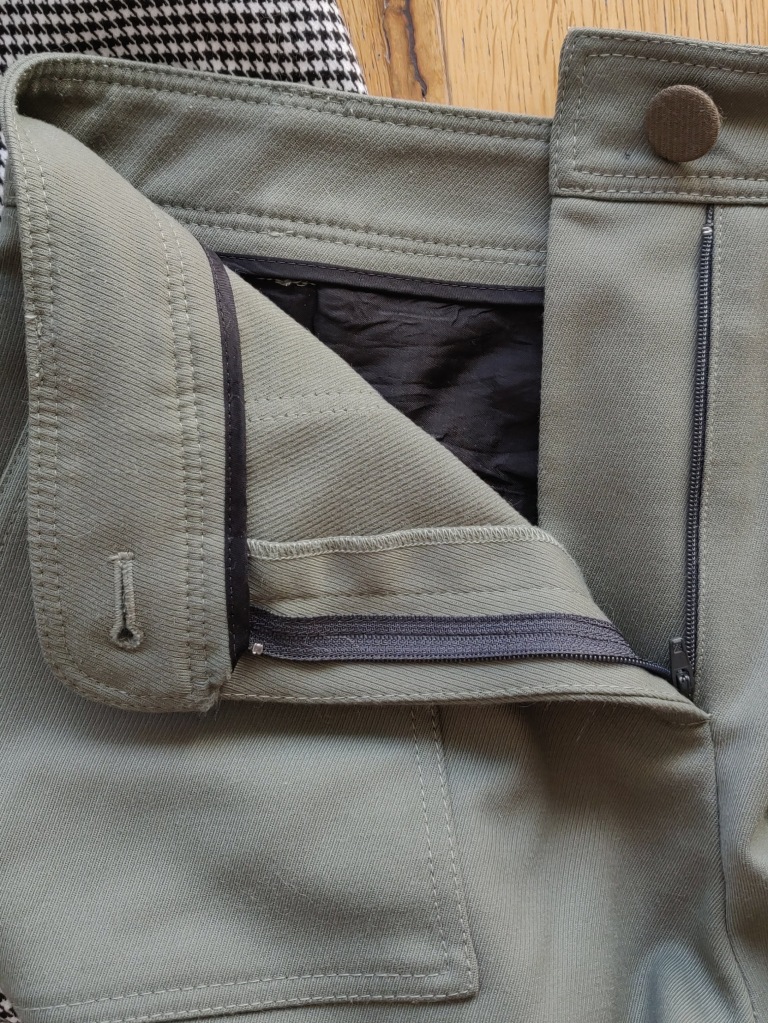
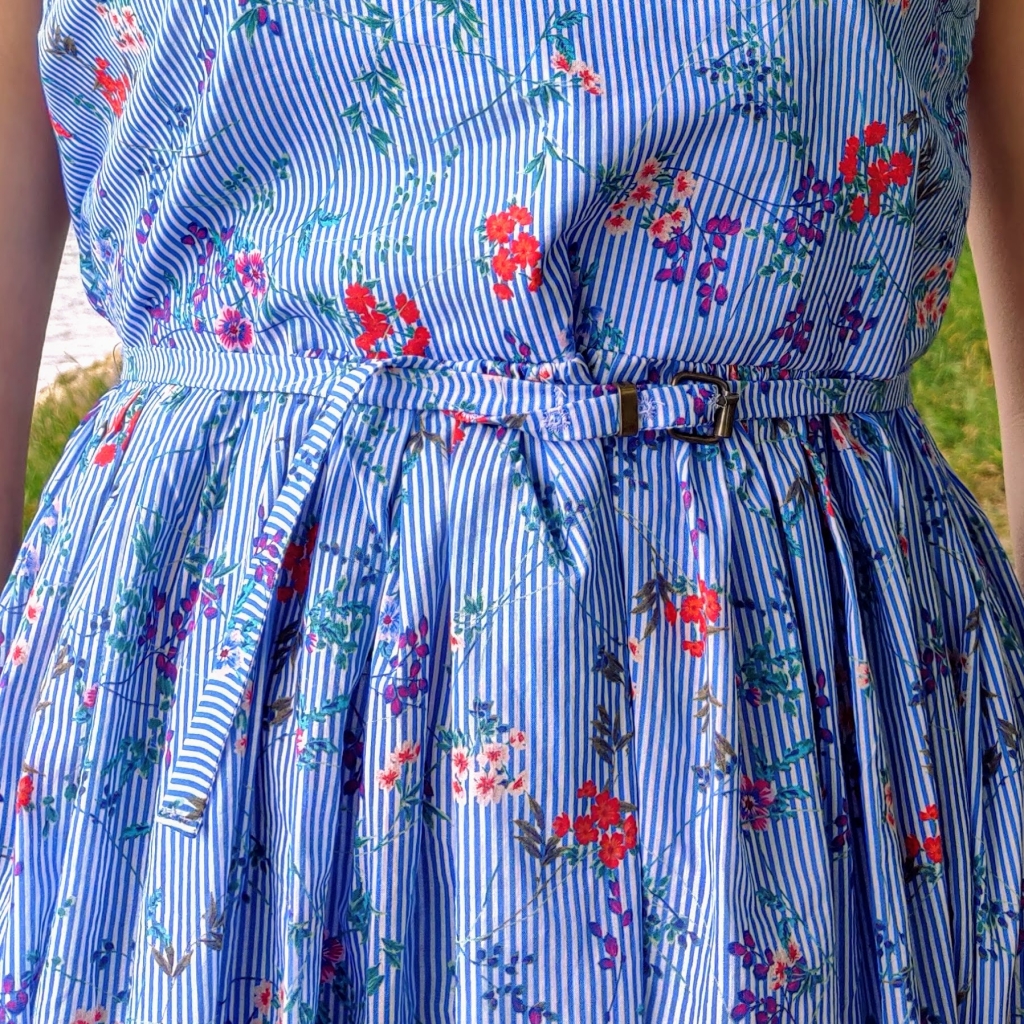
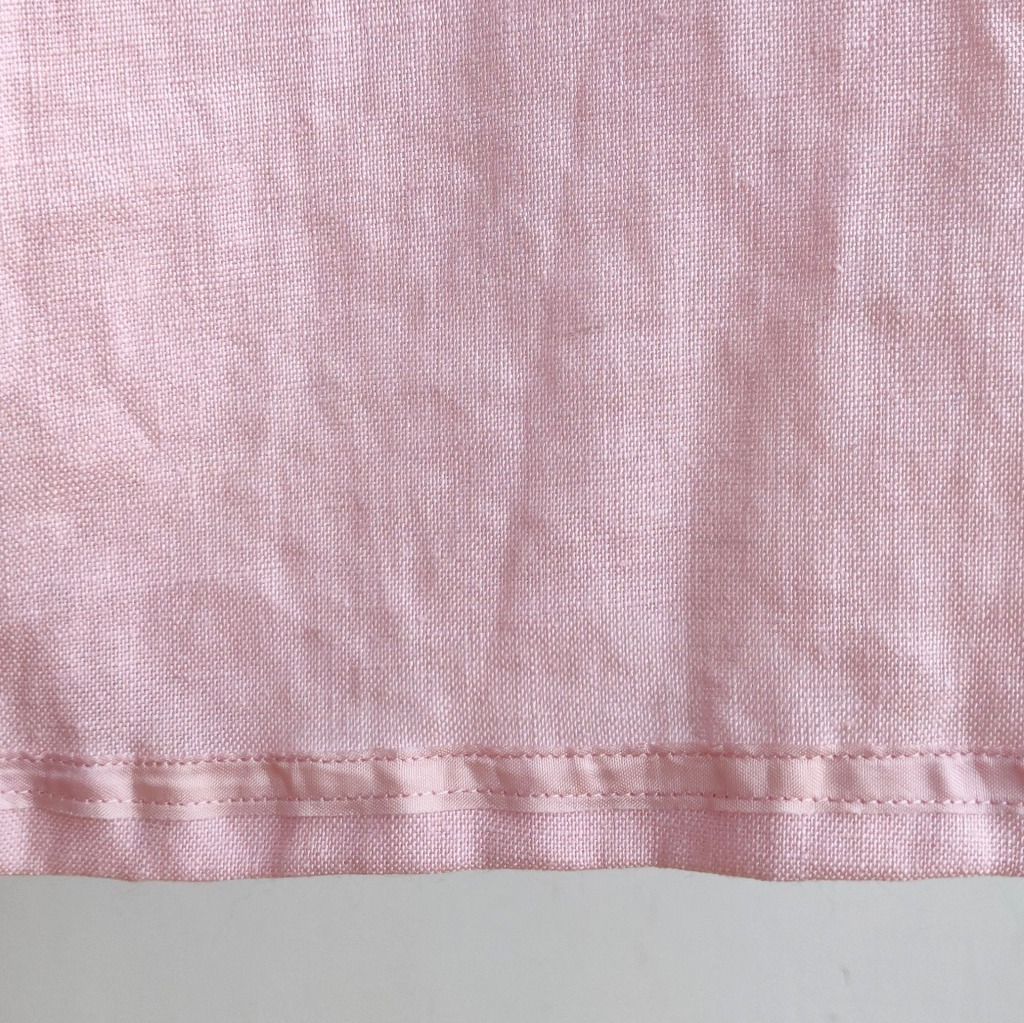
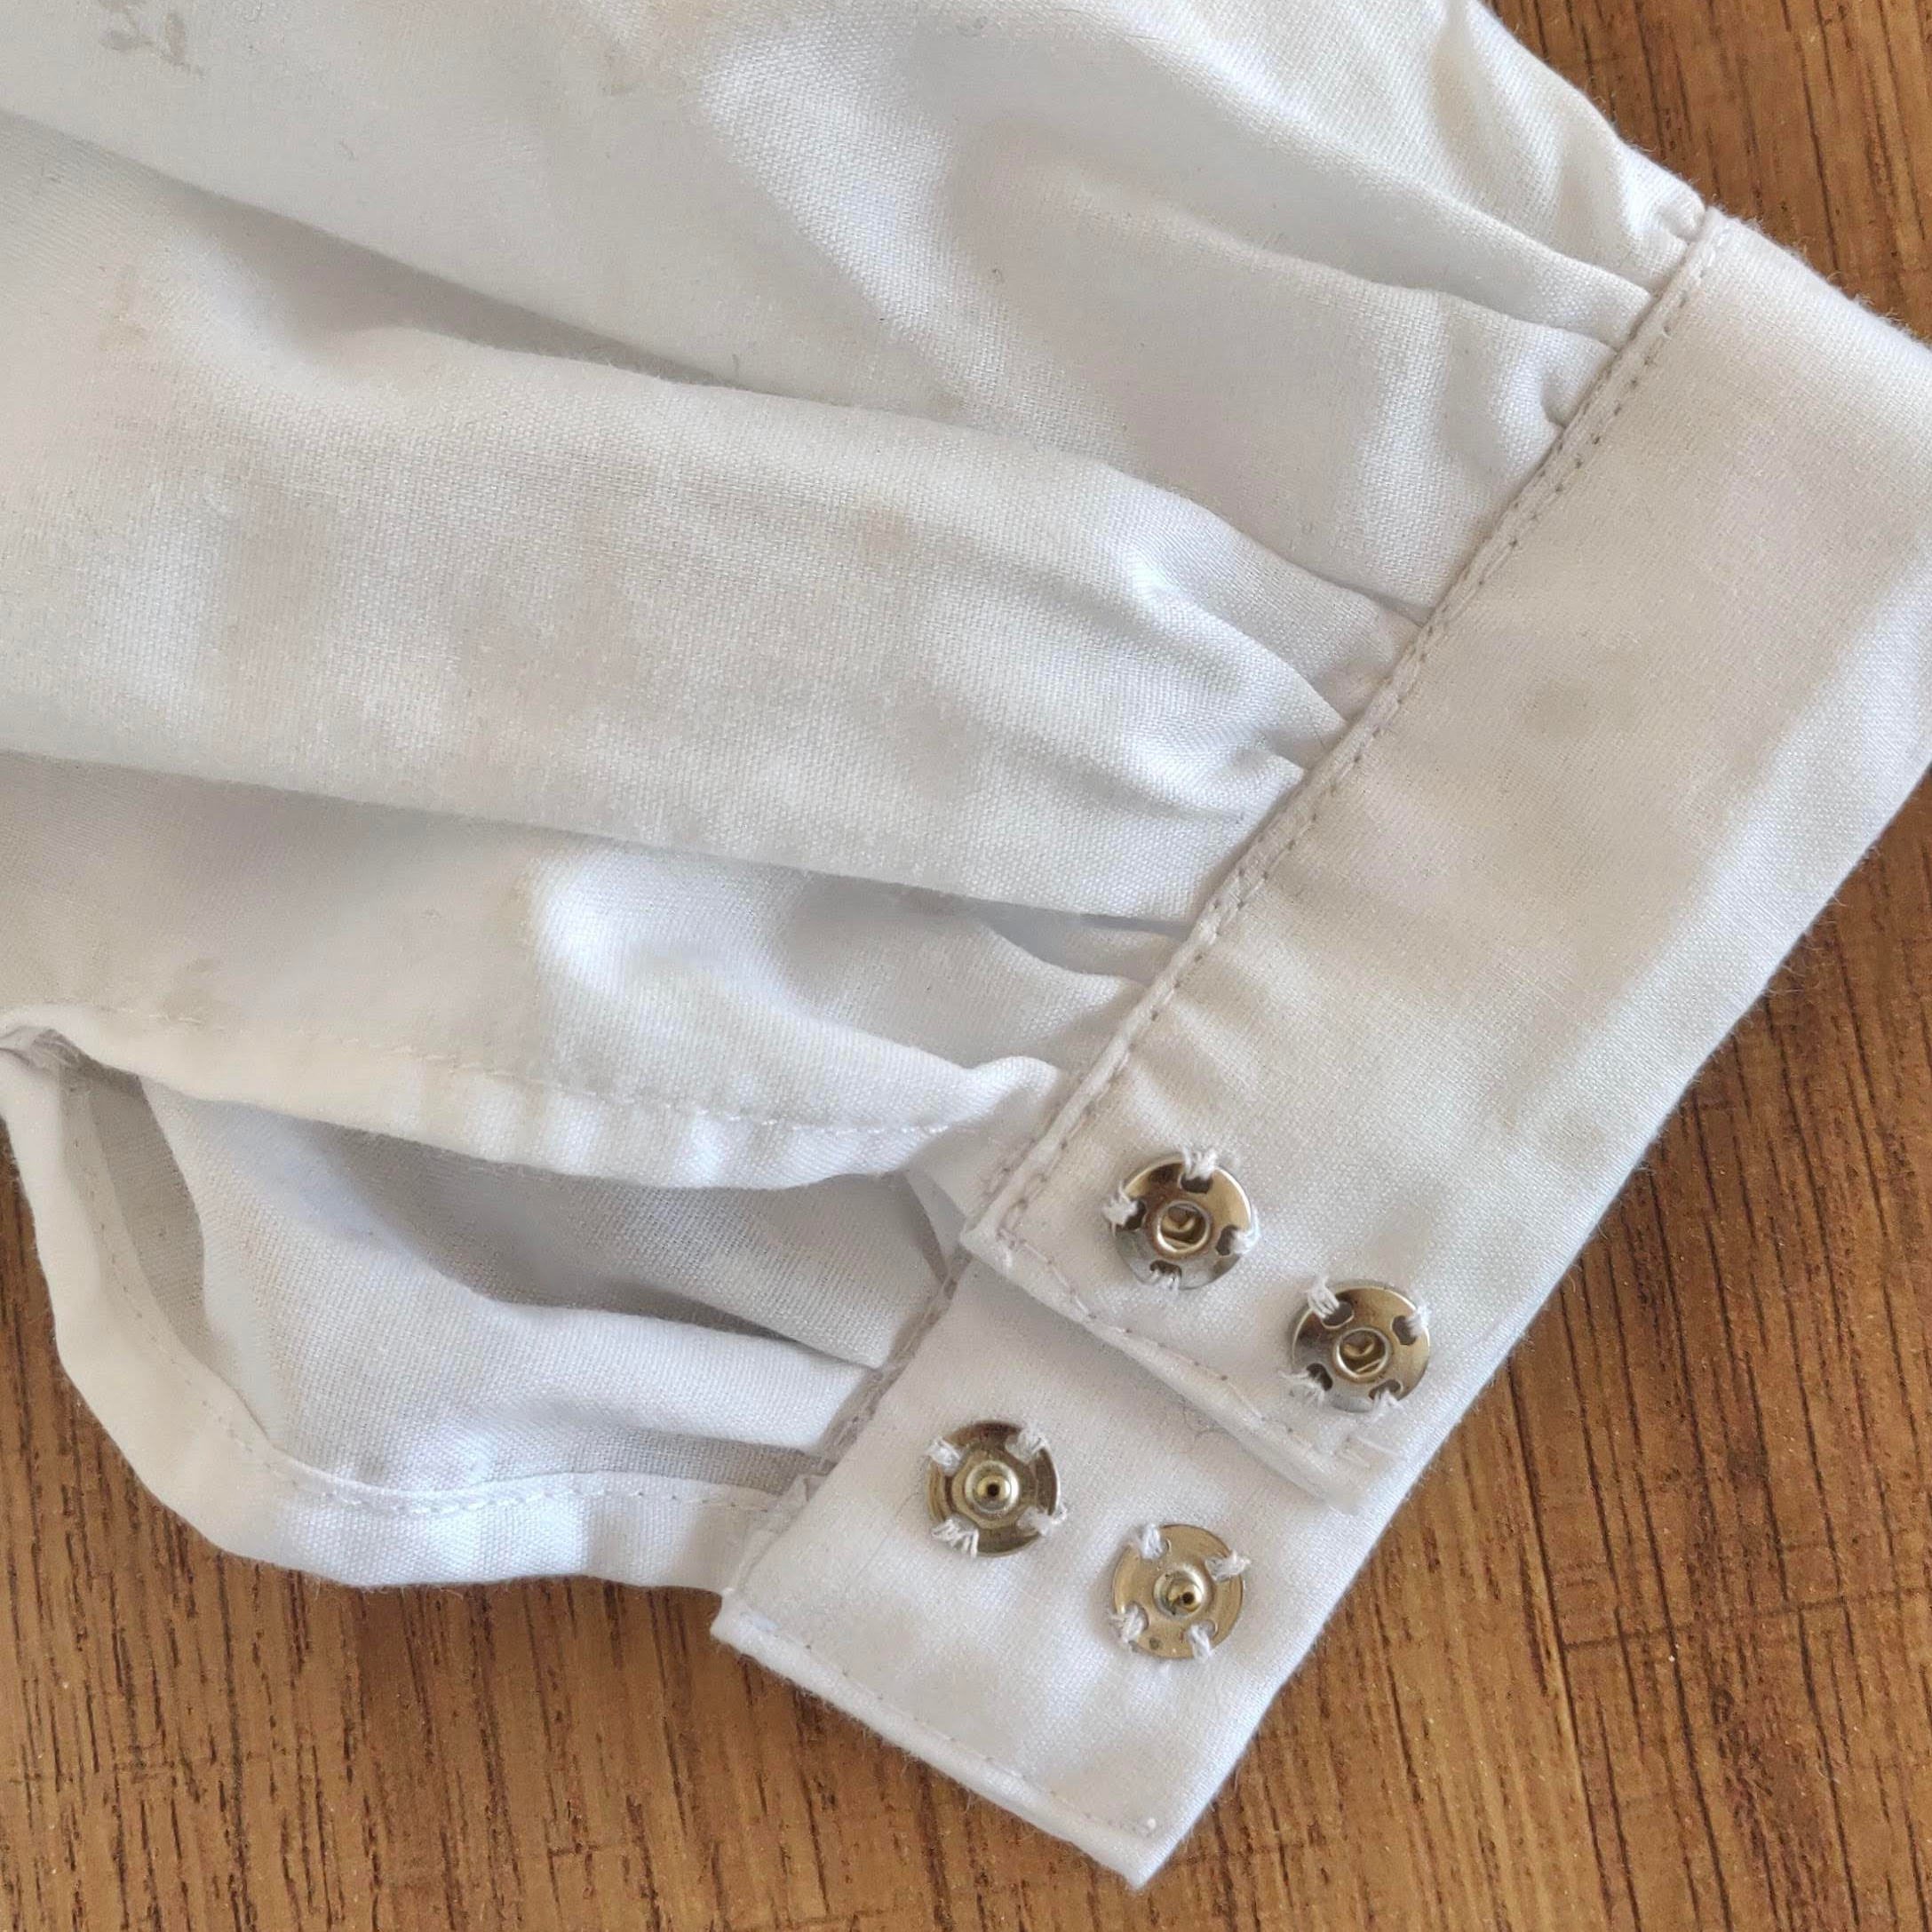
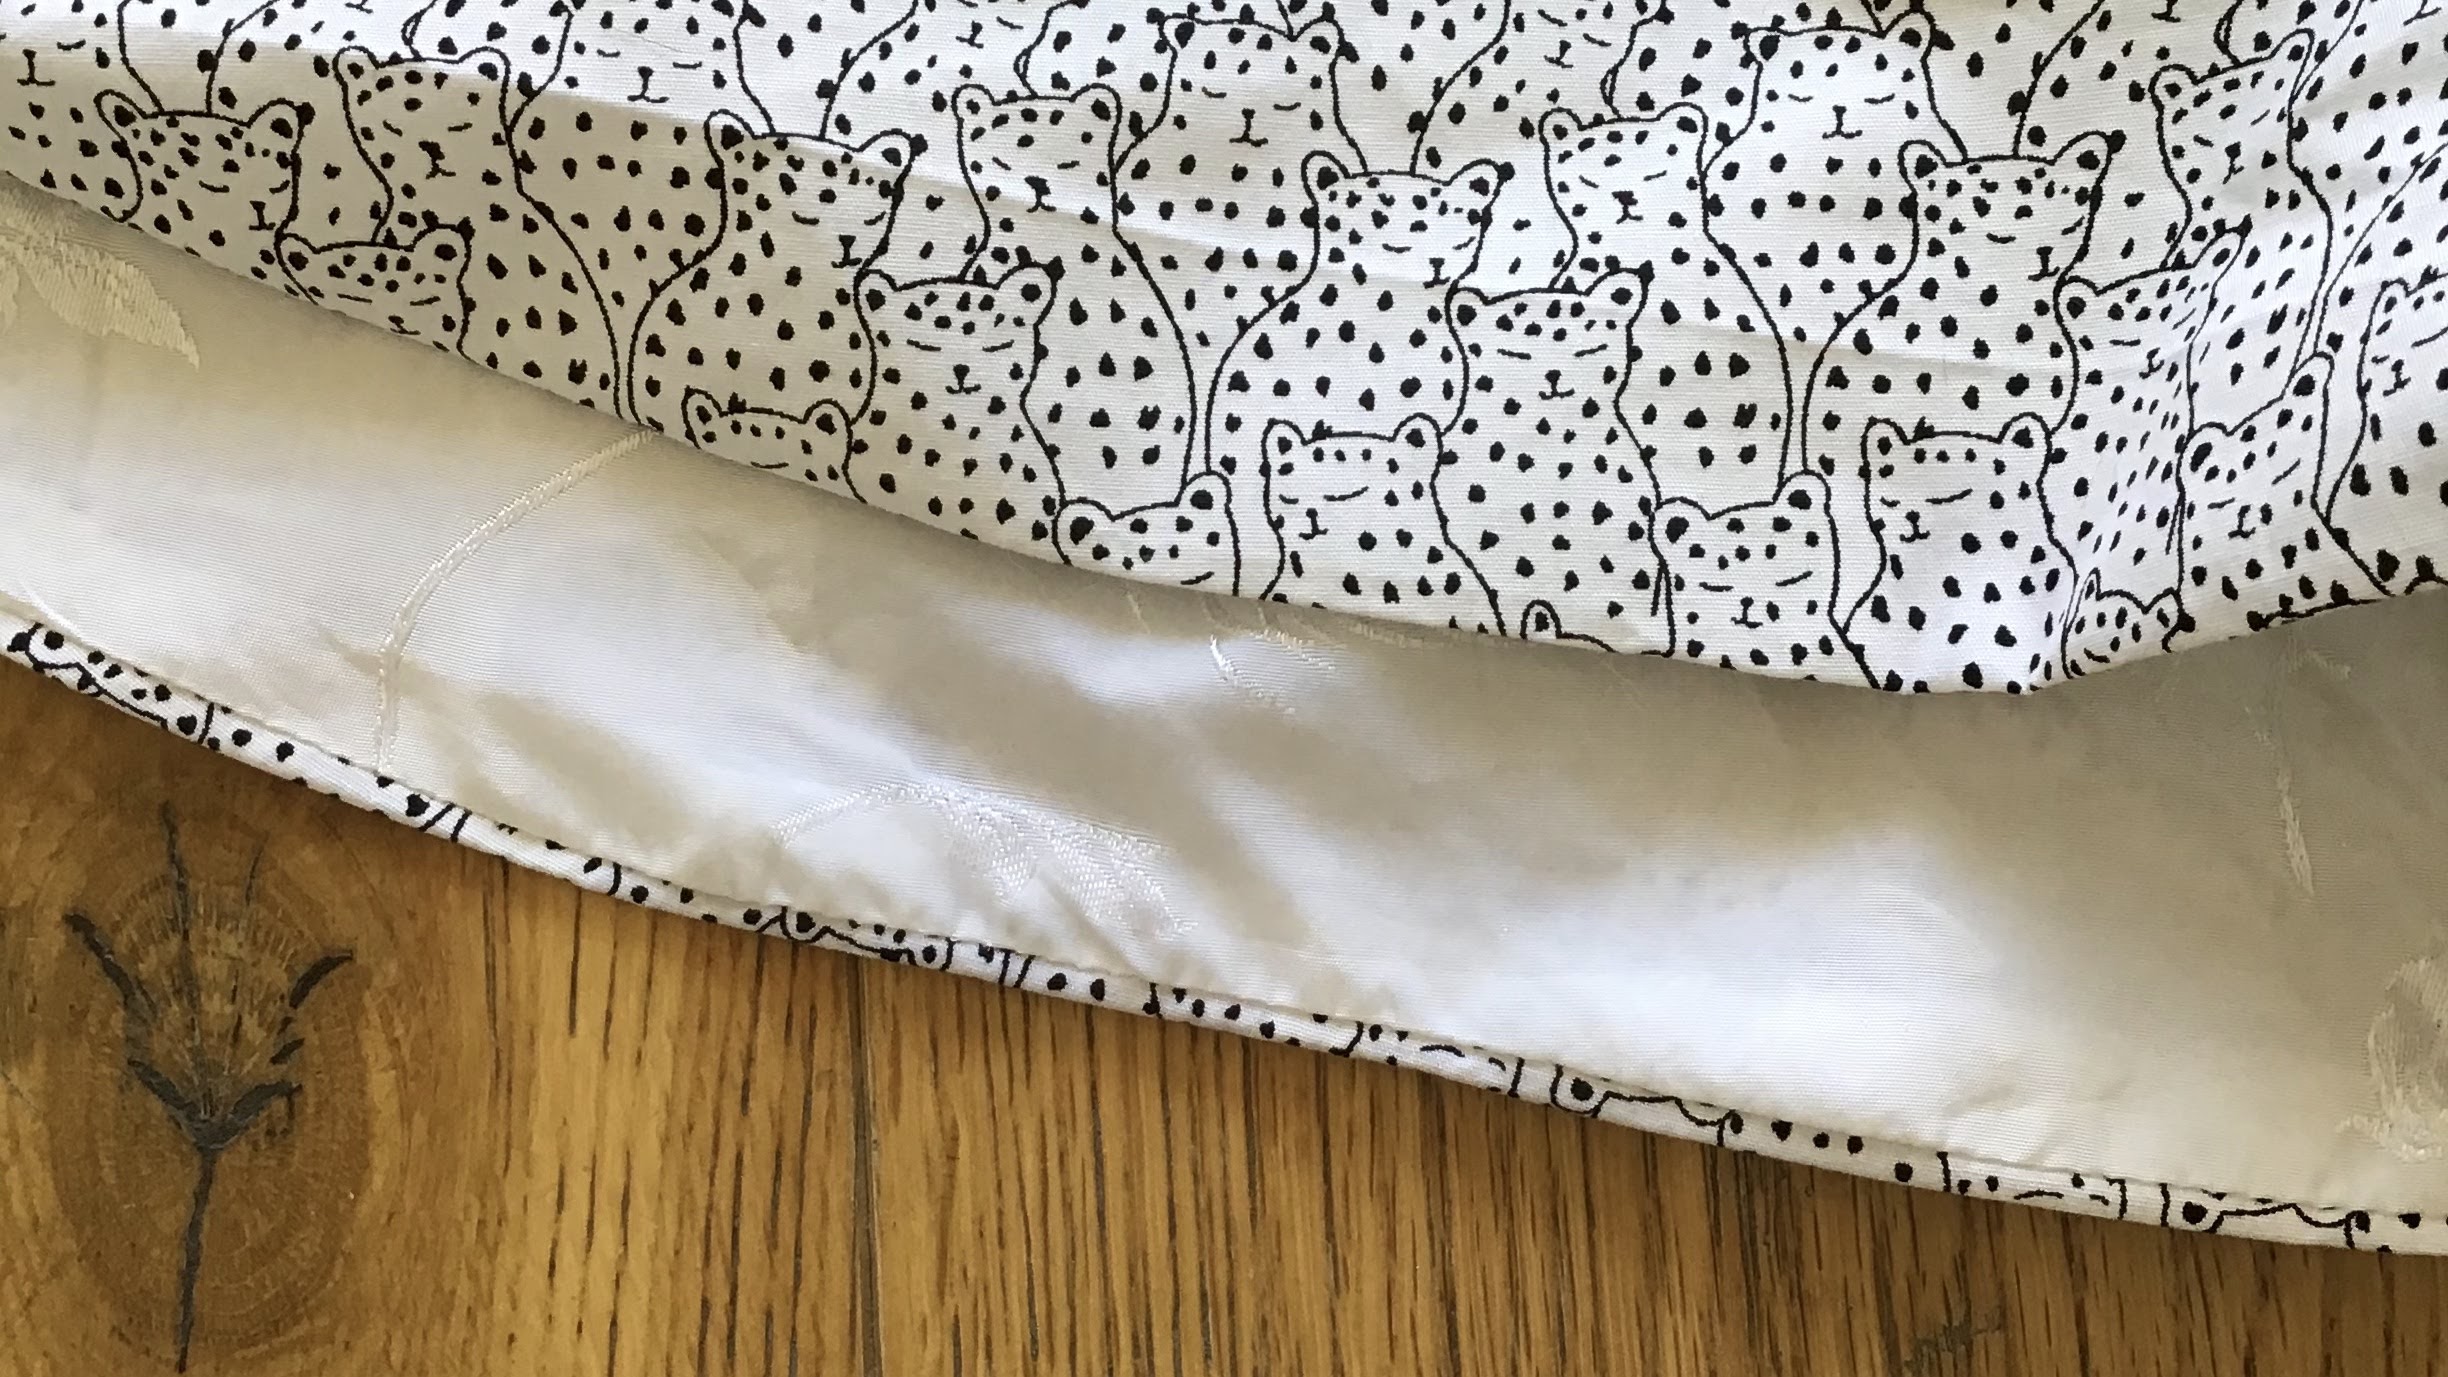
For the back closure I did a lapped zipper. I prefer invisible zippers, but still haven’t found an invisible zipper foot that works with my Pfaff machine yet. I’ve tried purchasing random, non-branded feet off the internet, but no luck yet! The hem, neck, and armholes are all finished by sewing singlefold bias tape to the SA and then whipstitching it to the main fabric by hand.

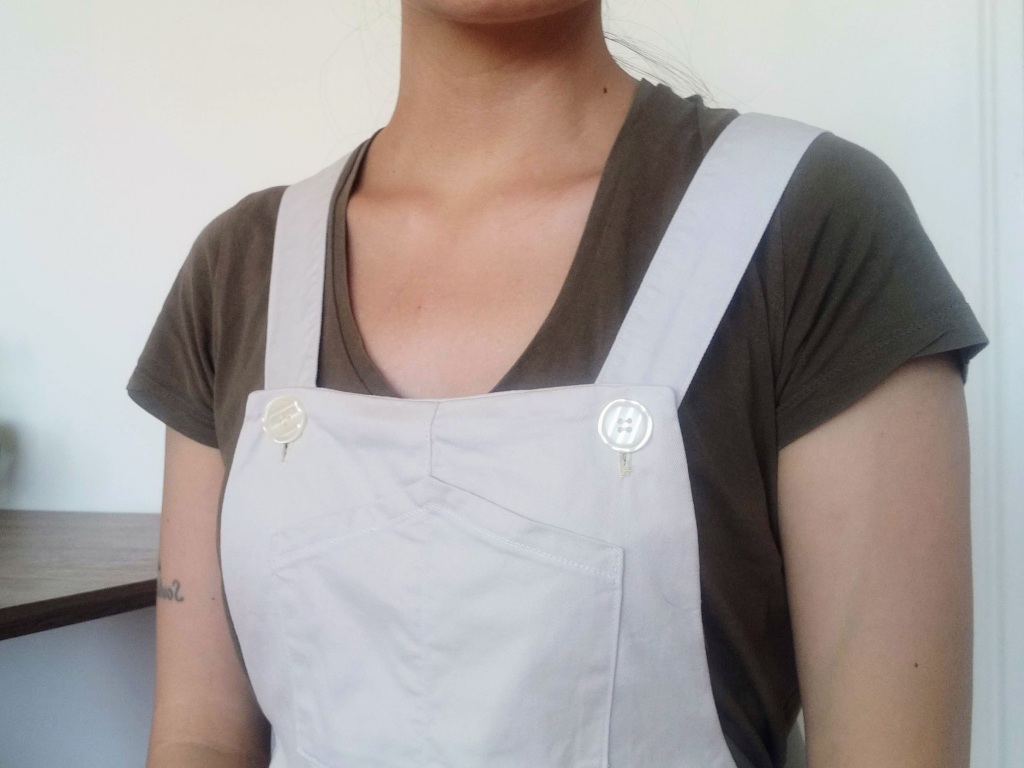
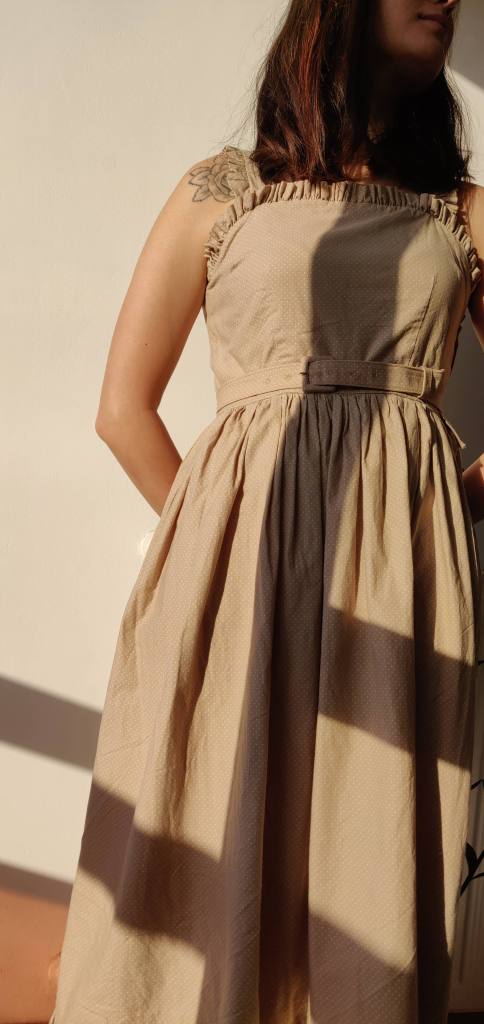
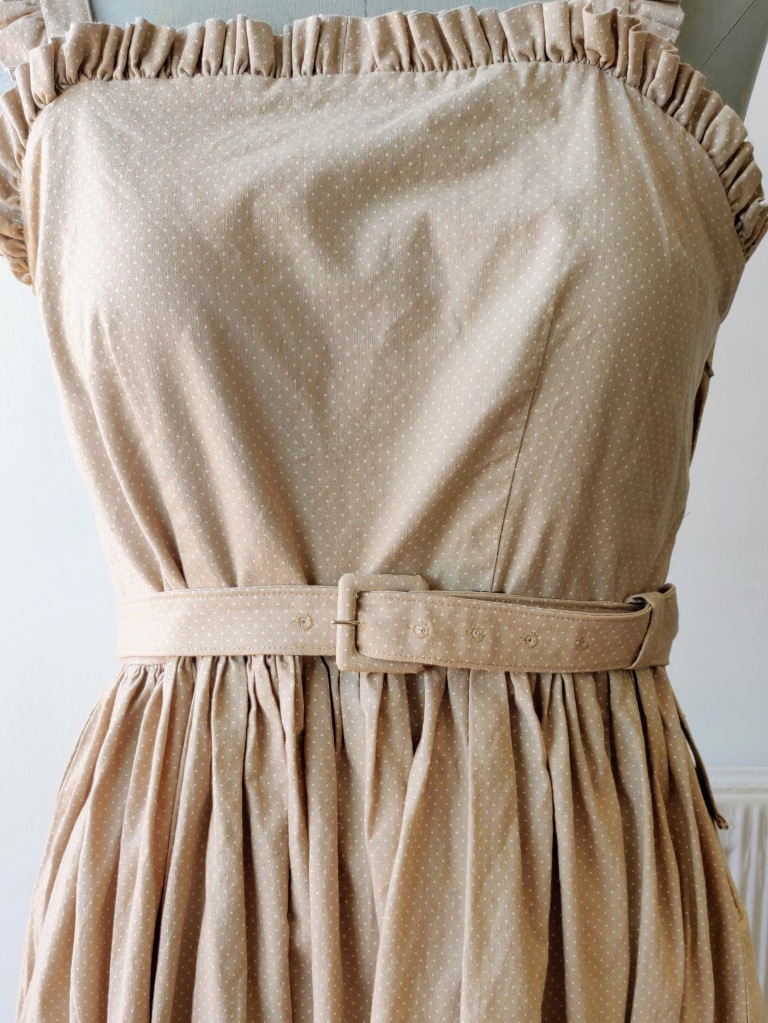
The belt was made to measure by creating a tube of fabric with one side interfaced. The buckle was re-used from an old leather belt which I threw out recently. For the belt holes, I punched holes using an awl and stitched the eyelets by hand with a blanket stitch. There is an eyelet stitch on my sewing machine, but it was a bit too small than what I needed, and the final hand sewn result actually feels much stronger and less likely to snag than the machine version. I think in the future I can work on a cleaner finishing, but from now on, handsewing is the way to go!

Now time to enjoy while listening to my favorite 60s playlist!

The Sicily Slip Dress in Viscose

I’m excited to have finally finished my first bias-cut garment! This is a project which is simple to fit and make, but still a bit technical since it is bias cut. The pattern is by a new indie designer based in Australia, Sewing Patterns by Masin.

The only modification I made to the pattern was to take in the cowl neck slightly because it felt super low on the toile I made. However, after sewing up the pattern in this medium weight viscose (From my favorite store Sacrés Coupons), I realized the difference was only due to the loose weave of the fabric used in my toile. However, I think it still has a beautiful drape in the final version, and will probably keep it like this when I make more versions.

This is a pretty quick sew overall. The longest parts are lining up the pattern pieces on the bias as accurately as possible, and then letting the dress hang on the bias before completing the baby hem in order to let the fibers “settle” and stretch out. Otherwise there are only 4 pieces of fabric to sew together! Front, back, and 2 straps. The self facing just folds over onto itself.

The only advice that I might give anyone on this pattern is to invest in 2 useful sewing gadgets:

A loop turner is very cheap and makes the skinny straps super easy to do. I can’t believe I struggled so many years turning fabric inside out inside of buying this! I got mine on Minerva.com.

Also, this is the first time I used my skirt marker (Link to Amazon.fr). This helps me get a much more accurate hem rather than using my ruler to measure up from the floor and awkwardly trying to mark the fabric.

Loop turner
Hem marker

And now, my search for the perfect silk continues!

Yanta Overalls Pattern Review

The fabric I chose is a cotton twill from Minerva in the sand color. I ordered 2 meters versus the 2.1 recommended and it was juuuust enough to cut everything and use the self fabric as the facing. I love the weight of this fabric. It’s completely opaque and feels sturdy, but not too thick. It was easy to cut and sew with.

After being a longtime fan of Helen’s Closet through the I Love Sewing podcast which she co-hosts, I finally bought one of her patterns. I always enjoy seeing the design she releases, but it’s the Yanta overalls which really got me. 

Last year I made my first pair of overalls using the free jumpsuit pattern from Peppermint Magazine. I wore it a lot, but I wanted to try a design with a more classic bib front pattern and more complex details. I find the pockets make the garment feel more structured and put together whereas the Peppermint Jumpsuit pattern is very minimalist. and casual.

There are many reasons I love using indie sewing patterns. I support small, usually women-run business. They make you feel like part of a community whether that be in terms of style or personal values. But my most selfish reason is that they have really well written instructions for beginner sewists. 

While I now consider myself a confident intermediate sewist, this is still something I appreciate and rely on when tackling more difficult and new-to-me sewing techniques. And I have to say, Helen’s instructions are some of the best I’ve come across in my sewing journey thanks to their thoughtful thoroughness, clarity, and design.

My Overalls

After browsing the pattern hashtag on Instagram, I knew I would want to take in the hip curve for a streamlined but still very casual look, but made up my size 4 muslin without making any alterations to the pattern.

I also become concerned in my muslin that the crotch was too low for me, so I decided to take out a few centimeters at the waist which allows enough room to sit and move around comfortably. Now that I’ve attached the straps, I think I should have kept 1 more centimeter, but I made up for it by lowering the button placement on the straps a little bit. 

I decided to to use a lapped zipper on the left side. The zipper, depending on how you fit your garment, is actually optional. Technically if I wanted I could take mine on and off without the zipper, but don’t want to put too much strain on the waist by squeezing in and out.

Fitting

When making a muslin, you usually don’t need to cut out every pattern piece to check the fit. Here, the designer clearly indicates only the essential pieces need to be cutout for those who want to save time and fabric.

What I appreciated the most is that you’re given information on how the garment was designed to fit your body, which is useful as fitting/tailoring is a skill that takes a lot of time and experience to develop. This goes further than just marking the waist line and is a useful guide when judging your mockup.

The designer offers specific instruction for altering the pattern for different cup sizes since standard patterns are always drafted for a B cup. Sewing for curvy areas of the body is one of the hardest parts of sewing (hence my fear of pants), and knowing what adjustments is not always clear depending on the type of garment being sewn. For a loose fitting bib, it’s not a huge deal to make these changes, but I love the thoughtfulness.

I also think this is a great pattern for someone who wants to start sewing pants. The loose fit is pretty forgiving and won’t require much fitting, and it’s one of those pieces that looks more difficult than it is to sew. Or at least, whenever you have such well written instructions as these!

Happy sewing!

Ruffled cotton summer dress #YouCanHackIt

After drafting this blue dress based on a highly modified bodice, I decided to make a version with a curved neckline. I used 3 meters of this polka dotted cotton broadcloth from minerva. it is a medium weight 100% cotton. It comes in many colors and I think the green version would be dreamy too.

Here it is worn layered with a cotton batiste Garibaldi blouse or worn alone for hot summer days.

Construction

Before I got to this version of my pattern, I did make an intermediate mockup with some denim scraps I had. I learned 3 things from my mockup:

  1. Don’t curve the neckline too much. It won’t stand up on its own and feels like there is too much fabric around the face area. Here I sewed a piece of elastic along the top of the bust to make it stand up.
  2. The ruffle proportion is important. Here it’s a bit too large and not gathered enough. They should also stop just before the side seam unless sweaty chest ruffles are your thing.
  3. If made into a dress bodice, the straps must be detachable, otherwise it will be difficult to get on and off.

With that in mind, I altered my front bodice piece to look like this.

There really isn’t much curve at all along the top.

For the skirt, instead of using any specific dimensions, I cut 2 rectangles using almost all of the fabric I had left. The leftover went into the bottom ruffle. Since I didn’t have any leftover fabric, I was worried the final ruffle wouldn’t be gathered enough, but it worked out perfectly!

Finishings

The bodice is lined with scrap cotton batiste to keep it as light and breathable as possible. To hide the gathering on the waist inside, I machine stitched pre-made bias tape over all the raw edges.

The bodice is lined with scrap cotton batiste to keep it as light and breathable as possible. To hide the gathering on the waist inside, I machine stitched pre-made bias tape over all the raw edges.

The straps are attached with a button sewn on the inside of the bodice with hand stitches in the “ditch” between bodice and ruffles.

I like the idea, but the downfall is that the buttonholes can be visible while wearing. I feel like the buttonholes have gotten a bit stretched out and will need to be reinforced in time.

I have not altered the back bodice since the version I used for my blue dress.

The straps are sandwiched between the lining and outer fabric. The ruffles end just before the seam allowance.

Although not visible in the photo, the closure is a lapped zipper on the left side of the bodice.

And for the bottom ruffle I used this rich green seam tape to hide raw edges. Since the tape wasn’t very wide, I attached one side with machine stitching, trimmed the raw edges, then whip stitched it down by hand. I love doing easy hand sewing while listening to an audiobook or podcast.

The last touch is the belt. I had the buckle on hand and after a bit of research and tutorials such as this one, I needed some double sided tape in order to smoothly attach the fabric to the metal.

For the actual belt, I used stiff iron-on interfacing on my fabric, which is just 2 long rectangles. There is a belt loop secured with hand stitches so it can’t slide, and a series of machine-stitched eyelet holes pierced afterwards with an awl.

Overall I’m really happy with my dress and still haven’t seen any PDF patterns comes out with this type of bodice. That’s the great thing about hacking your sewing patterns once you get the fit right, you can slowly start to experiment and make your dream garments ✨

Sewing a 1950s shorts pattern without instructions

I’ve had this pattern for almost a year in my stash, just waiting to make the perfect shorts suit. I purchased it on Etsy, alongside with a few other vintage patterns, when I went back to the States last summer. I’ve been wanting to make a shorts suit for a while, and it seems like this year it’s becoming a super trend.

However, the reason it took me so long to make these is because I’m scared of pants 😱. Crotch curves and depth, complicated waistbands, and worst of all: front flies. And even when you feel comfortable with a pattern, it can easily go awry just by switching up the fabric choice. Since I generally tend to wear skirts and dresses most of the year, it’s too easy to ignore my need for pants.

So lo and behold I motivate myself to open my pattern and cut into this beautiful suiting fabric and got ready to assemble everything when I realized…I’m missing the instructions for the shorts !

To be honest, I’m not sure how much of a loss this is since Big 4 sewing patterns are notoriously bad about writing detailed, clear instructions. But let’s just say I decided to go back and make a mockup in scrap cotton.

Overall, I am happy with the result. I didn’t make any fit adjustments. The pattern I purchased was a size 16 which corresponded with my body measurements. The waistband is a very comfortable high waist, with a loose fit shaped by darts. The pockets are deep enough to actually hold my phone.

There’s just one thing which I hate about the final result, which is the visible front fly. To wear the shorts out in public, I paired them with an unticked white linen buttonup (the Grainline Studio Archer pattern). However, in the meantime I think I’ve identified what I need to do next time I make this pattern.

When comparing with a pair of RTW trousers, I realized that they have an additional piece. A long rectanlge to which the top layer of the fly is sewn and then folded to the inside. This creates a nice amount of space between the edge of the fabric and the zipper so that it’s nicely hidden.

Looking back on the pattern envelope, it turns out this piece is missing 😭😭😭. But at least this is a piece I can easily DIY now that I know where it’s supposed to go.

😁 The good: This soft suiting fabric is a perfect match for the pattern. Also, for a true high-waist, it’s also very comfortable. I wore it all day at work and out for a walk.

😱 The bad: My front fly construction is missing a key piece.

🧐 To improve: Perhaps after I get more comfortable with the final front fly construction I’ll go back and fix this pair, but I don’t have the courage for the moment.

Hope you enjoyed hearing about my mini-sewing disaster! It feels a bit strange to show projects that don’t work out exactly as I wanted, but I think it’s a valuable part of the sewing community to show what our sewing journeys are really like. Here’s to someday sewing that perfect pair of shorts or trousers ❤️


#YouCanHackIt Cotton Summer Dress

I have been saving this fabric for at least 2 years waiting for the right idea to come along, and  I’m delighted to say that the result is exactly what I was dreaming of !

I’ve seen so many variations of this silhouette across social media. The shape is so simple that I decided I could create my own version by adapting one of my current fitted bodice patterns #YouCanHackIt. My base was the Sonja Dress by Salme Patterns who is unfortunately no longer active. This is a pattern I’ve already heavily modified to fit me, but is still evolving as my patterning skills improve.

To make my new pattern, I took out the center back seam and transferred 3cm of SA onto the left side to have room for an invisible zipper. I deepened the arm scythe and drew my desired neckline. After only one mockup, I re-adjusted the neckline and pinned on straps to extract a measurement.

I also opted out of the waist darts for a more casual fit but left the markings on my pattern for future versions.

Here’s a look at the cut of the neckline. It works well with a lightweight blouse underneath.

For a clean finish, I lined the top with the same fabric. This also means the straps can be sandwiched between the two layers.

I cut the straps very long so I could adjust the length as desired, but after trying it on, I decided to keep the full length. I feel super glam as they float in the air as I walk.

The matching belt is my first-ever attempt at belt making. I definitely need some more practice, but it is actually way easier than I thought. It is a pretty common feature of dresses from the 50s/60s and just makes the outfit feel complete. The tiny buckle was part of a bag of sewing supplies purchased at an antique store in the US for cheap. For the buttonholes I used eyelet stitch on my machine and punched holes with my handy awl. I used an existing belt as a reference for measurements.

I definitely plan to experiment more in belt making and have a few other buckles in my stash I can use. Also, does anyone else hate spending money on those tiny belts ? You know they’re going to wear out quickly, are made of really crap materials that are bad for the environment, and also never have enough colors to match what you want them to…Yay for sewing 😎

The skirt is a simple gathered rectangle. Rather than use any specific measurement, I used the remainder of my fabric left after creating the bodice. The hem is finished by folding over twice and machine stitching. It was a very wide hem to add a bit more weight at the bottom and bring it up to my desired length. 

😁 The good: The fabric and pattern combo is 💯

😱 The bad: After wearing out of the house on a humid day, it would be more comfortable to slightly widen arm scythe again, but this version is absolutely wearable as is.

🧐 To improve: I think the skirt needs either 1) a slip because it is a lightweight fabric or 2) a petticoat to add some fullness to the silhouette. For these photos I wore another midi skirt underneath to fake the look of a petticoat. 

That’s all for today, but you’ll definitely be seeing new variations of this bodice pattern this summer 🙂


Puffy sleeves continue. A pink Lilas blouse

Today I want to share this sweet pink creation using Lilas Blouse pattern from the French indie brand Lysimaque Sew. As you know, I can’t resist a puffy sleeve ! What’s special about this pattern is the lantern sleeve design. Instead of gathers at the top and bottom of the sleeve, the fullness is added in the center by joining these 2 curved pieces :

2 piece pattern for a sleeve

The other element which led me purchase the pattern is the asymmetric front bodice. This is not a common feature of my current to wardrobe, so I enjoy the novelty while still keeping the garment understated and wearable.

This is a quick and satisfying sew, despite the fact that it has buttons.

I felt inspired by spring to add some embroidery around the neckline. Embroidery is an activity I only do off-and-on, but staying at home so much as part of the covid lockdown makes it easier to slow down and take part of these slower techniques to embellish my garments.

I used a looped blanket stitch for the bloomed flowers, french knots for the buds, and fishbone stitches for the leaves.

Since the back neckline won’t be as visible because of my hair, I only kept the vine and leaves.

To finish the facing, I used an overlocker sewing machine stitch and then hand sewed it to the main fabric using a catch-stitch so that everything is invisible from the right side.

For the bottom hem, I used this perfectly matching vintage seam tape for a clean and non-bulky finish

This is now the second time I’ve sewn this pattern. I always find it interesting to see which patterns I reach for more than once and how they evolve each time. The first version I made used white linen and and some beautiful rich green vintage buttons from my stash. Don’t you just love it when people find old sewing supplies in their house and gift them to you ? 🤩

The main difference between the two is that I sewed one of them inside out. It’s very obvious with the asymmetric design !

There are 2 intentional changes I made on the pink version. First, I placed my buttonholes closer to the edge to avoid the excess fabric from awkwardly flapping out.

Secondly, I finished the arm elastics differently. On the white version I finished the sleeve edge with a zig zag stitch, folded it over the elastic, and then zig zagged the layers together.

On the pink version I attached some leftover pink self-made bias tape to the raw sleeve edge, folded it inward, and stitched around the edge of the bias to create a channel. I then slid in my pre-measured elastic using a safety pin, joined ends with a zig zag stitch, and then sewed up the small opening in the channel I had just used.

The pink version has a nicer looking finish. I also find this method easier since the gathering is naturally spread out in the end vs having to stretch the elastic while on the machine. And please learn from me: use white elastic with light colored fabrics !

So what’s your favorite kind of puffy sleeve ? I would love to try out a gigot sleeve. So many ☁️puffy☁️ sleeves and so little time !

Until next time, here’s my “I’m fab” pose :

3 puffy sleeve shirt hacks and inspiration

There’s something about historical undergarments as outerwear that I just love. I’m just so attracted to the idea of both women’s and men’s chemises. Is it the light, breathable linen ? The crisp white ? The loose, comfortable shape that lets me eat what I want ?

Maybe that’s why I keep sewing Garibaldi blouses. This is a historical pdf pattern I purchased from Truly Victorian. I think I first bought this pattern after watching the Poldark series. It’s a bit cheesy, but I love a good historical fiction ! I mean, look at Aidan Turner rocking his chemise on the beach !

Just need a pair of high waisted pants and a kerchief to top it off. Although I think for the Poldark social class it’s more likely to be called a stock or cravat.

So I’d like to show you some of my Garibaldi blouses.

Garibaldi Blouse #1

The first one I made, I already started diverging from the original pattern instructions 😈 Instead of making traditional cuffs, I added ties to the wrist. They are sewn down by a few stitches in the center back, and then I tie them when I get dressed.

😁 The good: Puffy cloud sleeves!

😱 The bad: The ties get wet when I wash my hands and my sleeves catch on door handles

🧐 To improve: I quickly realized that if you don’t put in the optional waistband, why waste all that time making buttonholes and buttons ? You can be sure I didn’t make that same mistake twice.


Garibaldi Blouse #2

For this version, I got closer to my Poldark inspiration by removing the button bands and cutting the front on the fold. I slashed the neckline to my desired depth and finished with self made bias binding.

I also shortened the took out some width on the sleeves in order to avoid further workplace danger but keep the puffy drama. I hand sewed snaps onto the cuffs for quick and easy dressing.

Closeup of shirt cuff with snap button closure

And finally I did a forward shoulder adjustment because I noticed the seams were sitting way too far back on the first version.

😁 The good: Super quick to throw on since the only closures are the cuffs.

😱 The bad: My big sleeves still catch on door handles, but I’ve come to accept the inherent hazards of this style

🧐 To improve: The snaps should have been sewn closer to the edge of the cuff, but are totally functional as is. It’s usually hidden by the sleeve anyway, so I’m sure only other sewists might have noticed!


Garibaldi Blouse #3

This one was made during the covid confinement. Can you tell I was inspired by this “freedom” fabric design ?

All closures on this version use ties. The fabric is quite delicate and wouldn’t have held up well with elastic or buttons. I also just find the idea of having a quiet, soft garment. No pokey metal bits or sounds of zippers, just soft fabric ties that you can adjust to your liking.

😁 The good: Freedom !

😱 The bad: I’m pretty happy with the result, but it takes several times of wearing a garment before I really decide what I like/don’t like.

🧐 To improve: to be determined…

This pattern is so easy to use and fun to hack. Check out my Garibaldi Blouse Inspiration board on Pinterest for more ideas ! If you do make a Garibaldi Blouse or other puffy sleeved confections, please tag me on IG ! @conniya

Scrapbusting shorts for spring using a free PDF sewing pattern

You know how you have those fabric scraps that are too big to throw away, but never big enough to actually make what you want ? Well I’ve been going through mine in an attempt to get all my fabric to fit on its dedicated shelf space in my new apartment.

I came across a piece of this cotton poplin from Mondial Tissus, which I used to make a Grainline Studio Archer Buttonup.

Turns out I had just enough left for a pair of Spring Shorts ! This pattern is available for free download from Peppermint Magazine. Each month they release a sewing pattern online. The Spring Shorts are from the 27th issue and you can find the download here.

img_0199

I have already tried out this pattern, but the fit was too loose for me. I have a strong fear of – and bad luck with – pants. I’ve had my favorite pair of jeans for 10 years, and anytime I try to buy new pants they end up being too small or too big or the standard sizes doesn’t suit me. And when I try sewing pants, they usually don’t work out.

So using this “scrap fabric” took the pressure off for me to try my hand at this pattern again. I reduced the pattern by 2 sizes and got everything to fit on the fabric. I just love sewing with poplin; it’s super easy and fast to work with.

For the waistband, I used this rope/twine I had on hand. This was in a bag of sewing supplies I got from an antique store in the US (my favorite place to look for good deals when I’m visiting home).

When I tried on my shorts, I realized that the fabric was a little too transparent in areas with only 1 fabric layer. Therefore I got out some other scraps of this slippery white fabric. I hadn’t used it for anything yet because there are some 90s flower designs which aren’t to my taste (I think my grandma used this a cousin’s wedding a long time ago).

img_0200

To make the lining:

  1. Cut 2 back short pieces as usual.
  2. Cut 2 front pieces. Be sure to line up the pocket pieces behind them in order to have a smooth side since we don’t need pockets.
  3. Sew inner and outer side seams (do NOT sew crotch seam yet)
  4. Right sides together, sew the lining and main fabric together at the bottom hem for both legs (I use 1cm SA)
  5. Flip the lining to the inside of the shorts. For a smoother finish, you can clip into the SA along the curves lines, but it’s not necessary if your lining fabric is really light.
  6. Sew the crotch seam, making sure that the raw SA will be enclosed between the lining and main fabric.
  7. Fold the top of the lining down by 1cm and pin to the main fabric. It should just barely cover the seam of the waistband.
  8. Right side of main fabric facing up, stitch in the ditch of the waistband to secure the lining.
  9. Iron the lining at the bottom of the leg to make sure it lies flat, like in the photo below
img_0198

Creating your own lining is a great method to be able to use a wider range of fabrics for the pattern you want. It’s not something I do that often, but a little extra time makes a big difference. I’m not sure if my lining fabric is a rayon or other synthetic fiber, but they are super comfy to slide on and I love the clean finish at the hem !

img_20200423_182427

Sewing for my sister

I am both lucky and unfortunate to have a sister the same size as me. We can borrow each other’s clothes, but let’s face it, mostly she just borrows mine. One of the pros is that if I want to sew something for her, I just make it in my size!

Recently I asked my sister to buy me the Brigitte Triangle Bra pattern by Ohhh Lulu and I said I’d make some bras for her. I bought enough bra straps to make five bras, some hook and eye closures, and three types of elastic from Sew Sassy Fabrics. I highly recommend this website! They have tons of hard-to-find swimwear and bra-making supplies, some available wholesale. The site design is not the best, but I was really happy with the wide selection and my first order.

I LOVE this pattern! It’s super fun to sew up, and makes good use of leftover fabrics. It also saves a LOT of money compared to buying them at a department store (lingerie gets expensive). The best part though, is that it actually fits! It is hard to find RTW bras that fit me in the cup without being tight around my torso. By making my own, I can cut an xs cup and a medium band.

I’m sending the first three pictured to my sister. Here they are in opposite order sewn.

Plaid Flannel Triangle Bra_Ohhh Lulu patterns_handmade by Conniya

DSC01884

This is my favorite out of the five. Instead of using a knit fabric, I used plaid flannel cut on the bias. My fabric wasn’t very large, so I slashed the pattern and added a side seam to the band (with black topstitching). I tried to match the plaid at all the seams, but none of them line up exactly. I finished the top edges with foldover elastic (FOE) and the bottom by zig-zagging clear elastic to the WS then folding under and zig-zagging again. Since I was using 2 hooks and eyes for the back closure, I made the back band narrower so no edges would be hanging out.

Black triangle bra with FOE_Ohhh Lulu patterns_handmade by Conniya

A simple black knit, finished with FOE on all edges. Since the bottom is meant to be folded under, I had to trim excess fabric before attaching the FOE.

Pink and black triangle bra_Ohhh Lulu patterns_handmade by Conniya

This is the stretchy linen fabric leftover from this circle skirt. I used FOE for all the edges. However, the FOE on the bottom is a wider one with more of a plush feel. I got it from JoAnn’s a long time ago and had enough left to do this.

Pink and black picot edge elastic triangle bra_Ohh Lulu patterns_handmade by Conniya

Pink and black picot elastic closeup_Ohhh Lulu patterns_handmade by Conniya

Non-slip elastic closeup

For this one I experimented with picot edge elastic on the top, which is traditionally used in a lot of under wear. Since this is a woven fabric that frays, I zig-zagged the edges before applying the elastic. On the bottom, I folded the bottom under once, then attached non-slip elastic with two lines of zig-zags. As you can see in the photo, there’s a rubbery line that makes it non-slip that is surrounded by a plush texture. I prefer the more finished look of FOE, but this bra is still really cute when it’s not on a hanger.

Black triangle bra 1_Ohh Lulu patterns_handmade by Conniya

Black triangle bra 1 closeup_Ohhh Lulu patterns_handmade by Conniya

This is the first bra I made with a similar but different knit fabric from the one above. The top edges are encased in FOE, and the bottom has been folded to the WS with unfolded FOE inside. I should have overlapped the bottom of the cups more, which I did in all the other versions.

Hopefully my sister likes her bras! I’ll probably send her a couple of my other recent makes as well, which I’ll be sharing here soon.