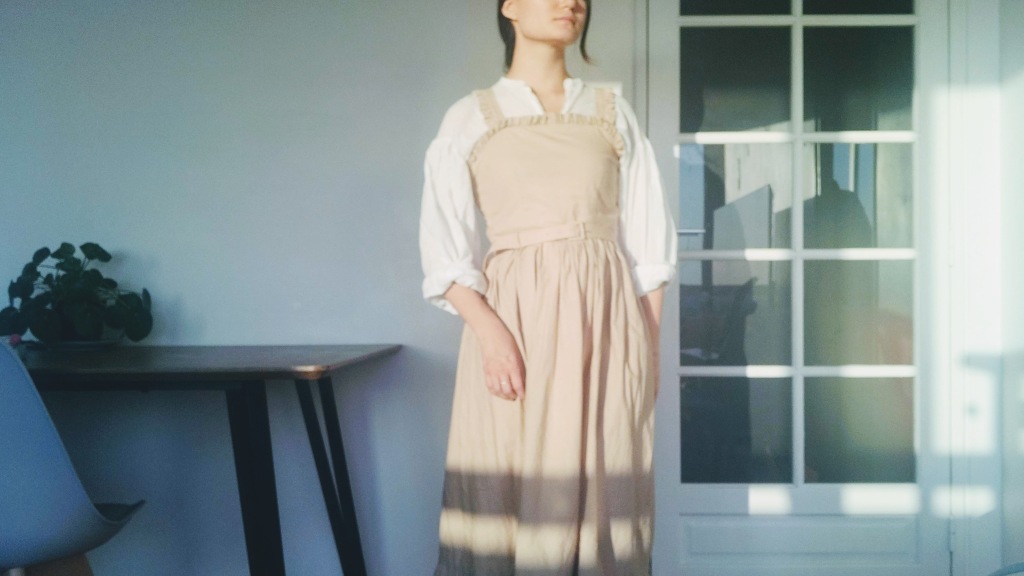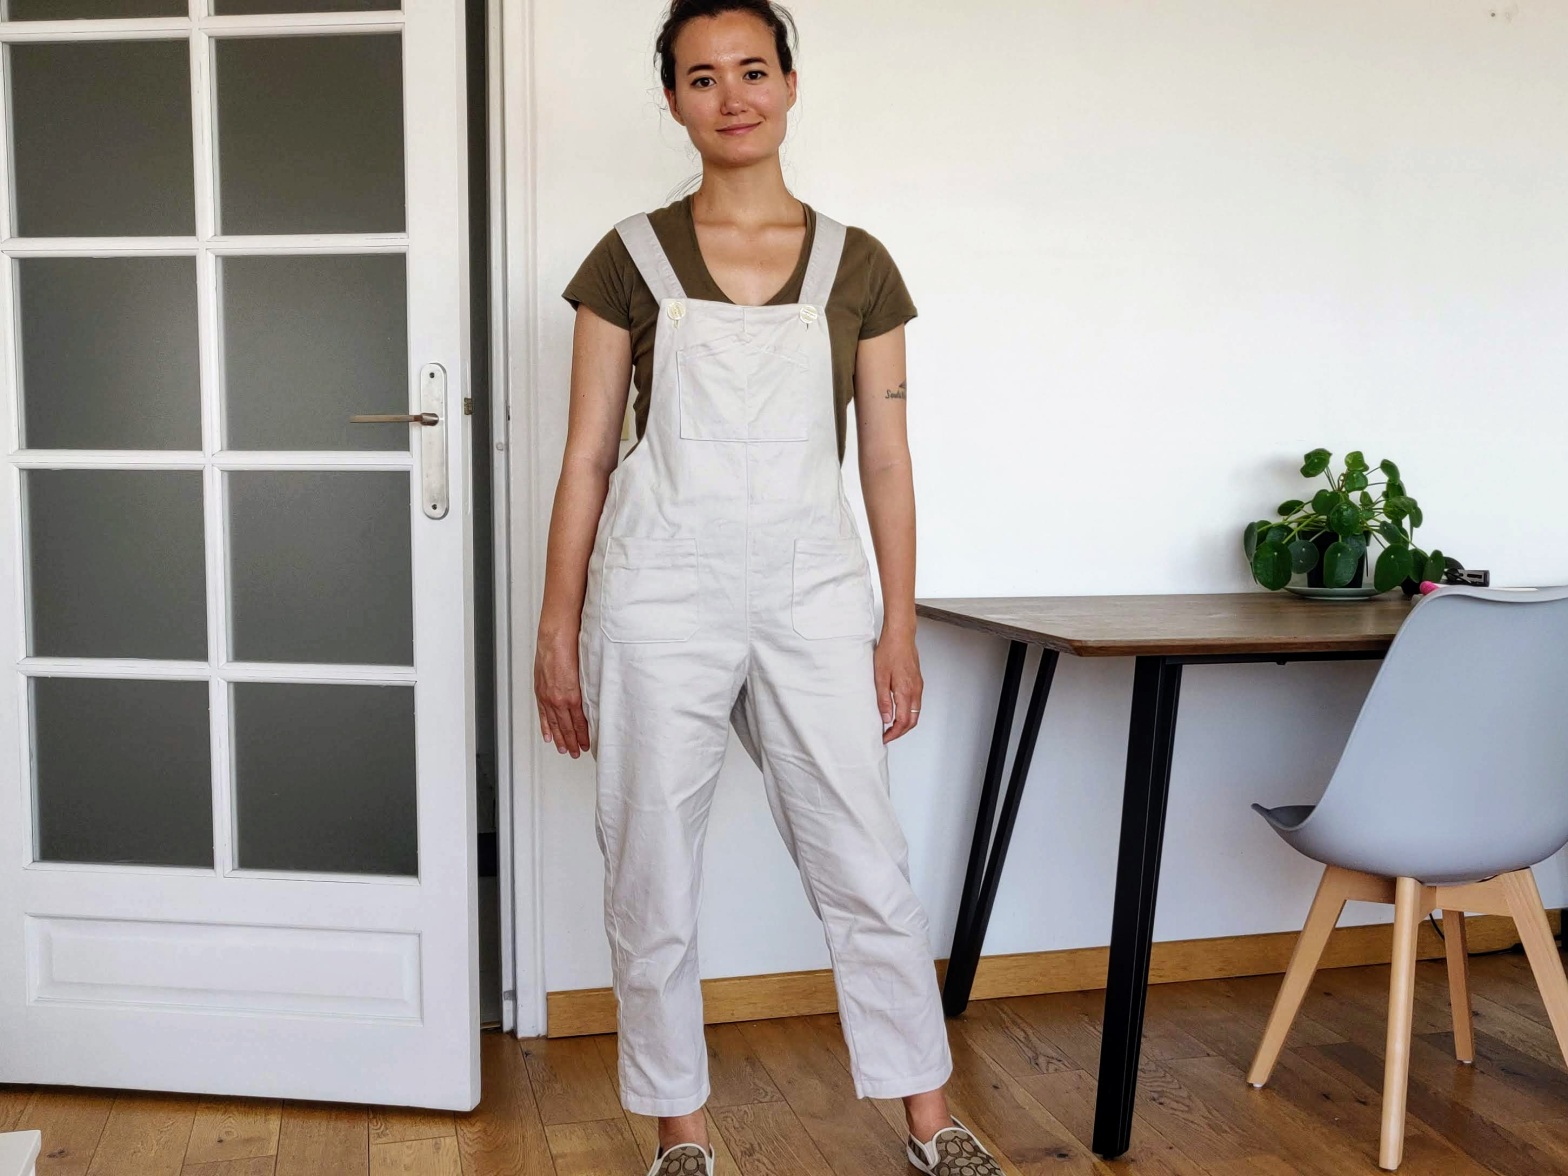
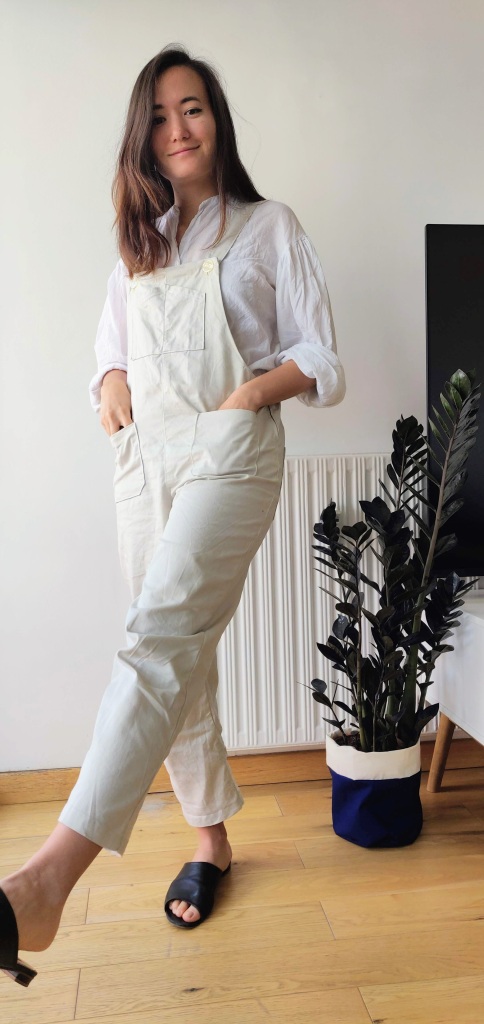
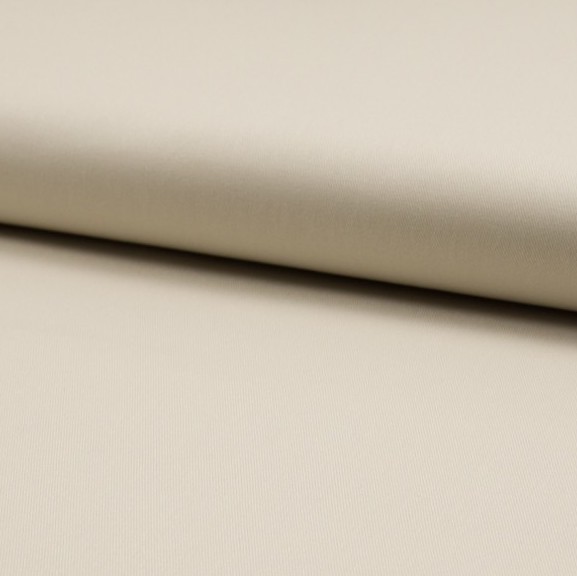
The fabric I chose is a cotton twill from Minerva in the sand color. I ordered 2 meters versus the 2.1 recommended and it was juuuust enough to cut everything and use the self fabric as the facing. I love the weight of this fabric. It’s completely opaque and feels sturdy, but not too thick. It was easy to cut and sew with.
After being a longtime fan of Helen’s Closet through the I Love Sewing podcast which she co-hosts, I finally bought one of her patterns. I always enjoy seeing the design she releases, but it’s the Yanta overalls which really got me.

Last year I made my first pair of overalls using the free jumpsuit pattern from Peppermint Magazine. I wore it a lot, but I wanted to try a design with a more classic bib front pattern and more complex details. I find the pockets make the garment feel more structured and put together whereas the Peppermint Jumpsuit pattern is very minimalist. and casual.
There are many reasons I love using indie sewing patterns. I support small, usually women-run business. They make you feel like part of a community whether that be in terms of style or personal values. But my most selfish reason is that they have really well written instructions for beginner sewists.
While I now consider myself a confident intermediate sewist, this is still something I appreciate and rely on when tackling more difficult and new-to-me sewing techniques. And I have to say, Helen’s instructions are some of the best I’ve come across in my sewing journey thanks to their thoughtful thoroughness, clarity, and design.
My Overalls
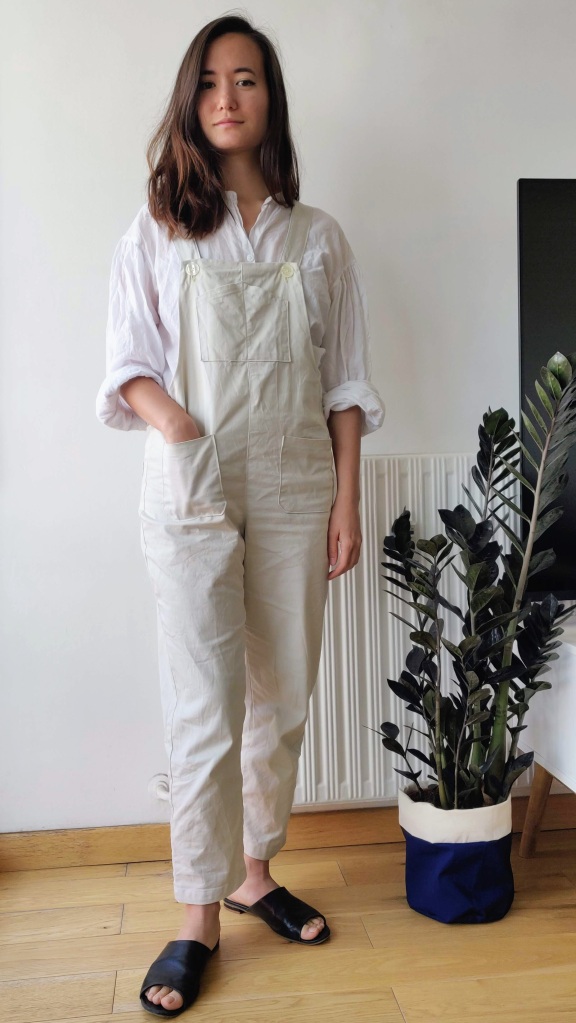
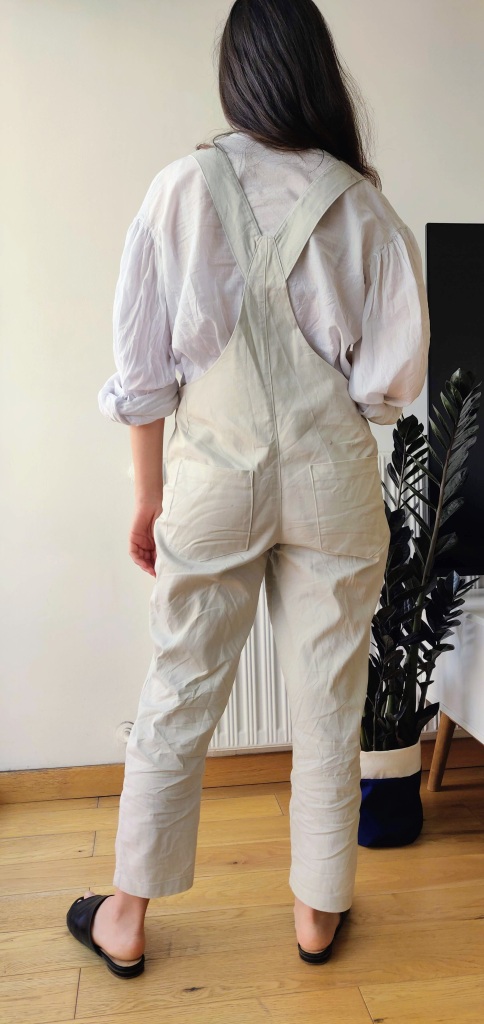
After browsing the pattern hashtag on Instagram, I knew I would want to take in the hip curve for a streamlined but still very casual look, but made up my size 4 muslin without making any alterations to the pattern.
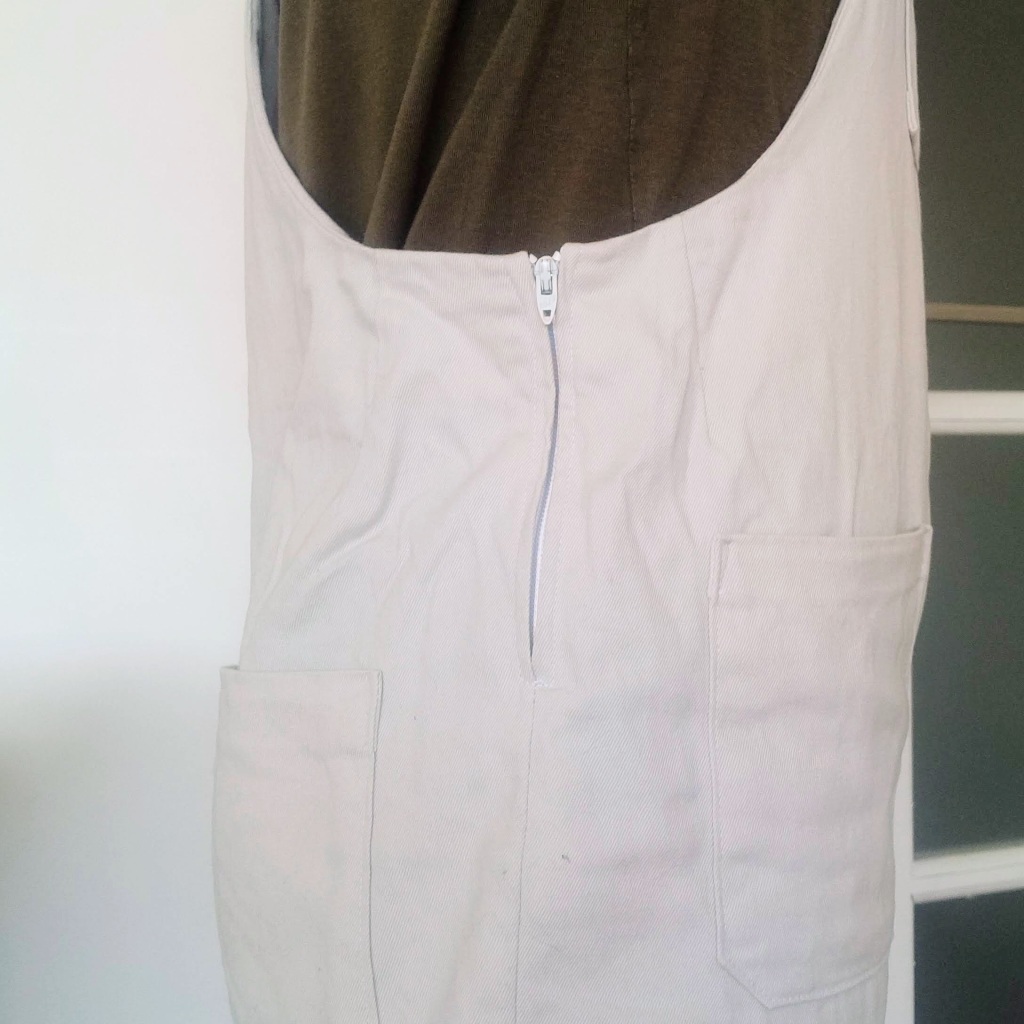
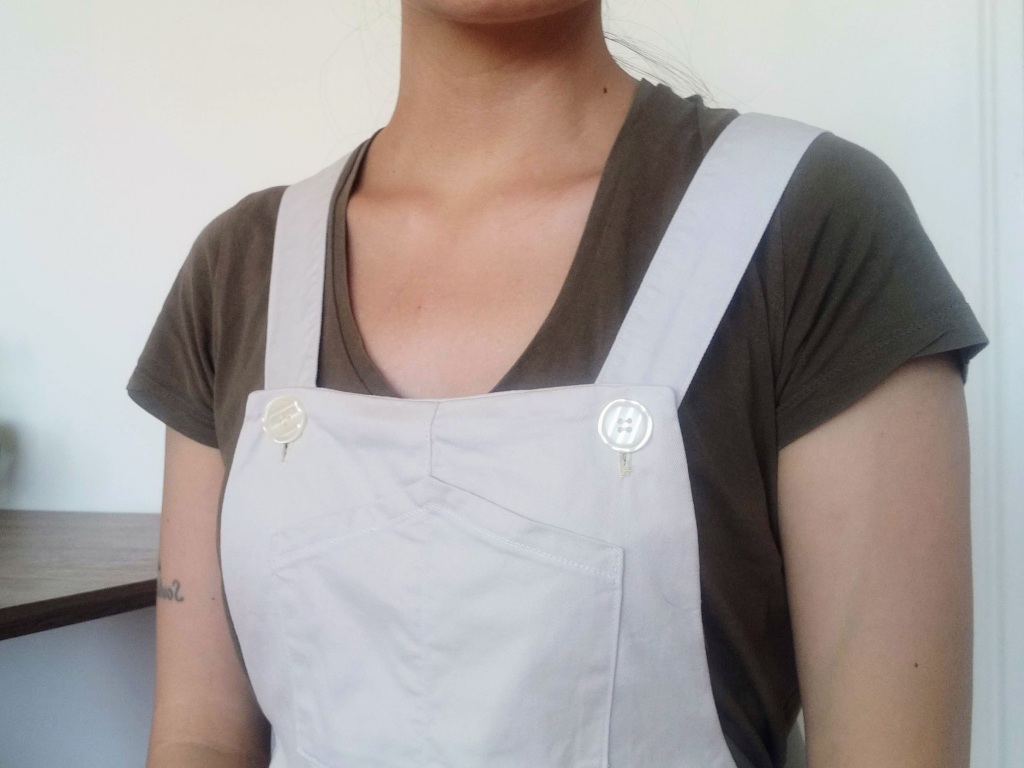
I also become concerned in my muslin that the crotch was too low for me, so I decided to take out a few centimeters at the waist which allows enough room to sit and move around comfortably. Now that I’ve attached the straps, I think I should have kept 1 more centimeter, but I made up for it by lowering the button placement on the straps a little bit.
I decided to to use a lapped zipper on the left side. The zipper, depending on how you fit your garment, is actually optional. Technically if I wanted I could take mine on and off without the zipper, but don’t want to put too much strain on the waist by squeezing in and out.
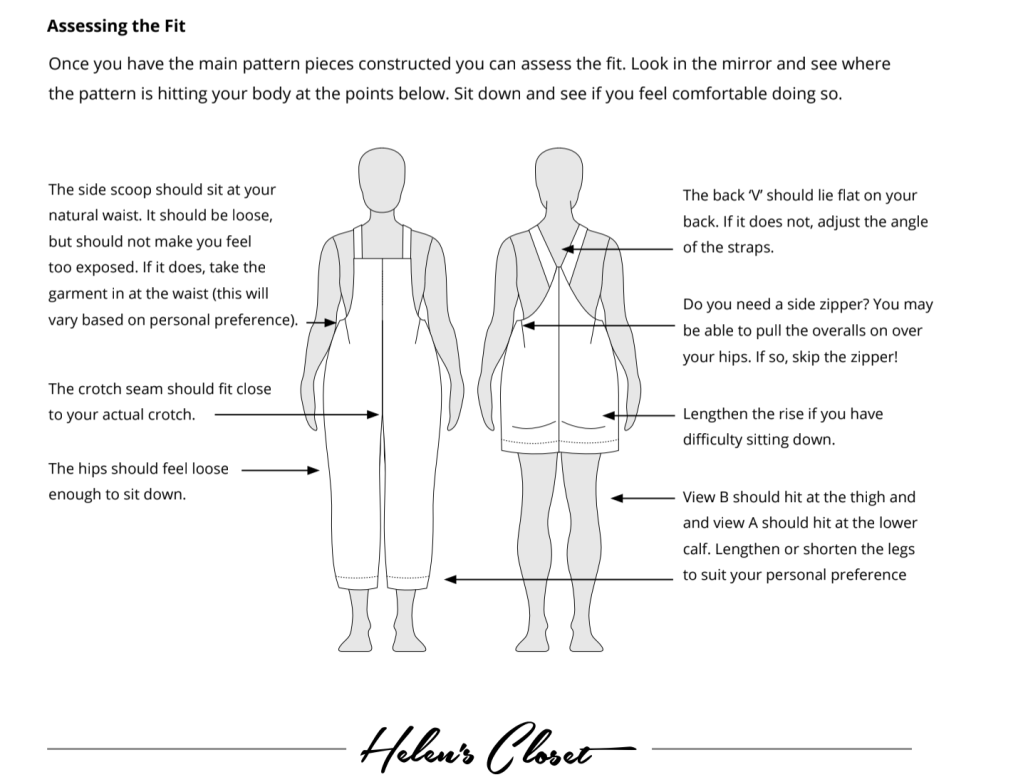
Fitting
When making a muslin, you usually don’t need to cut out every pattern piece to check the fit. Here, the designer clearly indicates only the essential pieces need to be cutout for those who want to save time and fabric.
What I appreciated the most is that you’re given information on how the garment was designed to fit your body, which is useful as fitting/tailoring is a skill that takes a lot of time and experience to develop. This goes further than just marking the waist line and is a useful guide when judging your mockup.
The designer offers specific instruction for altering the pattern for different cup sizes since standard patterns are always drafted for a B cup. Sewing for curvy areas of the body is one of the hardest parts of sewing (hence my fear of pants), and knowing what adjustments is not always clear depending on the type of garment being sewn. For a loose fitting bib, it’s not a huge deal to make these changes, but I love the thoughtfulness.
I also think this is a great pattern for someone who wants to start sewing pants. The loose fit is pretty forgiving and won’t require much fitting, and it’s one of those pieces that looks more difficult than it is to sew. Or at least, whenever you have such well written instructions as these!
Happy sewing!