Three skirts

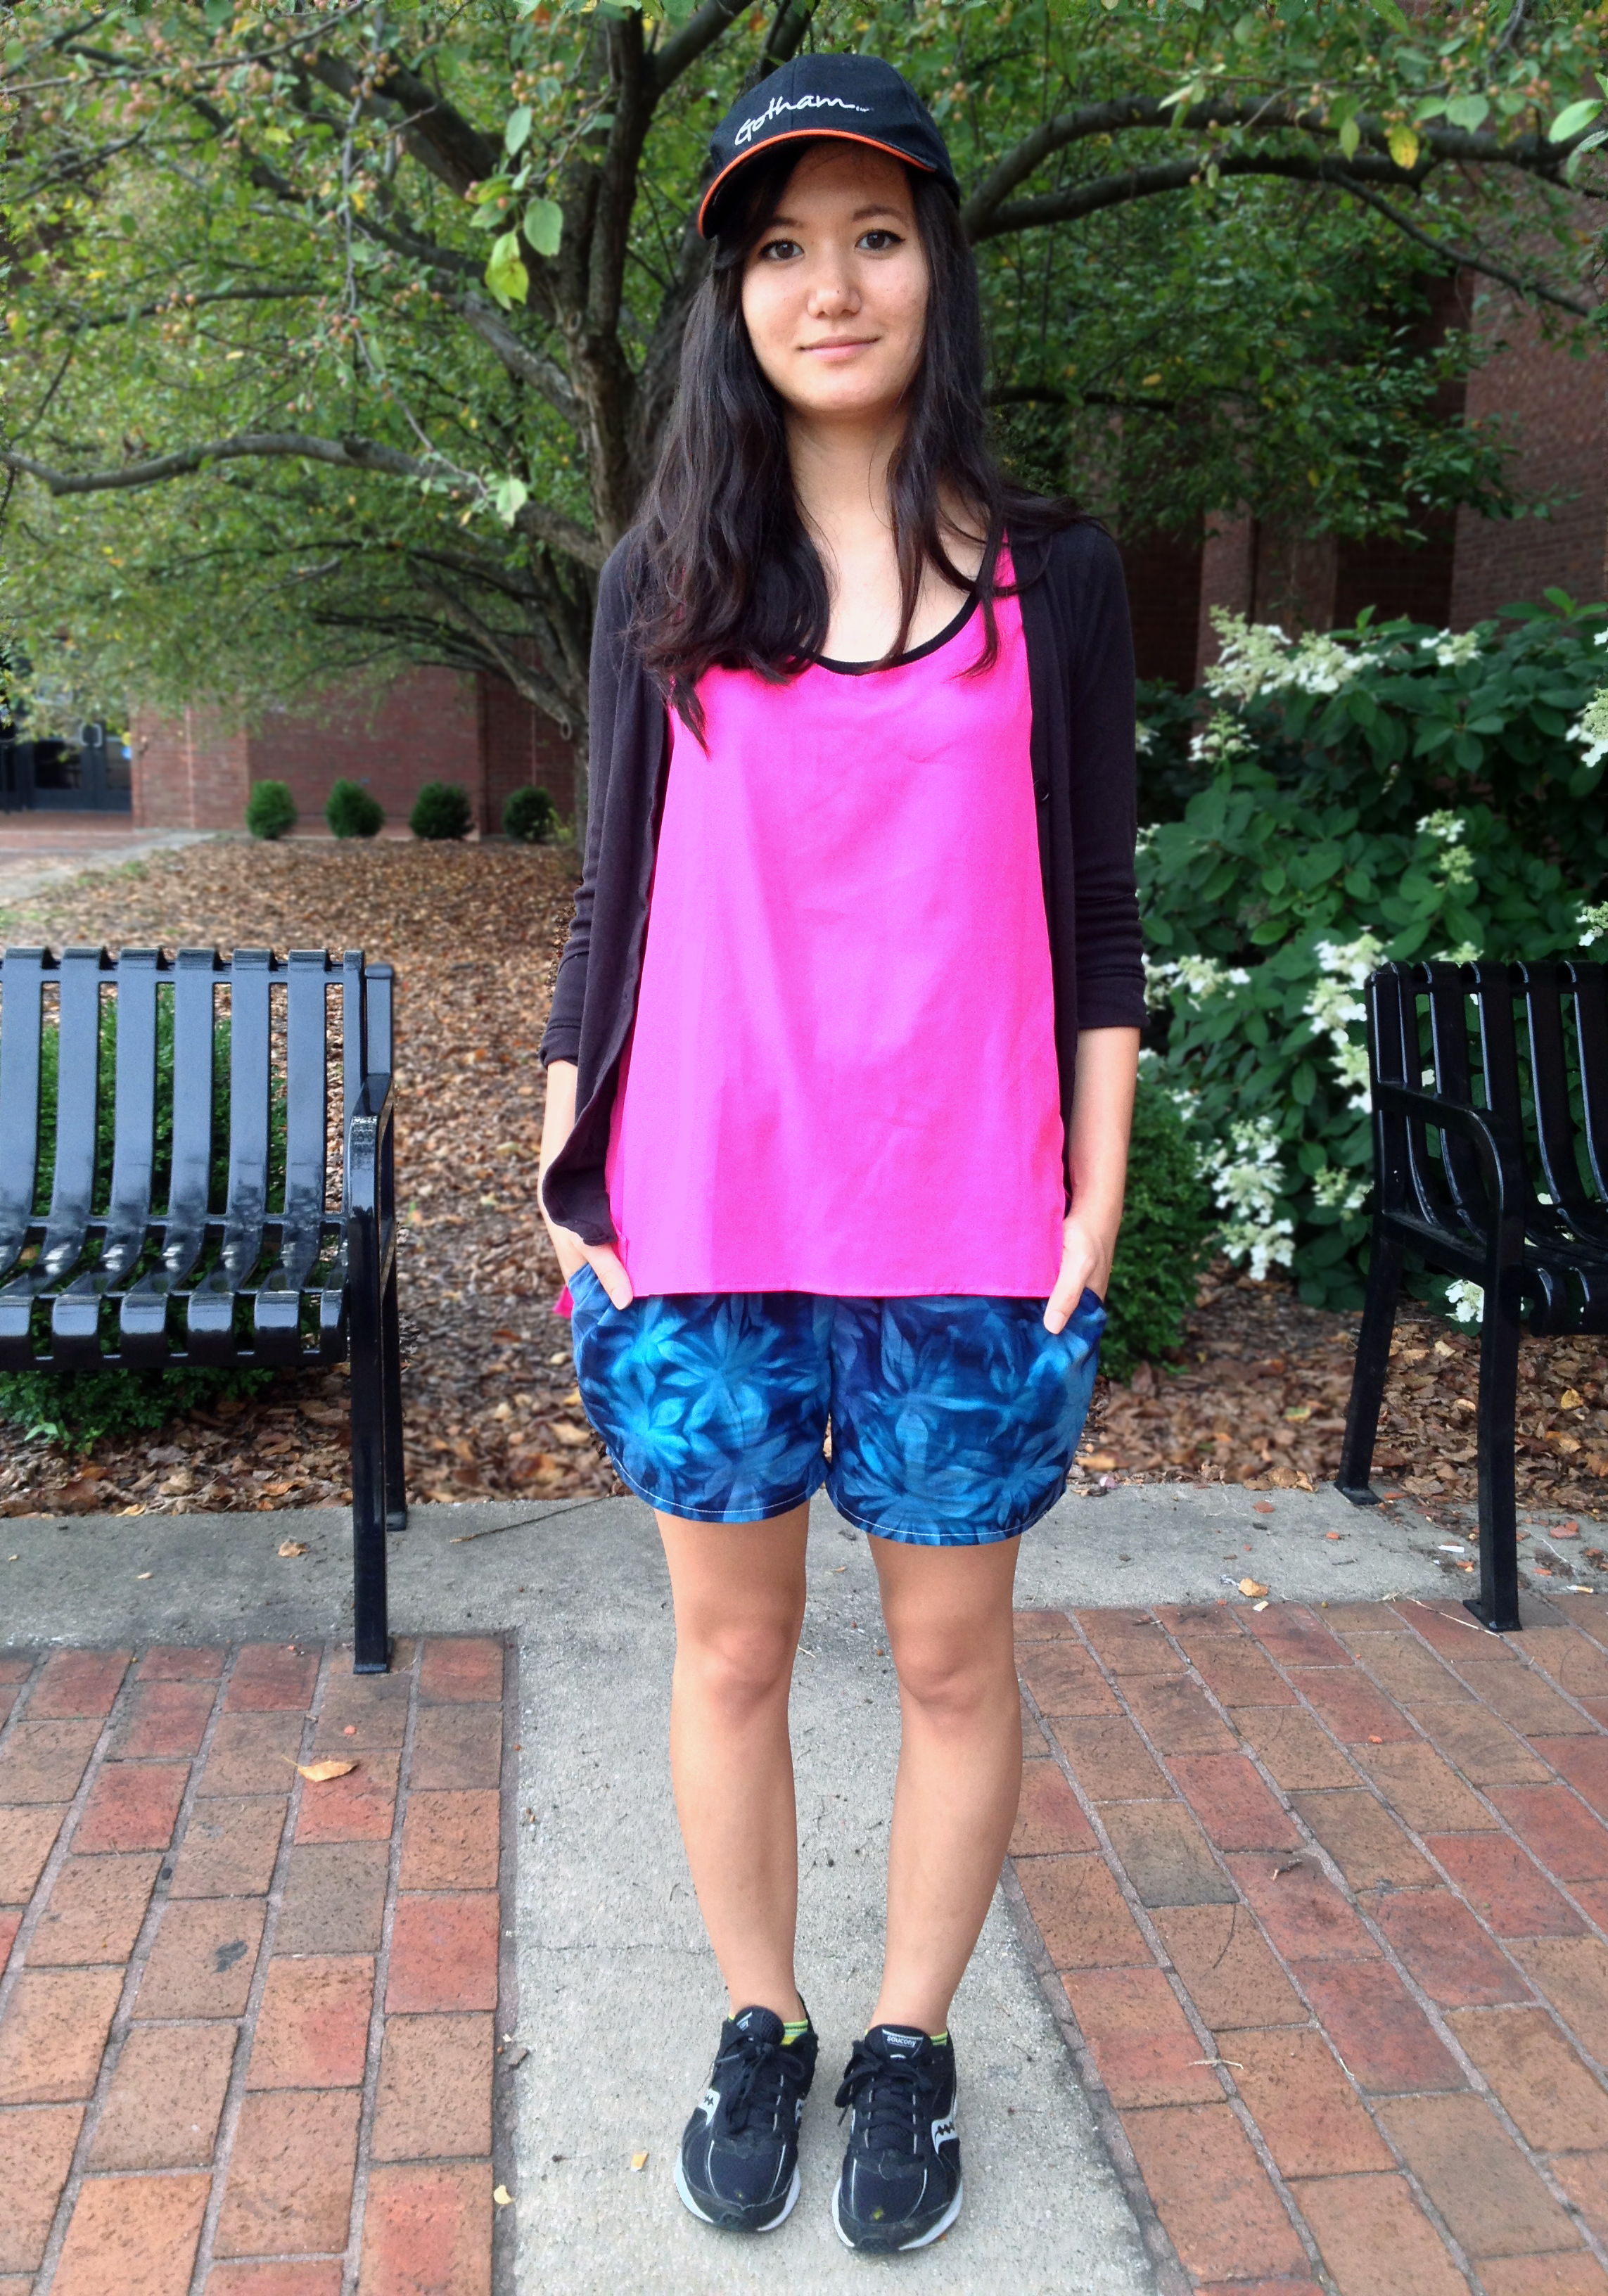
I have less than two weeks left with my little sewing machine before I leave the country! I’m studying at Anyang University in South Korea this semester and then interning for six weeks in Chile (You can keep up with me on my travel blog ConniyaGoes). That means I won’t be able to sew. However, I’ve made several things over winter break that I have yet to take pictures of, so here’s the first batch!

Double Knit houndstooth circle skirt handmade by Conniya

This is a full circle skirt using a double knit hounds tooth print from Denver Fabrics. I was pretty disappointed in quality when I first received my order from them. However, I am liking it a lot more now that it’s in skirt form. This was my first time sewing double knit, which is a really stable fabric with just a little stretch. The waist is slight gathered by the 2″ elastic, and there are no seams. I didn’t hem it since the fabric was so stable at the bottom.

Pink circle skirt handmade by Conniya.

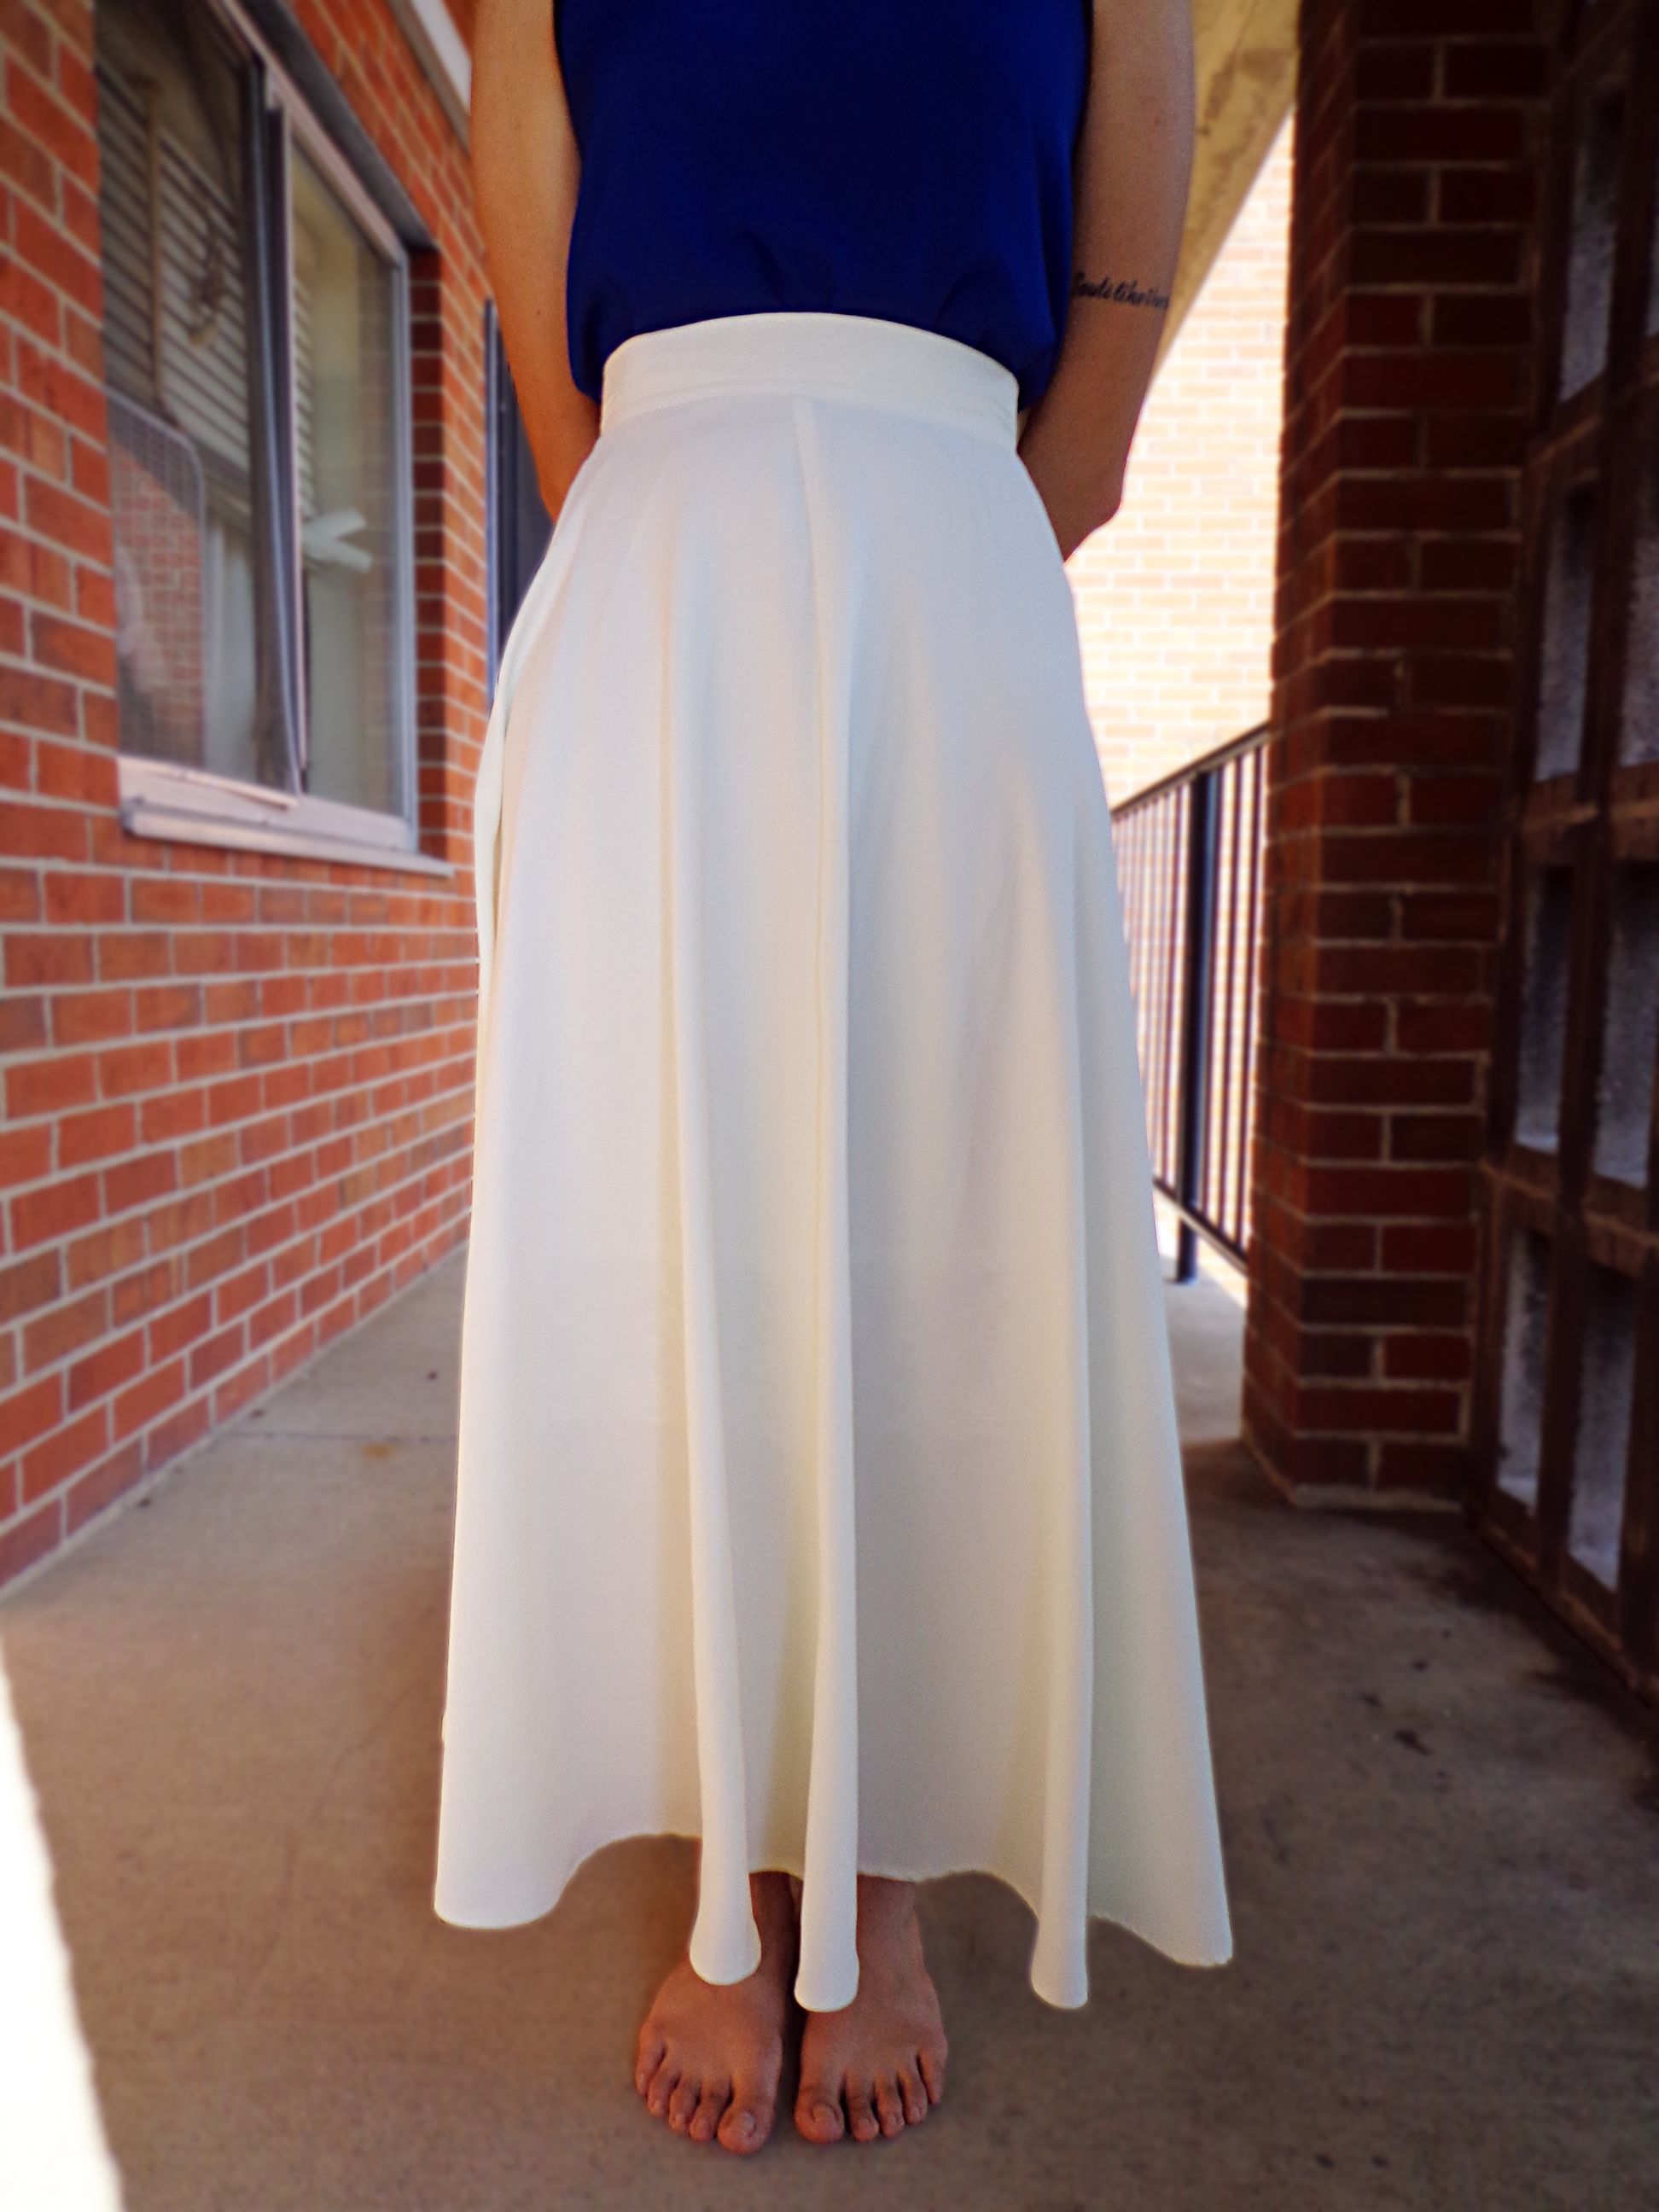
Another full circle skirt using a pink linen also from Denver Fabrics. It was not at all what I was expecting when I ordered it online. It is actually quite stretchy, and a pretty low quality. I decided to go ahead and make it into a circle skirt since trying to return it wasn’t going to be worth the effort. It has an interfaced waistband and lapped zipper in center back. To finish the hem, I attached a light pink single fold bias tape and hand stitched it to the underside. It wouldn’t usually be this wrinkly, but I was afraid my brother would change his mind about taking pictures if I took the time to iron it first hahaha.

Skirt handmade by Conniya. (Peplum skirt_Salme Patterns)Finally, a fitted skirt from the same double knit as the circle skirt. I used my peplum skirt pattern without the peplum (Salme Patterns). I really love this one! I think it’s really flattering and the slight stretch of the double knit makes it comfy. I used an invisible zipper in the back, and finished the hem by turning it under once and top stitching with a slight zigzag so it could stretch. The seam between waistband and skirt could sit a lot better, but it’s hard to use an iron on this fabric due to the way it’s printed.


Have a great day and don’t forget to follow me at www.conniyagoes.wordpress.com!

A handmade Christmas part I

This is the dress I made for my friend Rachel! I thought it would be fun to sew something for her this year because we’re the same size and I really like making dresses 🙂  I used the Sonja dress pattern (Salme Patterns) that I had already altered to fit me.

Handmade Sonja Dress by Conniya

The fabric is one I already had. I am unsure of the fiber content, but it definitely has some poly in it. Unfortunately that didn’t keep it from getting a bit wrinkly after being wrapped up. The dress is fully lined with a navy cotton for the top and slick navy poly for the skirt in the hopes that it won’t stick to tights in cold weather. I used store bought double fold bias tape for the neck and armholes.

handmade Sonja Dress by Conniya I got the pattern to match really well at the front waist and fairly well at the back zipper.

Back view_Handmade Sonja Dress by Conniya

Now I just need to finish the other handmade Christmas gift I’m working on! Only a few days left.

Diamonds and Ruffles Scout Tee + instructions

The Fall semester is finally over! That means time to sew and watch TV! To celebrate the end of finals, I made this lovely scout tee Friday. I wore to out on Saturday to see The Hobbit and already know I’ll be wearing it a lot more. Skip to the bottom of the post for instructions.

IMG_1484

Fabric is from Grandma’s stash. It’s definitely cotton, but has a really cool soft/slick texture to it as well. It’s a really crisp white with subtle little diamonds that catch the light.

IMG_1488IMG_1491

What I really love about this shirt is that it’s really loose and comfy, but can be worn casually or dressed up. I need to hand sew some tiny belt loops on the waistline so the skinny belt will stay up without having to wear it too tight.

IMG_1482

This is a really easy modification to do, although making the ruffles even takes foreverrr. I have a love hate relationship with ruffles. Here are the steps I took:

1. Slash the pattern at the “shorten/lengthen” line and then cut out fabric as usual (just leave off the bottom part you cut off).

2. Sew the shoulders, bias neckline, sides, and sleeves as usual. I used 1/4″ double fold bias tape and used a slipstitch to hand sew it to the inside of the garment.

3. Cut out two long rectangles for the ruffle. The length of my two rectangles were about 40″ each (from selvage to selvage for each rectangle.” Make them smaller or larger depending on your shirt size and how full you want the ruffle. The height of the rectangle should be how much length you want to add to the shirt + seam allowance (I did 1/2″ at the top and 3/4″ for the folded hem). Make the rectangles really long, and you have a tunic or dress

4. Sew two lines of basting along the top of each rectangle 1/4″ and 3/4″ away from the edge. You’ll be sewing between these lines in a minute. Or use whatever method of gathering you want. Basting just means use the longest straight stitch on your machine.

5. Sew the rectangles right sides together so you have a tube and press seams open.

6. Gather the rectangles by pulling both thread tails and evenly redistributing the ruffles. This may take a while. Keep doing this until the rectangle is the same length as the edge of the shirt.

7. Match side seams and pin the gathered rectangles to the shirt edge, right sides together.Use as many pins as necessary. Keep fussing with those ruffles and get them evenly distributed! No one likes ripping out stitches later.

8. Using a straight stitch, sew the top and bottom together with 1/2″ seam allowance.

9. Pull out the basting. Finish the seam with a zig zag stitch, serger, or your preferred method. You could also sew a skinny piece of elastic onto the seam at this point if you want the shirt to be fitted at the waist.

10. Roll the bottom edge under twice, press, and hem.

TA-DA!

The Sonja Dress

The first half of the semester is over! It still feels like the first few weeks of school because I am constantly trying to get my act organized. I’ll be super busy writing papers and studying until December, but hopefully I can share my small backlog of completed projects.

This is the Sonja dress, a free Salme pattern which you can download here at BurdaStyle. It was released February 2012 (before I started sewing) and I just happened to come across a photo (on Pinterest I think?) that led me to the pattern. I love this dress! It’s pretty simple, fitted at the waist, and has a full, feminine skirt.

It’s a bit wrinkled in the photos because I just pulled it out of my suitcase after returning from Fall Break. I was so excited about my mannequin my boyfriend got for me I just had to take pictures! 🙂 The mannequin’s measurements are almost exactly the same as mine, but her shoulders are super wide. I don’t have a big living space, so I am still getting used to walking by her in the mornings without jumping out of my skin hahaha.

Sonja dress handmade by Conniya. Salme patterns.I did have to make several adjustments to the bodice. The original pattern was made for a really long torso. I slashed my pattern halfway between the neckline and bust about 2-3 inches and smoothed out the armhole curve. I also had to take in the sides quite a bit above the waist. I added about 2 more inches to the skirt than what was called for.

Sonja dress handmade by Conniya. Close view. Salme Patterns.The straps have a racerback look to them. I think I want to make them wider next time, because I’m definitely making another one of these dresses when i have the time.

The fabric is a vintage home fabric I got for cheap in Berea. The pattern calls for facings, which I don’t like. The next version I make will be with a thinner fabric, and I plan to fully line the bodice. This one is unlined, and the neckline is finished with single fold bias tape. Since this was mainly a test version, I went the lazy route on the armholes, folding them once and sewing around.

Sunny yellow peplum skirt and a vintage purse

Long time, no see!

I’ve been pretty busy with school and work and filling out various applications for study abroad, but I promise I haven’t quit making things. I’ve been doing quite a bit of knitting since it’s easy to carry and I can do a few rows at a time versus dragging out the sewing machine and having a big cleanup afterwards. But today I want to show you this skirt!

Sunny yellow peplum skirt. Salme patterns. full view. Handmade by ConniyaCute, ya? The pattern is from Salme Patterns. The fabric is a sturdy mid-weight I got from my Grandma’s fabric stash this summer. If you make this skirt, be very careful about cutting it out! I did not look at the layout diagram carefully before cutting and ended up having to redo the peplum after I’d already spent the time pressing and sewing the darts. And for some crazy reason I cut the back piece of the skirt on the fold and then realized that the zipper was supposed to go back there. But everything worked out and it fits perfectly despite the omittance of seam allowance.

Sunny yellow peplum skirt. Salme patterns. Closeup 1. Handmade by ConniyaI added the cute little bow just for the pictures– it’s actually a hair clip I picked up for 25 cents at an antique store in Berea, KY this weekend. Speaking of which…

Vintage 60s Koret gold metal basket handbag with leather interior. With handmade yellow peplum skirt by Conniya.Isn’t this bag adorable?! It’s cloudy and blue outside, so the photo doesn’t do it justice. It’s a vintage Koret handbag made out of metal that looks like a basket! I got it at Something Olde antique shop in Berea. The owner is a really cool lady- if you’re ever in Berea you should stop by! I love the purse, but I think I might post it on my Etsy store. If I actually used it, it’d probably end up getting banged around 😦 So shinnnyyyy.

Sunny yellow peplum skirt. Salme patterns. Vintage Koret 60s gold metal basket handbag. Handmade by ConniyaBut back to the skirt! The pattern is really easy and fit me perfectly. The only adjustment I made was to use an invisible zipper and I made the hem an ince or two longer than what was called for. I think it’d be fun to experiment with different patterns and textures. Maybe mix up the peplum fabric and skirt fabric?

Mitered corner on peplum skirt. Salme patterns. Handmade by Conniya.And check out these mitered corners! They look pretty good if I do say so myself 🙂

And here are a couple of hiking pictures I took on my long weekend off:

Conniya Pinnacles View 3Pinnacles View 1Have a great week!

Jessica shorts #2 with pocket embroidery

Here are my second pair of Jessica shorts! The first pair I made had to be taken in some, so I cut the same size and used french seams on this pair.

And in case you hadn’t heard, I was a featured maker on Kollabora this week! After seeing my first pair of Jessica’s they contacted me about this, and I was super excited! You can see it HERE.

4 White Jessica shorts with black pocket embroidery (Schnittchen Patterns) handmade by Conniya.

This is the same fabric as the white skirt I made earlier this summer. The fabric is semi-sheer, so I hemmed the short by hand using a slipstich. I’m wearing white leggings under them here, but earlier this week I wore them with short black leggings that had a lace hem, which is cuter I think. I should have lined the shorts, but by the time I decided this was the better option, I really didn’t want to go back and unpick all those french seams. I think these will be fine with long leggings as the weather gets colder.

DSC01714

I decided to add some cute pocket details since the shorts are one solid color. I drew the scallops with a water soluble marker and ruler. I used backstitches and french knots.

3 White Jessica shorts with black pocket embroidery (Schnittchen Patterns) handmade by Conniya.
2 White Jessica shorts with black pocket embroidery (Schnittchen Patterns) handmade by Conniya.

And here’s an awkward looking picture of the back.6 White Jessica shorts with black pocket embroidery (Schnittchen Patterns). Handmade by Conniya.Next up is some knitting and a pair of Lisa pants! And homework :/

Too 90s, a lot of UFOs, and the first day of school

I’ve recently given myself a resolution to finish all of my UFOs after reading Lauren’s post (of the Lladybird blog) on how she sews so fast. UFO stands for unfinished object. I have way too many of these. They not only bug me, but they take up space. Confession: I have an entire duffel bag camped out on the folding chair in my tiny living space just for UFOs. It’s kind of like how lots of people have a junk drawer; once it’s there you don’t question why you have so many things sitting around. Ah- I can feel you judging me! I promise it’s not a big bag 😛

I have promised myself I will not start a new project until every one of those UFOs is complete. So here’s the first completed project!
90s shirt. Handmade by Conniya

This shirt is McCall’s 4702. I picked it up for 10 cents at my favorite charity thrift shop when I was home this summer. It was printed in 1990.

vintage mccalls patternIt’s boxy and cropped, which is the style steer towards too much. But I’m not crazy about the shirt. I didn’t realize until I got to the part of the instructions that said to sew in shoulder pads that this pattern called for shoulder pads. I guess I just thought the models on the cover had really straight and tall shoulders? Haha- oh well! I obviously left the pads out of mine, so the shoulder seams sit slightly off of my shoulders.

Back view. Front closeup. 90s shirt. Handmade by ConniyaThe sleeves are just SO big. I haven’t decided whether I absolutely hate it yet or not. What do you think?

The back of the shirt also features a “design feature” (aka mistake). The back piece was cut on the fold, but I didn’t look closely before I cut. There was a chunk missing out of the fabric that I didn’t notice. I had one fabric scrap that was just barely big enough to cut out half of the back piece. Hello unwanted center seam!

Front closeup. 90s shirt. Handmade by ConniyaThis was my first time sewing a collar, and I really liked it! The instructions were a bit confusing, but I figured it out and it totally makes sense now. I want to start making more professional/fitted types of garments. I have yet to find a good looking trouser pattern, but I recently heard about this cool new line of indie patterns called Named. I’ve got my eye on the Tyler shirt.

Side view of 90s shirt. Handmade by Conniya.I’m kind of covering it up with my arm, but there’s a cool curved side split on each side of the shirt.

In other news, today was the first day of school. I actually only had one class, environmental economics, but then I also went to work. Here are some of my textbooks this semester. I still need to get my intro to managerial accounting textbook and statistics textbook as well as online access codes for 3 classes. So don’t expect me to keep up my current rate of sewing once school really gets underway!

textbooksAnd don’t forget to check out my Etsy store–> the link is in the sidebar to the right. I’ve got a few more finished pieces that will be added soon as well as some more UFOs, so stay posted!

Schnittchen Patterns Jessica Shorts #1

I’ve been patiently waiting for a sew along or sewing competition to participate in, and Kollabora is hosting a little competition with Schnittchen Patterns! Kollabora users can choose to sew either the Jessica Shorts or Katja shirt. I’ve been wanting to make some longer, casual shorts so I chose the Jessica pattern. This is also my first time sewing pockets! The pattern is only $5 for a digital download on Schnitten’s Etsy page.

Here’s my first pair using a cotton print I got at Hancock Fabrics yesterday (you don’t want to know the customer service nightmare I went through to get this ha). This is not the pair I’m entering into the competition though! Those are currently in the works 🙂

Jessica Shorts_Schnittchen patterns. Handmade by ConniyaFirst of all, these were really big. I ended up taking in all the seams in by 1 cm more than was called for. The size plus the blue flower print made me feel like I was wearing men’s swimming trunks :/ Still not sure how much wear I will get out of these, but I think they look better in context with the hot pink shirt and baseball cap. They aren’t the most slimming shorts.

Closeup_Jessica Shorts_Schnittchen patterns. Handmade by ConniyaAnd here’s what it looks like with the shirt tucked in:

Jessica Shorts_Schnittchen patterns. Tucked in. Handmade by Conniya

Here’s how they’re supposed to look. The instructions are a bit confusing because they’re translated from German, but the photo tutorial (in German) online was helpful and this is an easy pattern. I also recommend having enough ink in your printer that you can read the directions and symbols when you print your pdf pattern 😛 I really want to try the Lisa pants. They also have more patterns on their website here, so hopefully those will be available in English soon!

jessica shorts picture

Completed: gray knit and purple paneled peplum

I have two new shirts completed! I couldn’t think of an alliteration for this knit top, but it’s still awesome. I had just enough leftover fabric from the skirt I made a while ago to make a matching top!

Gray knit top and matching skirt.  Handmade by Conniya

I just love coordinates– just look at my Pinterest page haha. But this shirt also works well with the dreamy white skirt. This shirt is so comfy and the white skirt fabric also feels great against skin. Who says fashion shouldn’t be comfortable?

Gray knit top. Front view. Handmade by ConniyaI left the edges raw on purpose because I thought it looked cool. I still think so, but when paired with this skirt, I think it would look neater with a binding. I might go back and do that if I can scrounge up enough scrap fabric.

Gray knit top. Back View. Handmade by ConniyaI’m looking forward to making many more variations of this top. I’ve already got another one in the works. All I am going to say is…COLOR BLOCKING! It’s gonna be sweet.

This top is the same pattern as the clouds and swirls dress I’m still working on. (I’m wearing flip flops in this picture, which I don’t normally do- I HATE wearing flips flops btw)

Purple peplum top with gingham panel. Handmade by ConniyaI actually started this one before I started the dress version. Since I didn’t have instructions to follow, I ran into some time consuming technical difficulties (mostly regarding lining methods).

Purple peplum top with gingham panel. Front view. Handmade by ConniyaI’ve been wanting to make something with gingham for a while now. This gingham is from Grandma’s stash of fabric she let me go through. There wasn’t much of either of these fabrics, so this project made really good use of them. The shirt is more of a crop top. I would have made the peplum longer but I ran out of fabric. Since I’m not the belly baring type, I need to make a skirt or something high waist to wear with this. I’m really wanting to venture into the land of sewing pants and make some black trousers.

Purple peplum top with gingham panel. Back view. Handmade by ConniyaTo make the straps stay in place and be comfortable, I used elastic casing for the top back part. It’s a little bulky, but it works.

The next thing I want to to with this pattern is to add sleeves and raise the back. I actually hate wearing sleeveless tops- I usually only wear them at home or with a cardigan. I’m also wanting to experiment with flutter sleeves.

The dreamiest skirt

A few weeks ago, I was up late at night sitting in front of the sewing machine thinking, “What can I make next?” I couldn’t stop thinking about these two pictures that I had pinned on Pinterest. I don’t know the source of the first picture, but the second is from Peter Som’s Spring 2012 collection.

long white skirt with side slit SS12 NEW YORK FASHION

Here’s what I came up with! This creamy white, drape-y, gorgeous skirt!Long white flow skirt_front view, Handmade by Conniya

Whenever I put it on I just want to smile and do this:

Twirling-in-white-skirt

Don’t you wish everything in your closet made you want to do that?! Anyway, let’s talk about the construction. There are four triangular panels, the waist is interfaced, and it closes in the back with an invisible zipper and a hand sewn hook & bar.Back view_Long flowy white skirt. handmade by Conniya

However, there are several technical issues with the skirt. First, I just estimated the triangle dimensions that I cut out because having a full circle skirt of this length would be a ridiculous amount of fabric. Second, I did not cut out accurate triangles because the fabric i was cutting into was SUPER long which meant ironing would take forever and I would end up standing on half of it while I ironed the other half. Third, I totally wasn’t thinking about the grainline— some of the panels were cut on the bias and some weren’t! D: OMG so embarrassing, guys. I blame it on being tired 😛
Long flowy white skirt_handmade by Conniya

As a result, you can see that the seams are a little wonky. Btw, those are all french seams. Ooh-la-la!

These issues made hemming it evenly really difficult. SHOUTOUT TO GRANDMA!!! I took it down to her house for advice and she ended up sitting on a little stool with a ruler and measuring the hem distance from the ground while I stood still in the skirt. And then she cut and pressed the hem so I could finish sewing it on my machine. And I also hijacked my grandparents’ computer and signed them up to follow this blog (Are you reading this, Grandpa? Be sure to show Grandma these pictures!)

Side view_long flowy white skirt. Handmade by ConniyaDespite a few mistakes, I am absolutely in love with this skirt. It’s a bit fancy for everyday but I think I will wear it anyway because fashion is about what makes you happy and confident, not what people in central and eastern Kentucky think about what you wear!